
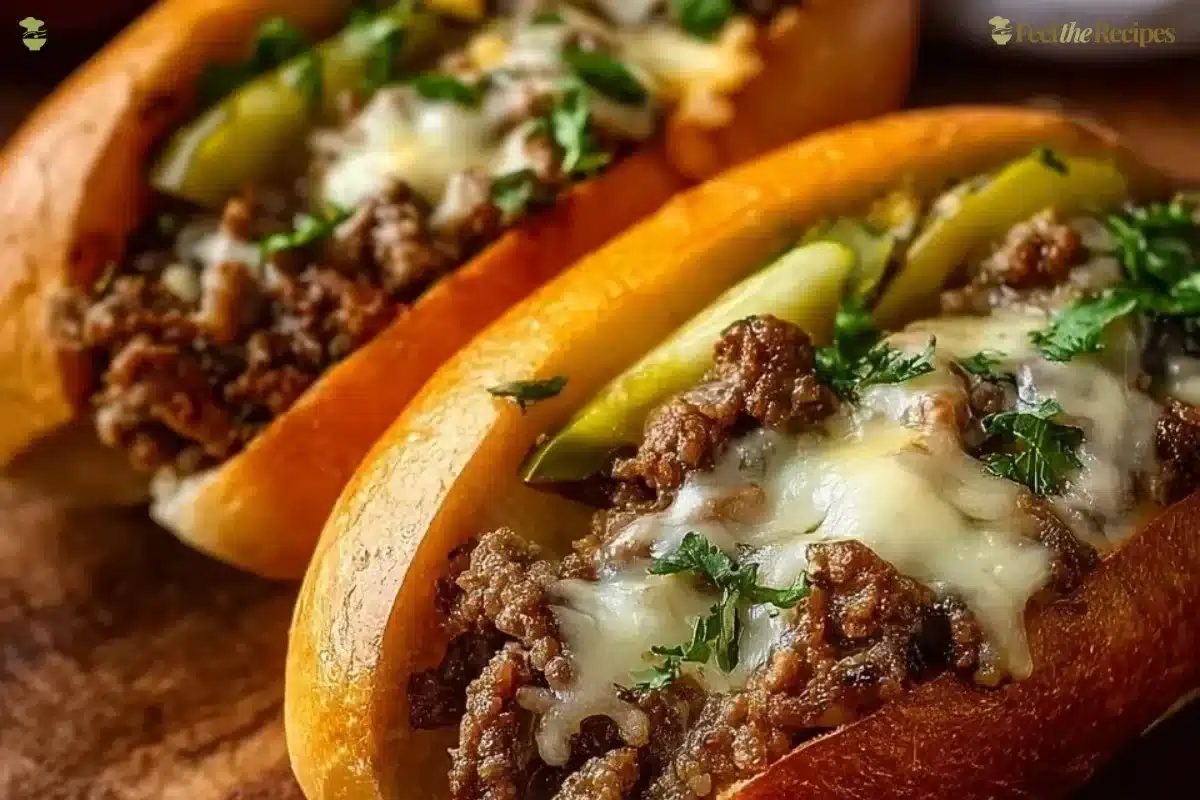
There’s something special about Ground Beef Philly Cheesesteaks the way the sizzling beef and onions send a warm, savory signal through the house and everyone starts drifting toward the kitchen. It feels like comfort that’s also quick and practical, the kind of meal that turns an ordinary evening into something a little more joyful. Clara is right here with you, guiding each step so you can make a sandwich that tastes like it was worth the wait.
If you enjoy hearty ground beef meals, you might also like this creamy garlic butter pasta with ground beef for another simple, satisfying weeknight option.
Why You’ll Love Making This Ground Beef Philly Cheesesteaks or The Story Behind My Ground Beef Philly Cheesesteaks
I started making Ground Beef Philly Cheesesteaks on busy nights when I wanted something fast, filling, and a little indulgent without a lot of fuss. Ground beef is forgiving. It cooks quickly and soaks up seasonings and onion sweetness in a way chunkier cuts cannot. Plus, using provolone keeps things classic: creamy, mild, and perfect for melting over hot meat.
This version is practical for a weekday dinner, but it also feels special enough for guests. It’s one of those recipes that teaches basics how to brown meat well, coax sweetness from onions and peppers, and get cheese to melt just right. You will learn kitchen skills while making a crowd-pleaser.
Step-by-Step: How to Make Ground Beef Philly Cheesesteaks
“Cooking isn’t about perfection. It’s about enjoying every delicious step.”
Before you dive in, take a moment to gather your tools: a roomy skillet, a wooden spoon or spatula, a baking sheet, and a sharp knife. Having everything at hand makes the process calm and easy.
Overview: We start by softening onions and peppers to bring out sweetness. Then we brown the ground beef and season it simply. After that, we assemble the sandwiches with provolone and finish them briefly in the oven so the cheese melts beautifully and the rolls warm through. Short, sensory, and reliable. Now let’s walk through each step.
- Heat olive oil in a skillet over medium heat.
- Let the oil warm until it glistens but is not smoking. You want a gentle shimmer so onions can soften without burning.
- Add sliced onions (and bell peppers, if using) and sauté until softened.
- Stir often. Listen for a gentle sizzle. Cook until onions become translucent and lightly golden at the edges, about 6 to 8 minutes. If you like caramelized flavor, cook them a bit longer until deep golden brown.
- Add ground beef to the skillet, season with salt and pepper, and cook until browned.
- Break the meat into even pieces so it cooks quickly and evenly. Cook until no pink remains and the beef has some browned bits. Taste a small piece and adjust salt and pepper. If you want, add a pinch of garlic powder or a dash of Worcestershire sauce for depth.
- Preheat the oven to 350°F (175°C).
- This temperature is hot enough to melt cheese and warm rolls without drying the meat.
- Place hoagie rolls on a baking sheet, and fill each with the beef and onion mixture.
- Spoon evenly so each roll gets a juicy portion. If your beef mixture released liquid, drain some off first so the rolls don’t get soggy.
- Top each sandwich with slices of provolone cheese.
- Lay the provolone across the meat, then tuck edges under slightly so it melts into the sandwich.
- Bake in the oven for about 5-10 minutes, or until the cheese is melted and bubbly.
- Keep an eye on the sandwiches. You want gooey, melted cheese and warm bread. If you like a toastier top, switch to broil for the last 30 seconds, watching carefully.
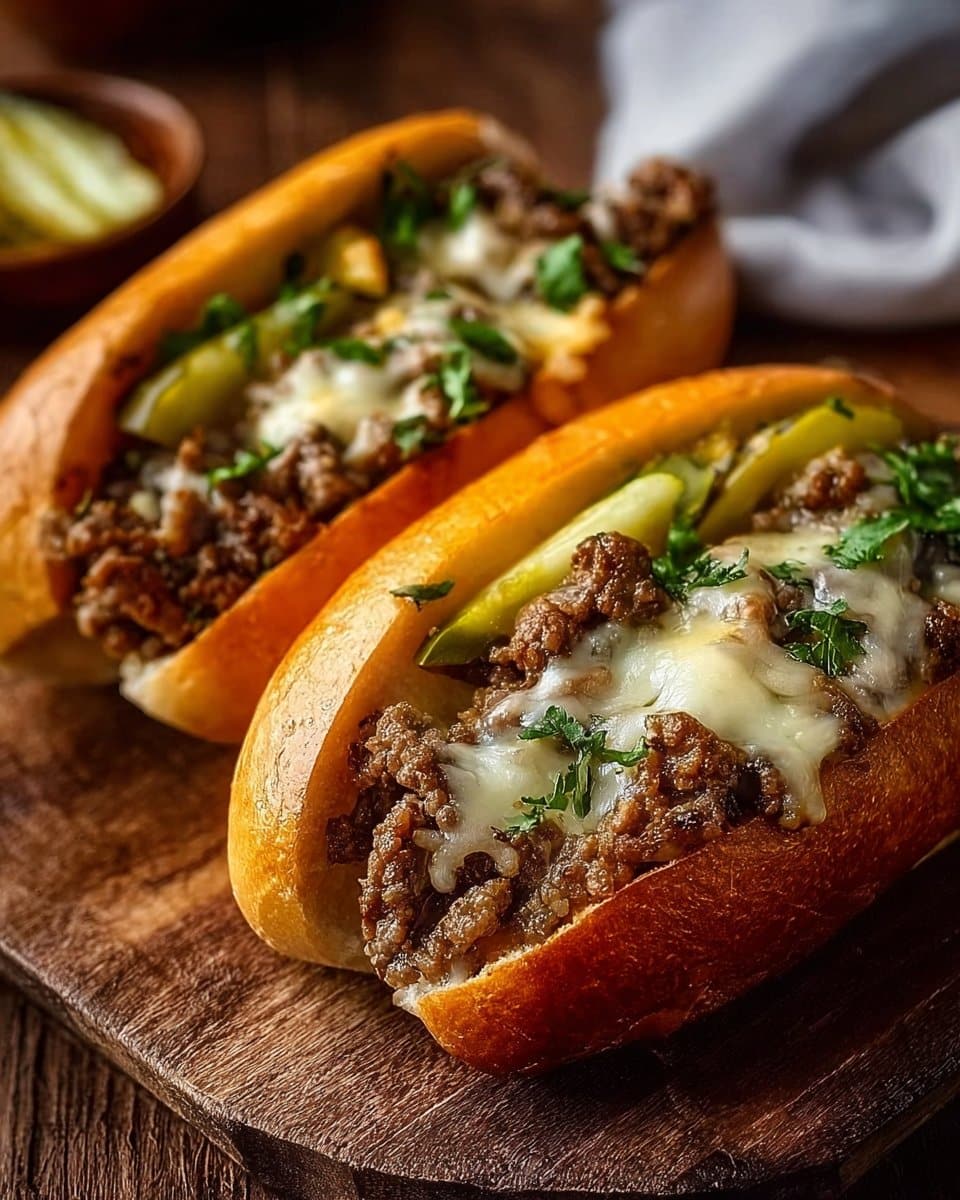
- Serve hot and enjoy your delicious Philly cheesesteaks!
- Add pickles or hot sauce at the table. Slice and serve without delay so the cheese stays gooey and the sandwich is at its best.
Ingredients You’ll Need for Ground Beef Philly Cheesesteaks
1 lb ground beef use 80/20 for flavor and juiciness.
1 onion, sliced yellow onions caramelize nicely.
1 bell pepper, sliced (optional) red or green, for color and sweet bite.
4 hoagie rolls sturdy, but not too dense; slightly crusty outside is ideal.
6 slices of provolone cheese classic and mild-melting.
Salt and pepper to taste start light, then adjust.
Olive oil for sautéing or use real butter for richer flavor.
Optional: a splash of Worcestershire sauce, garlic powder, or a pinch of red pepper flakes simple ways to add depth.
Optional toppings: sliced pickles, sautéed mushrooms, hot sauce, or chopped parsley small additions that change the mood of the sandwich.
Short notes: Use real butter for a richer finish if you like buttery bread. Fresh herbs make all the difference if you have parsley or a little oregano on hand. If you prefer a slightly smokier taste, try smoked provolone or throw in a few sautéed mushrooms.
Directions: Cooking with Confidence
- Heat olive oil in a skillet over medium heat.
- Wait until the oil shimmers. This helps the onions start cooking immediately.
- Add sliced onions (and bell peppers, if using) and sauté until softened.
- Stir so nothing sticks. Watch the edges for golden color.
- Add ground beef to the skillet, season with salt and pepper, and cook until browned.
- Break the meat into bite-sized pieces and cook evenly. Add a splash of Worcestershire sauce if you like a savory, meaty note.
- Preheat the oven to 350°F (175°C).
- Give it a few minutes to reach temperature while you finish the filling.
- Place hoagie rolls on a baking sheet, and fill each with the beef and onion mixture.
- If the beef mixture is very juicy, drain off excess fat first. You want moist but not soggy.
- Top each sandwich with slices of provolone cheese.
- Cover the meat fully so the cheese melts into every bite.
- Bake in the oven for about 5-10 minutes, or until the cheese is melted and bubbly.
- The cheese should be soft and slightly bubbling. If you prefer a crispier top, broil for 20 to 30 seconds while watching closely.
- Serve hot and enjoy your delicious Philly cheesesteaks!
- Let the sandwiches sit for a minute so the cheese settles but still stretches when you bite into it.
How to Serve Ground Beef Philly Cheesesteaks and Make It Shine
Serve each sandwich straight from the oven for the best texture. The contrast of melted cheese and warm roll is what makes the sandwich special.
Pair with a simple side like crispy oven fries, a green salad, or coleslaw. If you want something heartier, roasted potatoes or a cup of tomato soup work beautifully.
For presentation, slice the sandwich on a diagonal and plate it with a small pile of pickles or a lemon wedge if you added peppers. A scattering of chopped parsley brightens flavors and looks fresh.
If you’re serving to a group, set out a small toppings station: extra provolone or cheddar, pickled jalapeños, hot sauce, and sautéed mushrooms. This lets each person customize their sandwich without complicating your cooking.
How to Store Ground Beef Philly Cheesesteaks for Later
Cool leftovers quickly to keep them safe. Place sandwiches in an airtight container or wrap tightly in foil and store in the refrigerator for up to 3 days.
To reheat, wrap in foil and warm in a 325°F oven until heated through, usually 10 to 15 minutes. If you prefer the microwave, zap for 1 to 2 minutes on medium, then finish for 1 minute in a toaster oven or skillet to restore some crispness.
If you want to freeze, wrap each sandwich tightly in plastic wrap and then foil. Freeze for up to 2 months. Thaw in the refrigerator overnight and reheat as above. For best results, add a fresh slice of cheese before reheating so it melts fresh.
Clara’s Tips for Success
- Brown the beef well: Browning creates flavor. Let the meat sit undisturbed for a minute after adding to the pan so it can develop some color before stirring.
- Don’t overcrowd the pan: If the skillet is too crowded, the meat will steam instead of brown. Work in batches if needed.
- Drain excess fat: A little fat is good for flavor, but too much will make the rolls soggy.
- Melt cheese gently: Low oven heat melts cheese evenly. Broil only at the last moment if you want a browned top.
- Try quick seasoning: A splash of Worcestershire sauce or a pinch of garlic powder brings savory depth without extra steps.
For an extra note on handling beef tenderness and cooking techniques, you might find this short guide useful: are beef back ribs tough? it explains how heat and cut affect texture, which helps when thinking about ground beef versus whole cuts.
Simple Variations to Try
- Cheesesteak with mushrooms: Add a cup of sliced mushrooms to the onions for earthy flavor and extra umami.
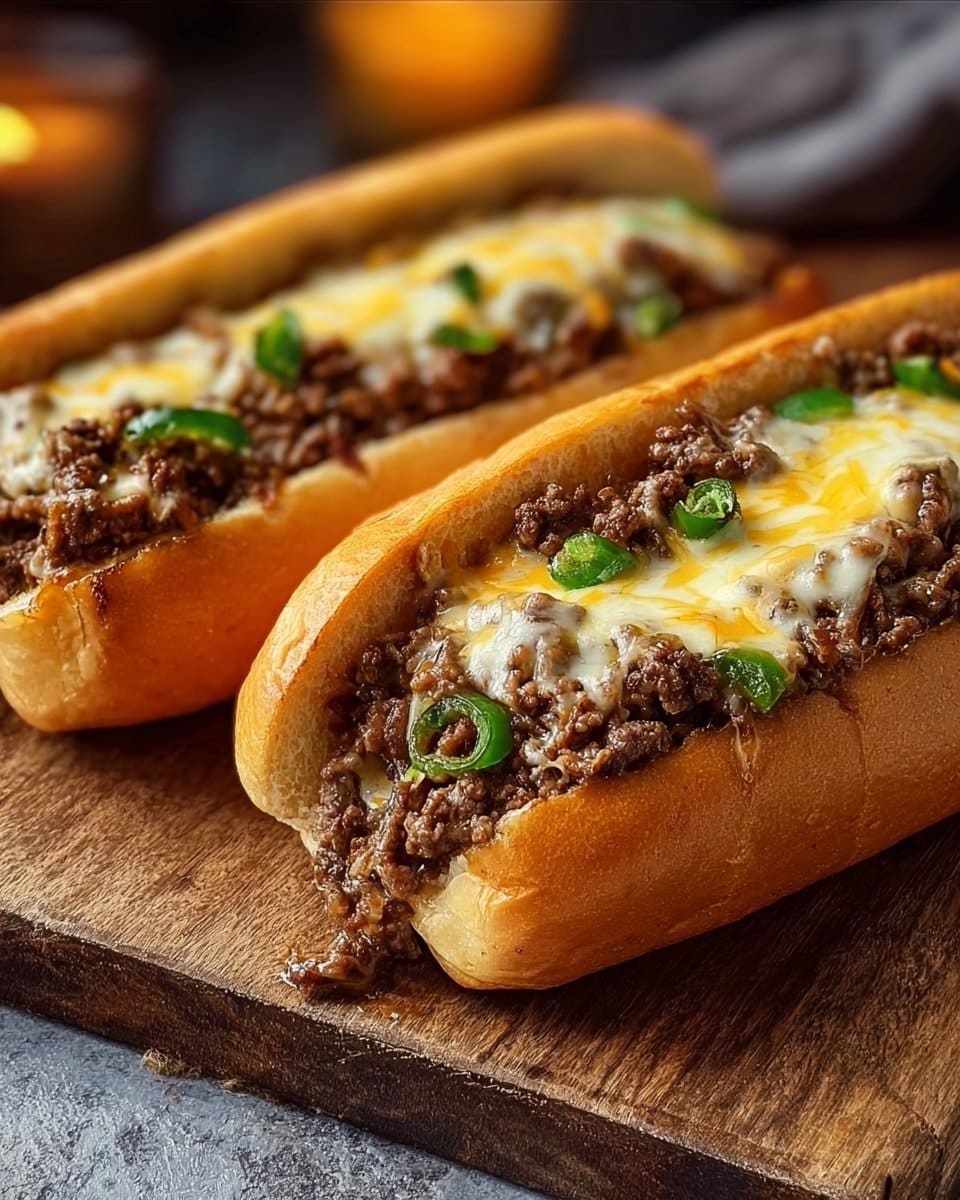
- Spicy version: Toss red pepper flakes into the onions and offer pickled jalapeños on the side.
- Cheddar and caramelized onion: Swap provolone for sharp cheddar and caramelize the onions until deep and sweet.
- BBQ twist: Stir a spoonful of BBQ sauce into the beef mixture and top with crispy onions for crunch.
- Lighter option: Use lean ground beef or turkey, and serve on toasted whole-wheat rolls with extra grilled peppers.
If you want to experiment beyond sandwiches, try spooning the beef mixture over rice or pasta for a quick bowl dinner. For inspiration on other ground beef meals that pair well with this approach, explore this guide: beef back ribs guide for ideas about meat handling and flavor pairing.
Building Confidence in the Kitchen
You do not need fancy tools or unusual ingredients to make a great cheesesteak. A good knife, a roomy skillet, and attention to heat are your best friends.
Taste as you go. When you season the beef, taste a small spoonful to see if it needs more salt, pepper, or a touch more seasoning like garlic powder or Worcestershire sauce.
Trust your senses. Smell will tell you when onions are sweet and ready. Look for browned bits on the meat. Listen for the comforting sizzle that signals everything is cooking. These cues are more important than precise timing.
If something goes wrong, stay calm. If the meat is over-salted, serve with plain bread or a dollop of plain yogurt on the side to tone it down. If the onions get too dark, scrape them out and start a fresh batch; sometimes a small restart is faster than trying to rescue.

Ground Beef Philly Cheesesteaks
Ingredients
Method
- Heat olive oil in a skillet over medium heat until it shimmers.
- Add sliced onions and bell peppers (if using) and sauté until softened, about 6 to 8 minutes.
- Add ground beef, season with salt and pepper, and cook until browned, breaking it into pieces as it cooks.
- Preheat the oven to 350°F (175°C).
- Place hoagie rolls on a baking sheet and fill each with the beef and onion mixture.
- Top each sandwich with slices of provolone cheese.
- Bake in the oven for about 5-10 minutes, or until the cheese is melted and bubbly.
- For a toastier top, switch to broil for the last 30 seconds, watching carefully.
- Serve hot and enjoy your delicious Philly cheesesteaks!
- Add pickles or hot sauce at the table.
Nutrition
Notes
Tried this recipe?
Let us know how it was!FAQs About Ground Beef Philly Cheesesteaks
Can I make this ahead of time?
Yes. You can cook the beef and onions ahead and refrigerate for up to 3 days. Reheat gently and assemble with fresh cheese before warming in the oven so the cheese melts fresh.
What’s the best ground beef to use?
I recommend 80/20 ground beef for the best balance of flavor and juiciness. Leaner beef is fine if you prefer less fat, but you may want to add a splash of oil or butter to keep things moist.
Can I use different bread?
Yes. A sturdy roll like a hoagie or sub roll works best to hold everything. A softer roll will work but may get soggy faster. For a lighter feel, slice a baguette or use a toasted roll.
How do I keep the rolls from getting soggy?
Drain excess fat from the pan before filling the rolls. Toasting the rolls slightly in the oven or on a pan before filling also helps form a barrier so they stay pleasantly textured.
What cheese melts best?
Provolone is traditional and melts nicely. American cheese also melts beautifully and gives a creamy texture. If you like stronger flavor, try sharp cheddar, but note it will taste different.
Troubleshooting Common Issues
If the meat is dry: cook on medium heat and avoid overcooking. Add a splash of beef broth or a little butter to bring moisture back.
If the onions are undercooked: give them time. Onions need at least 6 to 8 minutes over medium heat to soften. If they start to brown too quickly, lower the heat and add a small splash of water to help them sweat.
If the cheese won’t melt evenly: cover the pan briefly to trap steam and melt cheese, or transfer to a warm oven on a baking sheet for a few minutes.
If the sandwiches are greasy: blot the beef lightly with a paper towel after cooking, or spoon off the excess fat into a heatproof container.
Feeding a Crowd
This recipe scales well. For a crowd, brown 3 to 4 pounds of ground beef in batches so each portion gets good color. Keep cooked meat warm in a low oven and set up an assembly line for toasting rolls, filling with beef, and melting cheese.
Serve with easy sides that can be prepared ahead: simple potato wedges, a green salad, or a big bowl of pickles and slaw. Let people add their own toppings at the table to keep it fun and low-stress.
Nutritional Notes and Quick Swaps
If you want to reduce calories, choose lean ground beef or ground turkey and serve on smaller rolls. For lower sodium, use unsalted buns and taste the beef before adding more salt.
Add vegetables like spinach or extra peppers to boost fiber and vitamins. Mushrooms are a great swap for some of the meat, lending umami and a meaty texture.
Final Encouragement or Closing Note
I hope this Ground Beef Philly Cheesesteaks recipe helps you discover how simple and rewarding homemade cooking can be. You’ve got this. Little steps, like browning meat properly and tasting as you go, build confidence fast. Make the sandwich yours, and don’t be afraid to try one of the variations.
Conclusion
For more recipe ideas and another simple take on a classic, check out this one from Easy Family Recipes: Easy Philly Cheesesteak (with Ground Beef) · Easy Family Recipes.
If you want a speedy, 30-minute version with helpful step-by-step notes, see this quick method at 30-Minute Ground Beef Philly Cheesesteaks.
Thank you for cooking with me. Keep practicing, trust your senses, and enjoy the sizzle.