
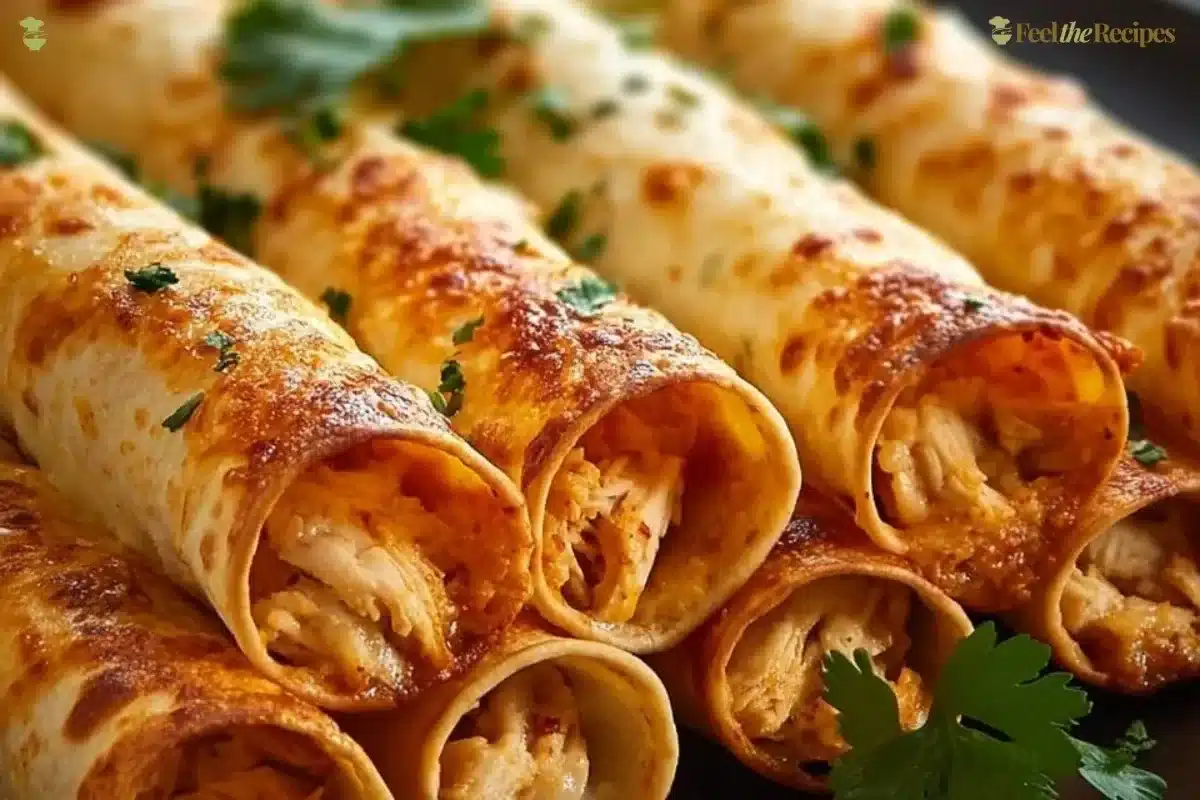
There’s something special about Crispy Chicken Taquitos the way their warm, spiced smell drifts through the house and makes everyone wander into the kitchen. They are small, confident bites that bring a lot of joy, and they are forgiving to make. Whether you are cooking for a busy weeknight or feeding a crowd, these taquitos are a simple way to show love through food.
If you like recipes that are approachable and a little bit playful, this one will make you feel capable. It pairs well with simple sides and is an excellent way to use leftover chicken without fuss. You might also enjoy learning new ways to adapt chicken-focused recipes, like the 38g protein chicken enchiladas, which share the same family-friendly spirit.
Why You’ll Love Making This Crispy Chicken Taquitos
These taquitos are quick, crowd-pleasing, and forgiving. The filling is creamy and gently spiced so it stays juicy inside the crisp shell. The baking method keeps hands cleaner than deep frying, and a short broil at the end can give the edges that satisfying crunch everyone notices first.
You don’t need fancy equipment. A simple bowl, a baking sheet, and a few pantry spices are enough. Rotisserie chicken or leftover roasted chicken turns this into a fast weeknight win. And because the filling is flexible, you can tune the heat and herbs to your family’s taste.
Step-by-Step: How to Make Crispy Chicken Taquitos
“Cooking isn’t about perfection. It’s about enjoying every delicious step.”
Before we dive into the ingredients and the oven, here is the kitchen game plan. You will mix the filling, warm the tortillas so they bend easily, roll each taquito tight, and bake them until they are golden and crisp. Small steps, clear actions, and tasty results.
Ingredients You’ll Need for Crispy Chicken Taquitos
- 2 cups cooked shredded chicken (rotisserie chicken works great)
- 4 oz cream cheese, softened
- 1/2 cup shredded cheddar or Mexican blend cheese
- 1/4 cup salsa (mild or spicy)
- 1/2 tsp garlic powder
- 1/2 tsp chili powder
- 1/2 tsp cumin
- Salt and black pepper to taste
- 8 small flour or corn tortillas
- Cooking spray or oil (for brushing)
- Chopped cilantro
- Sour cream
- Guacamole
- Extra shredded cheese – use a high-quality cheddar or Monterrey Jack for melting and flavor
- Butter – use real butter for rich flavor if you choose to lightly brown the taquitos in a skillet before baking
- Fresh herbs – fresh cilantro or green onions make all the difference for brightness
Notes:
- If you prefer corn tortillas for a more authentic texture, warm them a bit longer to prevent cracking.
- The cream cheese keeps the filling creamy and helps bind the shredded chicken, but Greek yogurt can substitute if you want a slightly tangier, lighter option.
Directions: Cooking with Confidence
- Preheat oven to 425°F (220°C). Line a baking sheet with parchment paper or lightly grease it.
- In a large bowl, combine shredded chicken, cream cheese, shredded cheese, salsa, garlic powder, chili powder, cumin, salt, and pepper. Mix well.
- Warm the tortillas in the microwave for about 20 seconds to make them pliable.
- Spoon 2–3 tablespoons of the filling onto one side of each tortilla and roll tightly.
- Place taquitos seam-side down on the prepared baking sheet.
- Lightly brush with oil or spray with cooking spray.
- Bake for 15–20 minutes or until golden brown and crispy. For extra crispiness, broil for 1–2 minutes at the end.
- Serve warm with sour cream, guacamole, or your favorite toppings.
Step-by-step tips while you work:
- Preheat and prep first, then focus on assembly. Everything goes smoother when the oven is ready.
- When you warm tortillas, stack them and cover with a slightly damp towel for a few minutes; that steam keeps them soft and less likely to split while you roll.
- Roll each taquito snugly so the filling stays inside as it bakes. If you find one is loose, fold one end in slightly before rolling.
- Place seam-side down on the baking sheet. That little trick helps them stay closed and look tidy after baking.
- Watch the last 2 to 3 minutes closely if you broil. The edges can go from perfect to overly dark quickly.
- Taste a small bit of filling before rolling if you want to adjust salt or heat. A quick tweak here prevents a bland final bite.
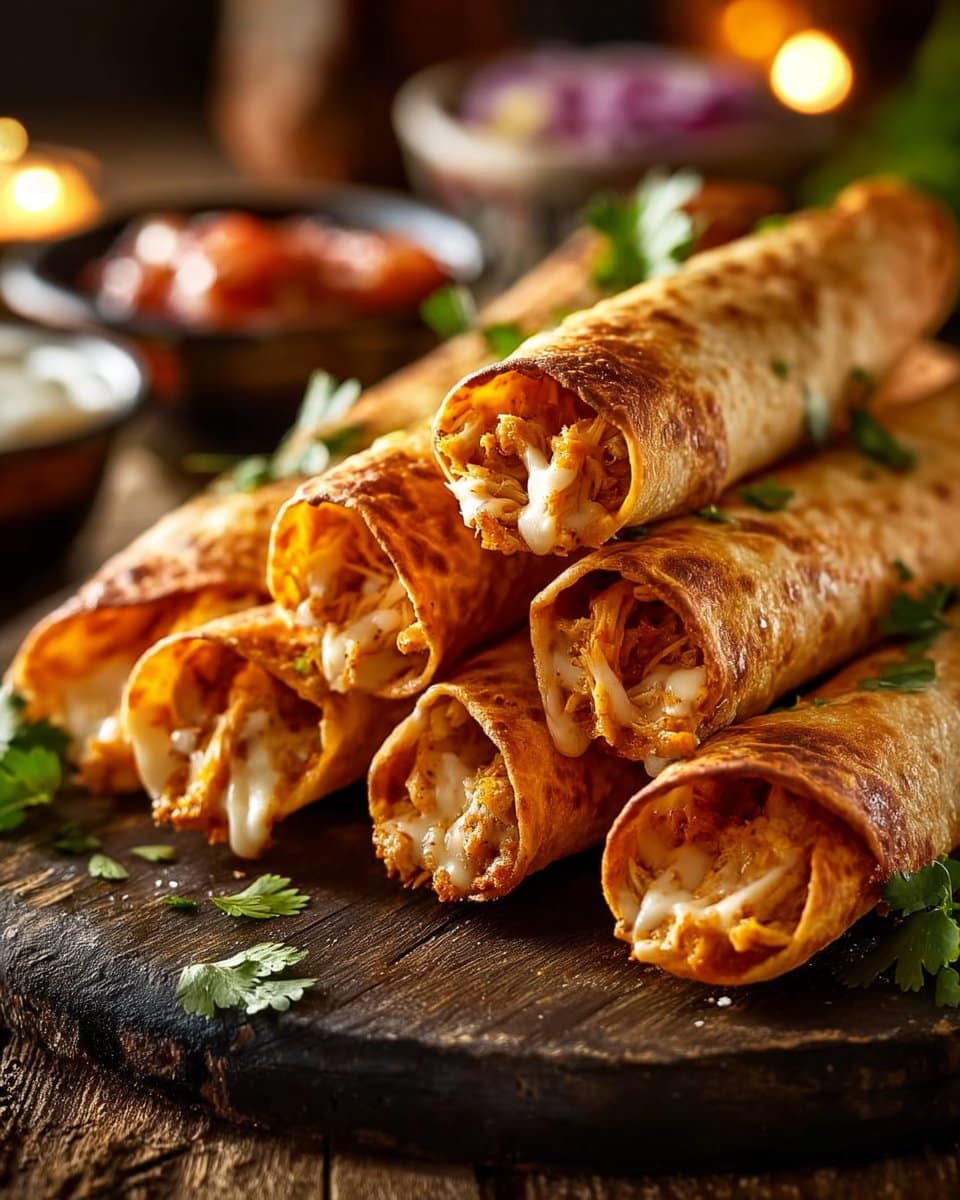
How to Serve Crispy Chicken Taquitos and Make It Shine
Think warm and colorful. Arrange taquitos on a tray with a few dipping bowls, or plate them with a simple salad for a main dish. Bright garnishes and contrasting textures make the plate feel thoughtful without extra fuss.
Serving ideas:
- Stack three taquitos per person and add a dollop of sour cream, a spoonful of guacamole, and a sprinkle of chopped cilantro.
- Offer lime wedges for squeezing over the top. The acid wakes up the creamy filling and makes each bite taste fresher.
- Serve with a side of black beans or a simple corn salad to make the meal more complete.
- For a party, set out bowls of shredded lettuce, pico de gallo, pickled onions, and extra cheese so guests can customize their plate.
A helpful pairing note: if you want a soup to serve alongside for a cozy meal, a hearty bowl of chicken tortilla soup provides matching flavors and makes the meal feel homey.
How to Store Crispy Chicken Taquitos for Later
Leftovers store well and reheat beautifully if you take a couple of simple steps.
To store:
- Cool taquitos to room temperature, then place them in an airtight container in a single layer if possible.
- If stacking is necessary, separate layers with parchment paper.
- Refrigerate for up to 3 days.
To freeze:
- Freeze on a baking sheet for 1 hour first so the taquitos firm up.
- Transfer to a freezer-safe bag or container. Label with the date. Use within 2 months for best quality.
To reheat:
- From refrigerated: Preheat oven to 375°F (190°C). Arrange taquitos on a baking sheet and bake for 8 to 12 minutes until heated through and crisp.
- From frozen: Bake at 375°F (190°C) for 18 to 22 minutes, flipping once halfway through. Finish with a brief broil if you want extra crunch.
- Avoid microwaving if you want to keep them crispy. If you must microwave, do it just long enough to lose the chill, then crisp them in a skillet or under the broiler for a minute.
These storage and reheating tips keep the texture as close to freshly baked as possible.
Clara’s Tips for Success
- Use warm tortillas. Cold tortillas crack when you roll them. A quick microwave or skillet warm-up saves time and frustration.
- Keep the filling snug but not overloaded. Too much filling makes rolling hard and can cause the taquitos to burst while baking.
- Adjust the salsa and spices to your taste. Start with less heat and add more after you taste the filling.
- Brush with oil, not too much. A light brush creates color and crunch without making the taquitos greasy.
- If you want extra flavor, add a squeeze of lime and a handful of chopped cilantro to the filling before rolling.
These are practical tricks I use all the time to keep the process smooth and enjoyable.
Simple Variations to Try
- Cheesy Green Chile Chicken Taquitos: Stir roasted green chiles into the filling for gentle heat and a smoky note.
- BBQ Chicken Taquitos: Swap salsa for a couple of tablespoons of your favorite barbecue sauce and add a little diced red onion.
- Buffalo Chicken Taquitos: Mix in a tablespoon of hot sauce and serve with a blue cheese or ranch dip.
- Veggie-Packed Taquitos: Add finely chopped sautéed peppers and onions to the mixture for extra texture.
- Breakfast Taquitos: Use shredded breakfast sausage or bacon, scramble a little egg into the filling, and top with breakfast salsa.
Small changes can take this basic recipe in many directions. Try one variation at a time to see how each ingredient alters the overall balance.

Crispy Chicken Taquitos
Ingredients
Method
- Preheat oven to 425°F (220°C). Line a baking sheet with parchment paper or lightly grease it.
- In a large bowl, combine shredded chicken, cream cheese, shredded cheese, salsa, garlic powder, chili powder, cumin, salt, and pepper. Mix well.
- Warm the tortillas in the microwave for about 20 seconds to make them pliable.
- Spoon 2–3 tablespoons of the filling onto one side of each tortilla and roll tightly.
- Place taquitos seam-side down on the prepared baking sheet.
- Lightly brush with oil or spray with cooking spray.
- Bake for 15–20 minutes or until golden brown and crispy. For extra crispiness, broil for 1–2 minutes at the end.
- Serve warm with sour cream, guacamole, or your favorite toppings.
Nutrition
Notes
Tried this recipe?
Let us know how it was!FAQs About Crispy Chicken Taquitos
Can I make this ahead of time?
Yes. Make the filling ahead and chill. When ready to serve, roll and bake. You can also roll the taquitos and freeze them before baking. Bake directly from frozen with a slightly longer cook time.
Can I use corn tortillas?
Yes. Corn tortillas are traditional. Warm them longer and handle them gently to prevent tearing. You may want to lightly oil or spray them so they crisp nicely.
Is there a dairy-free option?
Swap the cream cheese for a dairy-free spread or mashed avocado for creaminess. Use dairy-free shredded cheese or omit it and rely on salsa and spices for flavor.
How do I keep taquitos from getting soggy?
Bake on a hot rimless baking sheet, and do not cover them while stored warm. Cool on a rack briefly before storing, and reheat in the oven to regain crispness.
Can I make these in an air fryer?
Yes. Preheat the air fryer to 400°F (200°C) and cook in batches for 6 to 8 minutes, turning halfway, until golden and crispy.
Final Encouragement
Cooking should feel like a friendly adventure. These Crispy Chicken Taquitos are forgiving and filled with flavor, and they reward a little attention with a lot of crunch and comfort. Take your time to season the filling well, warm the tortillas, and keep your hands light but confident while rolling. You are doing great.
I hope this Crispy Chicken Taquitos recipe helps you discover how simple and rewarding homemade cooking can be. You’ve got this.
Conclusion
If you want inspiration for related baked taquito methods and to compare techniques, check out this helpful recipe for Easy Chicken Taquitos – Tastes Better From Scratch to see another creamy-baked approach. For a different take that focuses on freezer-friendly and crisp results, this guide to Crispy Baked Chicken Taquitos (Easy & Freezer-Friendly!) has useful tips and timing ideas.
Happy cooking, and may your kitchen fill with that irresistible, crispy aroma.