

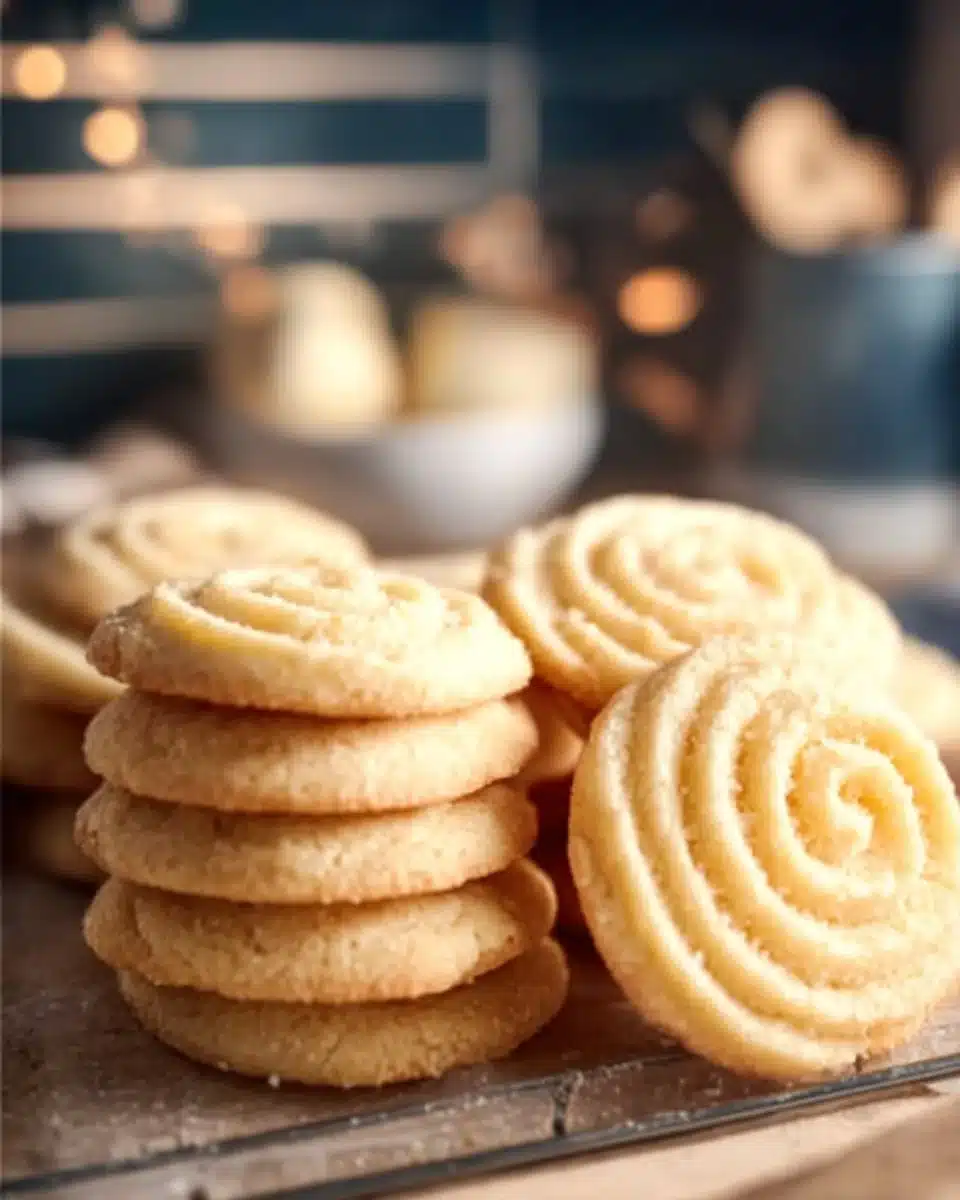
There’s something special about Soft Butter Cookies the way their warm, buttery aroma drifts through the house and calls everyone to the kitchen. Clara says they feel like a small, homemade hug: simple, kind, and reliably comforting. These cookies are easy enough for a weekday treat, yet pretty enough for company. If you’ve ever wanted a go-to cookie that turns out tender, melt-in-your-mouth, and slightly rustic, this recipe is for you.
If you enjoy trying different cozy cookie ideas, you might like my notes on soft thumbprint cookies for another comforting variation. Today, I will walk you through every step, share the small tricks that make a difference, and keep things friendly and encouraging. You can do this. Clara is right beside you.
Why You’ll Love Making This Soft Butter Cookies
These cookies live in my kitchen because they are kind of forgiving. The dough is pleasant to handle, the flavors are classic, and the texture is what people come back to again and again. Soft Butter Cookies sit neatly between a shortbread and a creamier cookie. They are tender without falling apart, buttery without being greasy, and rich without needing a dozen different ingredients.
They are a great first project for someone who has used a mixer but not much else. They also scale well if you want to make a double batch for a gathering. The piping step feels fancy but is remarkably simple once you practice a couple of times. The result looks bakery-made even when it was dressed in an apron and a smile.
These cookies also respond nicely to small tweaks, so you can make them your own. Add a lemon zest, swap vanilla for almond extract, or press a tiny jam center into the rosette. Each small choice changes the mood without making things complicated.
Step-by-Step: How to Make Soft Butter Cookies
“Cooking isn’t about perfection. It’s about enjoying every delicious step.”
Before we dive in, take a breath and gather the ingredients and tools. You will need a large bowl, a hand mixer or stand mixer, a heavy piping bag and a large open star tip, parchment paper, and a baking sheet. If you do not have a piping bag, I will show a simple alternative below. Lay everything out, set a timer, and remember this is supposed to be pleasant work.
Plan your time: about 10 minutes to mix, 15 minutes to pipe and chill if needed, and 13 to 15 minutes to bake a tray. Cooling time adds another 10 to 15 minutes. It moves quickly once the dough is ready.
Ingredients You’ll Need for Soft Butter Cookies
1 cup unsalted butter (softened) use real butter for a rich, authentic flavor.
2/3 cup granulated sugar gives gentle sweetness and a light texture.
2 egg yolks these add richness and help with the soft, tender crumb.
1 tsp vanilla extract (other extracts can be used) vanilla is classic; almond or lemon work well too.
2 cups all purpose flour measure by spooning into a cup and leveling for accuracy.
1/4 tsp salt (if you need to use salted butter, omit this) balances the sweetness.
2 Tbsp milk (whole or 2%) (more if needed, but the amount of milk will vary by batch due to the moisture level in the other ingredients) adds softness and helps the dough come together.
Notes: Use room temperature ingredients when possible. Soft butter creams up better and traps more air, which helps the cookies feel light. If your kitchen is warm, chill the dough briefly before piping so the shapes hold. If you want to experiment, try swapping one tablespoon of flour for cornstarch for an even more tender bite.
Directions: Cooking with Confidence
- Preheat oven to 350°F and line cookie trays with parchment (if the air temp is on the warmer side, it is a good idea to chill the cookies for 30 minutes before baking, so be sure to plan accordingly).
Begin by preheating the oven so it’s ready when your dough is shaped. Lining the trays with parchment prevents sticking and helps the bottoms bake evenly. - In a large bowl, cream the butter & sugar until light and fluffy using a hand mixer.
Creaming is about texture. Beat on medium speed for about 3 to 4 minutes until the mixture looks paler and feels airy. When you stop and scrape the bowl, the butter should hold soft peaks. That tiny lift is what makes the cookie tender. - Add the egg yolks and vanilla and mix on medium speed until well combined.
Add the yolks one at a time or together, then beat just until the yellow disappears and the mixture is smooth. The dough will look creamy and glossy. If you notice any streaks of yolk, mix a bit longer on medium speed. - Next, add the flour & salt to the mixture and mix on low speed until large crumbles form.
Add the dry ingredients in two additions, mixing on low so you do not overwork the flour. You want the dough to come together but not be compacted. The texture at this point will be crumbly. - Add the 2 tablespoons of milk and mix until the milk is absorbed. If the dough is not sticky, add another TEASPOON of milk until it is sticky and has the consistency of thick buttercream. Avoid using too much milk as this can cause the cookies to spread too much!
You are aiming for a pipeable dough that holds shape. If the dough becomes too wet, chill for 15 to 20 minutes and lift with a spatula instead of piping. - Transfer the dough to an extra large, heavy duty piping bag fitted with a large open star tip.
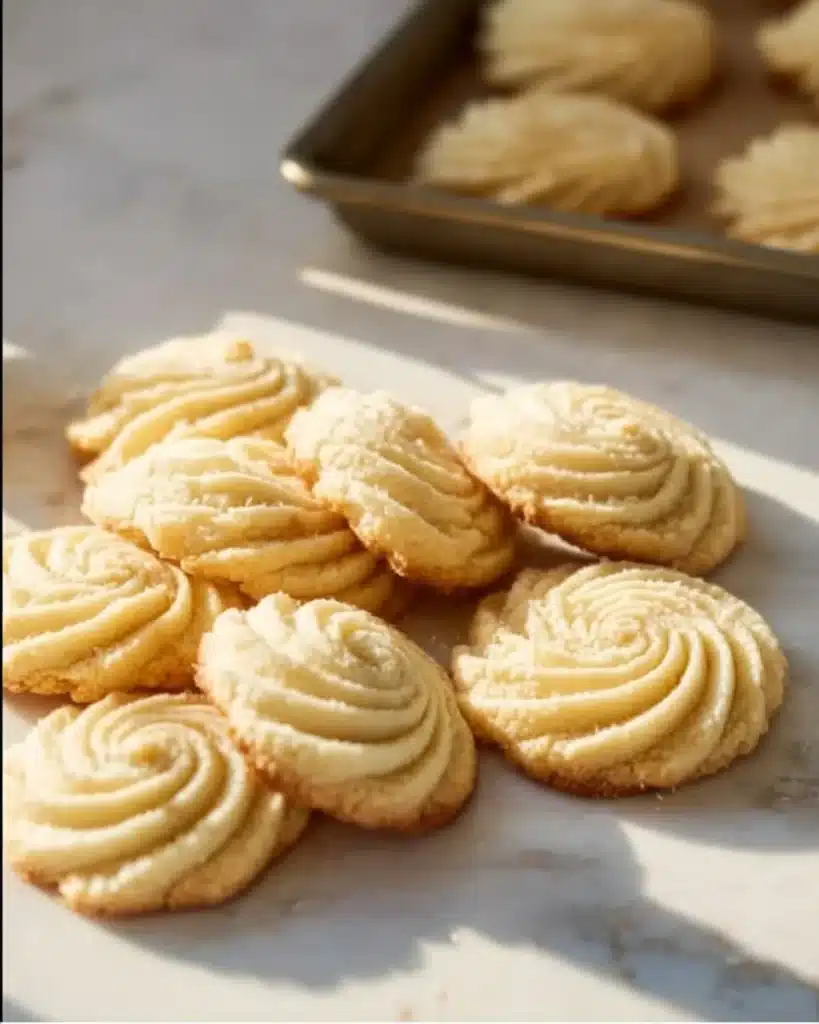
This step looks fancy but it’s forgiving. Lay the bag inside a tall cup and fold the top back to fill it neatly. Push the dough down so there are no air pockets. - Pipe the dough into rosettes by using the following motion; holding the bag upright, pipe the dough onto the tray and pull up slightly, then wrap around the center and pull gently to release.
Work straight down from about an inch above the parchment. Pressure should be even and steady. If your rosette tops are too pointy, stop squeezing a moment earlier. If they spread out too much, chill the piped tray briefly before baking. - Chill if needed.
If your kitchen is warm or the dough seems soft while piping, place the tray in the refrigerator for 20 to 30 minutes. Chilling firms the butter so the cookies will keep their pretty shape in the oven. - Bake in the oven until light golden brown on the edges, about 13 to 15 minutes.
Rotate the tray halfway through the bake for even coloring. The centers should look set but still slightly soft. The edges will be the telltale sign: lightly golden but not dark. - Allow to fully cool on baking sheet.
Let the cookies rest for at least 5 minutes before moving them. They continue to set as they cool, and moving them too soon can cause them to break. Slide the parchment onto a wire rack to finish cooling.
Clara’s calm voice here: if a cookie breaks, taste it anyway. Sometimes the most delicate bites become the first to disappear.
How to Serve Soft Butter Cookies and Make It Shine
Serve these cookies at room temperature so the butter flavor and tender crumb come through. Arrange them on a simple white plate to let the rosettes show, or stack them in a small bakery-style tin for gift-giving. For a cozy coffee break, place three cookies on a small saucer next to a steaming cup of tea.
For a special touch, dust lightly with powdered sugar, or press a tiny spoonful of jam into the center after baking. Fresh berries and a sprig of mint make a small plate look cared for without extra effort. A shallow bowl with a little lemon curd on the side turns these cookies into a bright, afternoon treat.
If you want to present a variety, pair the original with a lemon-scented batch and a cocoa variation so guests can try different flavors. The visual contrast of pale butter cookies and cocoa cookies is pleasing and helps you show off that you made them by hand.

How to Store Soft Butter Cookies for Later
Once completely cool, store the cookies in an airtight container at room temperature. Layer them with parchment if stacking to prevent sticking. Properly stored, these cookies will keep well for up to five days while maintaining their soft texture.
If you want to keep them longer, freeze the baked cookies in a single layer on a tray until firm. Then transfer to a freezer-safe container with parchment between layers. They will be good for up to three months. To thaw, move them to the fridge for an hour and then let them come to room temperature. Warm gently in a low oven for a few minutes if you want that freshly baked feeling.
You can also freeze the dough piped onto trays. Freeze until firm, then store the frozen shapes in a container. When ready to bake, put the frozen shapes onto a parchment-lined tray, let them sit for 5 to 10 minutes while the oven heats, and bake for a minute or two longer than the recipe indicates.
Clara’s Tips for Success
- Use room temperature butter for the best creaming. It should give slightly when pressed but not be greasy. If the butter is too soft, chill the bowl for 10 minutes and continue.
- Don’t overwork the dough. Mix on low once the flour is added to keep the cookies tender. A few visible crumbs before the milk is added are fine.
- If you do not own a piping bag, use a resealable plastic bag with a corner snipped off. It gives similar control for rosettes.
- Watch the edges for doneness. The center may look slightly underbaked but the edges will tell the story. Light golden edges equal a soft center.
- Keep your cookie sheets clean. Old bits of baked-on residue or dark pans can cause uneven coloring. Rotate trays for even baking if you have more than one.
Simple Variations to Try
- Lemon Zest Butter Cookies: Add 1 teaspoon of finely grated lemon zest to the dough and substitute half the vanilla with lemon extract. It brightens the flavor without changing texture.
- Cocoa Rosettes: Replace 2 tablespoons of flour with 2 tablespoons of good quality cocoa powder. These pipe and bake the same way and pair beautifully with coffee.
- Almond and Jam: Substitute 1/2 teaspoon of almond extract for the vanilla, and press 1/4 teaspoon of apricot jam into the center after baking. It creates a short, tender cookie with a jammy heart.
- Cinnamon Sugar Dust: While warm, brush with a touch of melted butter and sprinkle cinnamon sugar for a slightly crunchy finish. This is a nice warm-season twist.
- Herb-Infused Variation: For something unexpected, infuse the milk with a sprig of fresh rosemary, strain, cool, and use in the dough. It adds a subtle herb note that goes well with tea.
For more creative cookie ideas, I often test seasonal flavors like pumpkin and apple. If you enjoy those softer, cozy cookie styles, you might enjoy this soft pumpkin cookie with cinnamon frosting recipe for autumn baking.
Soft Butter Cookies
Ingredients
Method
- Preheat oven to 350°F and line cookie trays with parchment.
- In a large bowl, cream the butter and sugar until light and fluffy using a hand mixer.
- Add the egg yolks and vanilla, and mix on medium speed until well combined.
- Add the flour and salt to the mixture and mix on low speed until large crumbles form.
- Add the 2 tablespoons of milk and mix until absorbed. Adjust milk if needed to achieve a pipeable dough.
- Transfer the dough to a piping bag fitted with a large open star tip.
- Pipe the dough into rosettes onto the prepared trays.
- Chill if needed before baking to maintain shape.
- Bake in the oven until light golden brown on the edges, about 13 to 15 minutes.
- Let the cookies rest on the baking sheet for at least 5 minutes before moving to cool completely.
Nutrition
Notes
Tried this recipe?
Let us know how it was!FAQs About Soft Butter Cookies
Can I make this ahead of time?
Yes. You can prepare the dough and keep it in the refrigerator for up to 48 hours. If piping later, let the dough warm very slightly so it’s manageable, or pipe and freeze as directed above.
What if my cookies spread too much?
Too much milk, overly warm butter, or a hot oven can cause excess spreading. Chill the piped cookies for 20 to 30 minutes before baking, and check that your butter was not too soft when creamed.
Can I use salted butter?
Yes. If using salted butter, omit the added 1/4 teaspoon of salt. Taste the first batch and adjust next time if you prefer a touch more salt to balance sweetness.
My cookies are dry. What happened?
Overbaking is the most common cause. Remove them when the edges are just turning golden. Also ensure you are measuring flour correctly; spoon the flour into the measuring cup and level with a knife rather than packing.
How do I get clean rosette shapes every time?
Pipe with steady hands and keep the bag vertical. If you find the shell tip drags or you get a peaked top, reduce pressure slightly and practice a couple of times on parchment. Chilling the piped tray helps maintain shape during baking.
Troubleshooting Common Mishaps
If the dough seems too crumbly to pipe, add a quarter teaspoon of milk at a time until it holds together like thick buttercream. Be cautious and add the tiniest amounts. If the dough becomes too soft and oozes, place the bag on a tray and chill for 15 minutes before piping again.
If your oven has hot spots, rotate the pan once during baking. If the cookies brown too fast on the bottom, try a lighter colored baking sheet or add a second tray under the cookie sheet to act as a buffer.
Leftover sugar at the bottom of the bowl is fine; scrape the bowl and combine. The dough can look slightly uneven at first; the final mix smooths it out. Remember that slight irregularities are part of the charm of homemade cookies.
More Ways to Enjoy These Cookies
Turn them into tiny sandwiches with a thin smear of caramel or chocolate ganache between two rosettes. Use them as a garnish for a dessert plate alongside panna cotta or ice cream. These cookies are also lovely crushed into a parfait layer with whipped cream and fresh fruit.
If you are hosting a cookie exchange, make a few different flavors and label them. Guests appreciate variety, and this recipe is a friendly base that adapts well.
If you like combining textures, sprinkle 1 tablespoon of finely chopped toasted almonds on top immediately after baking while the cookies are still slightly warm. The nuts add a light crunch that contrasts with the soft interior.
For a simple afternoon treat, plate three cookies with a small glass of cold milk or hot cocoa. The pairings are intuitive and delightfully familiar.
For another comforting cookie with a different texture, try this apple and cinnamon treat that I like to make during colder months for a softer, heartier bite: apple cinnamon oatmeal cookies.
Final Encouragement or Closing Note
Baking is a series of small choices. Each time you bake these Soft Butter Cookies you will learn a little more about your oven, your butter, and how you like your cookies. Clara wants you to know that a tiny mistake will rarely ruin the whole batch. Taste, adjust, and most of all, enjoy the process.
Conclusion
If you want a reference for a slightly different take, this Soft Butter Cookies – The Best Recipe on OwlbBaking offers another viewpoint to compare techniques and ideas. For inspiration on richer, gooey butter-style cookies, see this take on Gooey Butter Cookies from Sugar Spun Run which explores a different texture that some bakers adore.
I hope this Soft Butter Cookies guide helps you feel confident in the kitchen. You have the skills to make something warm, buttery, and memorable. You’ve got this.