

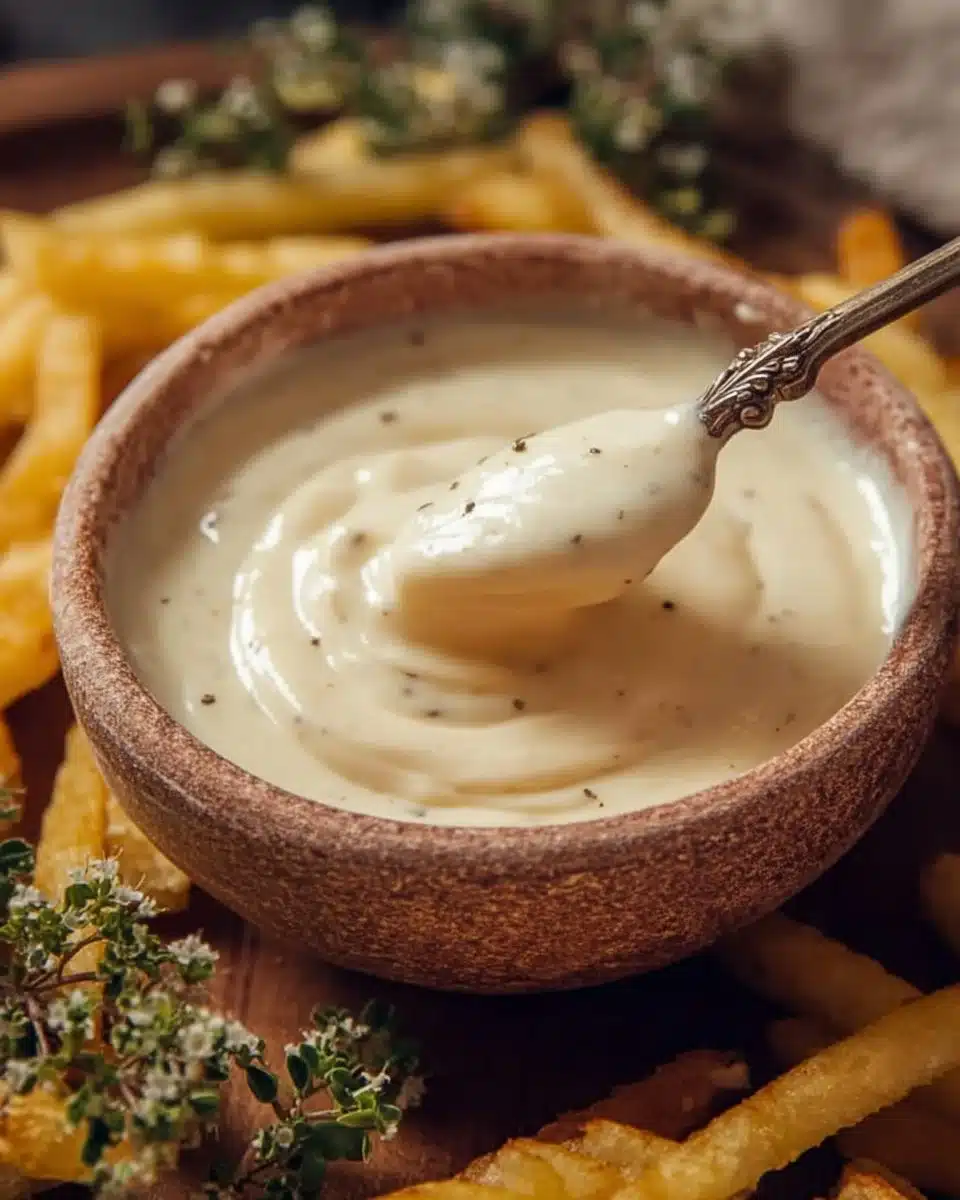
There’s something special about Homemade Aioli the way its garlic perfume drifts through the kitchen and draws everyone near. It’s one of those little homemade wins that turns ordinary fries, roasted vegetables, or a simple sandwich into a moment that feels cared for. Clara is right beside you: this is easy, forgiving, and absolutely worth trying tonight.
If you enjoy learning new staples to keep in your kitchen, you might also like the gentle tang of easy homemade coconut yogurt as a fresh complement to savory dishes.
Why You’ll Love Making This Homemade Aioli or The Story Behind My Homemade Aioli
I first learned to make aioli on a rainy afternoon when I wanted a creamy, garlicky sauce that felt more special than store-bought mayo. It took a little practice to get the texture right, but once I did, I made it for everything: potato wedges, grilled shrimp, and even as a quick spread on warm toast.
Making aioli at home gives you control of the flavor and the confidence that it’s fresh. You can make it bright with lemon, mellow with roasted garlic, or stud it with herbs for a summer touch. The process also teaches a simple but useful skill: how to emulsify oil into yolks without breaking the sauce. That skill unlocks many homemade sauces and dressings.
Step-by-Step: How to Make Homemade Aioli or Your Kitchen Game Plan
“Cooking isn’t about perfection. It’s about enjoying every delicious step.”
Before you start, gather everything on the counter. Emulsions like aioli are fussy if your tools or ingredients are scattered. Use a medium bowl, a steady whisk or an immersion blender, and a slow hand for adding oil. If you prefer a hands-on experience, whisk by hand. If you want speed and consistency, an immersion blender or food processor works very well.
Overview: You will mix the egg yolks with lemon juice, then slowly add oil while whisking so the mixture thickens and holds together. Once it’s creamy, fold in minced garlic, salt, and any flavorings. Taste, adjust, and enjoy.
Ingredients You’ll Need for Homemade Aioli
2 large egg yolks bring to room temperature for easier emulsifying.
1 cup olive oil use a mild-tasting olive oil for a balanced flavor.
3 cloves garlic, minced press or grate for the smoothest texture.
2 tablespoons lemon juice fresh is best for brightness.
Salt to taste start with a small pinch and build.
Optional extras: a pinch of Dijon mustard for stability and flavor, a teaspoon of water if the mixture feels too thick, or finely chopped fresh herbs like parsley for color. Fresh herbs make all the difference when you want a vibrant finish.
Directions: Cooking with Confidence
- In a bowl, whisk together the egg yolks and lemon juice until well combined.
- While whisking continuously, slowly drizzle in the olive oil until the mixture starts to thicken.
- Add the minced garlic and salt, and continue whisking until fully incorporated and creamy.
- Taste and adjust seasoning if necessary.
- Serve immediately or refrigerate for later use.
A little more detail to build confidence:
- Start with room-temperature egg yolks and lemon juice in a medium bowl. Whisk briskly until the mixture looks slightly pale and fluid. This makes it easier for the oil to bind.
- If you are whisking by hand, hold the bowl steady and add oil drop by drop at first. After the emulsion takes hold and looks creamy, you can pour the oil in a thin, steady stream. If using an immersion blender, place the yolks and lemon juice in a tall jar, add the oil in one go, and pulse until thick. Both methods work; choose the one that feels right to you.
- When the mixture begins to thicken, stop and taste for seasoning before adding garlic. Garlic is strong; fresh is lively. Add it little by little if you prefer a milder garlic presence.
- If your aioli looks too thick, whisk in a teaspoon of warm water at a time until you reach the consistency you like. If it breaks and looks separated, start with a fresh yolk in a clean bowl, whisk it a bit, and slowly add the broken aioli to re-form an emulsion.
- After you add salt and garlic, give the aioli one final whisk to make it silken. Serve right away for the freshest flavor, or chill briefly cold aioli will firm up a touch.
Clara’s note: Keep the whisking rhythmic and patient. A rushed pour of oil is the main reason an aioli can split. If that happens, take a breath and follow the rescue tip above.
How to Serve Homemade Aioli and Make It Shine
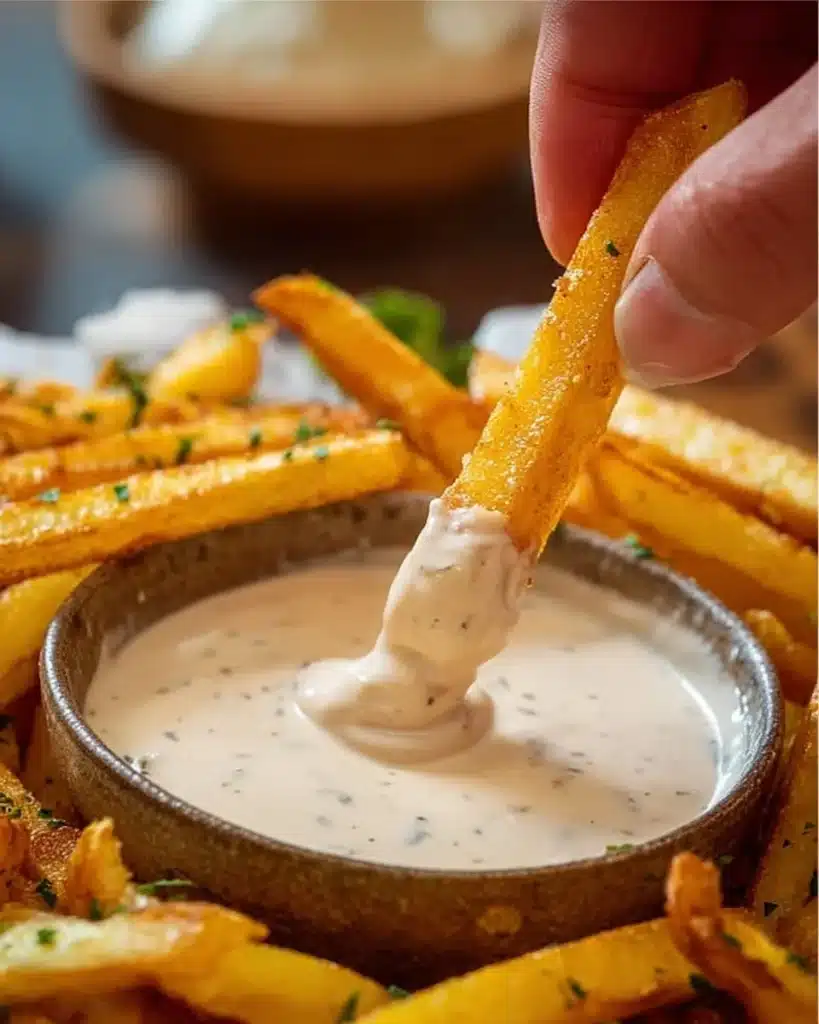
Aioli is one of those sauces that makes even simple foods feel special. Dollop it on hot fries and watch the steam carry the garlic scent. Spread it beneath slices of roasted eggplant for an easy vegetable sandwich. Serve it as a dip for crudites or soft pretzels. It’s also brilliant with grilled fish or as a sauce for roasted chicken.
For a pretty serving: spoon the aioli into a small ramekin. Use the back of a spoon to create a swirl, and sprinkle on a little smoked paprika or chopped parsley for color. Serve alongside warm bread or a colorful plate of vegetables so the texture and aroma invite tasting.
Pairings that work beautifully:
- Crispy, golden fries or roasted potatoes.
- Charred shrimp or seared scallops for a restaurant feel at home.
- Grilled vegetables like zucchini and eggplant for smoky contrast.
- Sandwiches and wraps as a creamy spread.
If you want a cozy pairing idea, try serving aioli alongside a bowl of soup for dipping crusty bread. It’s a small luxury that lifts the whole meal.

In case you decide to serve aioli with a baked snack, it pairs wonderfully with homemade cheesy breadsticks for a crowd-pleasing snack plate.
How to Store Homemade Aioli for Later
Fresh aioli keeps well for a short time, and treating it right will keep the flavor bright.
- Refrigeration: Store aioli in an airtight container in the refrigerator for up to 3 days. Use a clean spoon every time you scoop to avoid introducing crumbs or bacteria.
- Texture after chilling: Aioli firms slightly when cold. If you need it to loosen, let it sit at room temperature for 10 to 15 minutes, or whisk in a teaspoon of warm water before serving.
- Leftovers and safety: Because this aioli uses raw egg yolks, keep it chilled and use it within a few days. If you are serving it to people with weaker immune systems, consider using pasteurized egg yolks to reduce risk.
- Freezing: I do not recommend freezing aioli. Freezing tends to break the emulsion and change the texture when thawed.
Clara’s practical tip: Label the container with the date so you know at a glance when you made it. If the aioli smells off or looks discolored, trust your senses and discard it.
Clara’s Tips for Success
- Use room-temperature ingredients. Cold egg yolks and cold oil can make emulsification sluggish. If you forget, let the yolks sit for 15 minutes to warm slightly.
- Take your time when adding oil. Whether whisking by hand or using an immersion blender, patience ensures a stable, creamy aioli. A slow steady stream is your friend.
- If your aioli splits, don’t panic. Start a fresh egg yolk in a clean bowl and slowly whisk the broken mixture into it. This nearly always rescues the sauce.
- Adjust garlic to taste. Rub a clove on the bowl or mince it finely for a gentle garlic depth. If you want a milder, sweeter garlic note, roast the garlic first and fold it in.
- If you want a warm pairing or a simple meal, try aioli with a bowl of soup. It adds richness to each bite and feels like a small chef’s trick. If you want an idea, pair it with something cozy like homemade chicken and gnocchi soup to create a comforting dinner.
These tips come from trying and refining the method in a busy kitchen. They are small changes that make a big difference.
Simple Variations to Try
Aioli is a great blank canvas. Once you know the basic method, you can make many versions.
- Lemon-Herb Aioli: Add extra lemon zest and 1 tablespoon finely chopped parsley or tarragon for freshness. Great with fish.
- Roasted Garlic Aioli: Roast a head of garlic until soft, squeeze out cloves, mash and mix into the aioli for a sweeter, milder garlic flavor. Try 1 to 2 roasted cloves to start.
- Smoked Paprika Aioli: Stir in 1 teaspoon smoked paprika and a pinch of cayenne for a smoky, slightly spicy kick. Excellent with roasted potatoes.
- Mustard and Honey Aioli: Add 1 teaspoon Dijon and 1/2 teaspoon honey for a tangy, slightly sweet spread. This is delicious on sandwiches.
- Chili-Lime Aioli: Mix in 1 teaspoon lime zest and 1/2 teaspoon chili powder or a splash of hot sauce for a bright, spicy edge that pairs well with grilled shrimp.
Try one variation at a time so you can sense how each change modifies the sauce. Small additions go a long way.
Homemade Aioli
Ingredients
Method
- In a bowl, whisk together the egg yolks and lemon juice until well combined.
- While whisking continuously, slowly drizzle in the olive oil until the mixture starts to thicken.
- Add the minced garlic and salt, and continue whisking until fully incorporated and creamy.
- Taste and adjust seasoning if necessary.
- Serve immediately or refrigerate for later use.
Nutrition
Notes
Tried this recipe?
Let us know how it was!FAQs About Homemade Aioli
Can I make this ahead of time?
Yes. Make the aioli up to 3 days ahead and keep it chilled in an airtight container. Let it sit at room temperature for a few minutes before serving. If it firms up, whisk in a teaspoon of warm water to loosen.
Is it safe to use raw egg yolks?
Using raw yolks is common in traditional aioli. If you are serving people who are pregnant, elderly, or immunocompromised, use pasteurized egg yolks or a pasteurized mayonnaise base to reduce risk. Always keep aioli refrigerated.
What if my aioli splits?
Don’t worry. Start with a fresh yolk in a clean bowl and very slowly whisk the broken aioli into it. This usually brings the mixture back together. If you’re using a blender, try blending a fresh yolk with a little lemon juice and then adding the broken aioli slowly.
Can I make aioli without garlic?
Yes. The base technique works for any flavored mayo. Try making a plain lemon aioli, or add herbs, mustard, or spices instead of garlic for different profiles.
How long will aioli keep in the fridge?
Because it contains raw yolks, keep aioli no longer than 3 days in the fridge. Always use clean utensils when serving to avoid contamination.
Final Encouragement or Closing Note
I hope this Homemade Aioli helps you discover how simple and rewarding homemade cooking can be. You’ve got this. Making aioli is a small skill that pays daily dividends in flavor and satisfaction.
Conclusion
If you enjoyed this guide and want another simple aioli-based idea, take a look at this practical Garlic Aioli Recipe (4 Ingredients) | The Kitchn for a quick variation that uses just a few staples. For a different perspective on technique and flavor, see this helpful How to Make Homemade Aioli Recipe – House of Nash Eats which offers another clear approach to the same delicious result.
You’ve learned the method, the small troubleshooting steps, and ways to adapt aioli to your taste. Keep a jar in the fridge for the week and use it to brighten meals and inspire small, flavorful moments. Enjoy the process and the delicious results.