
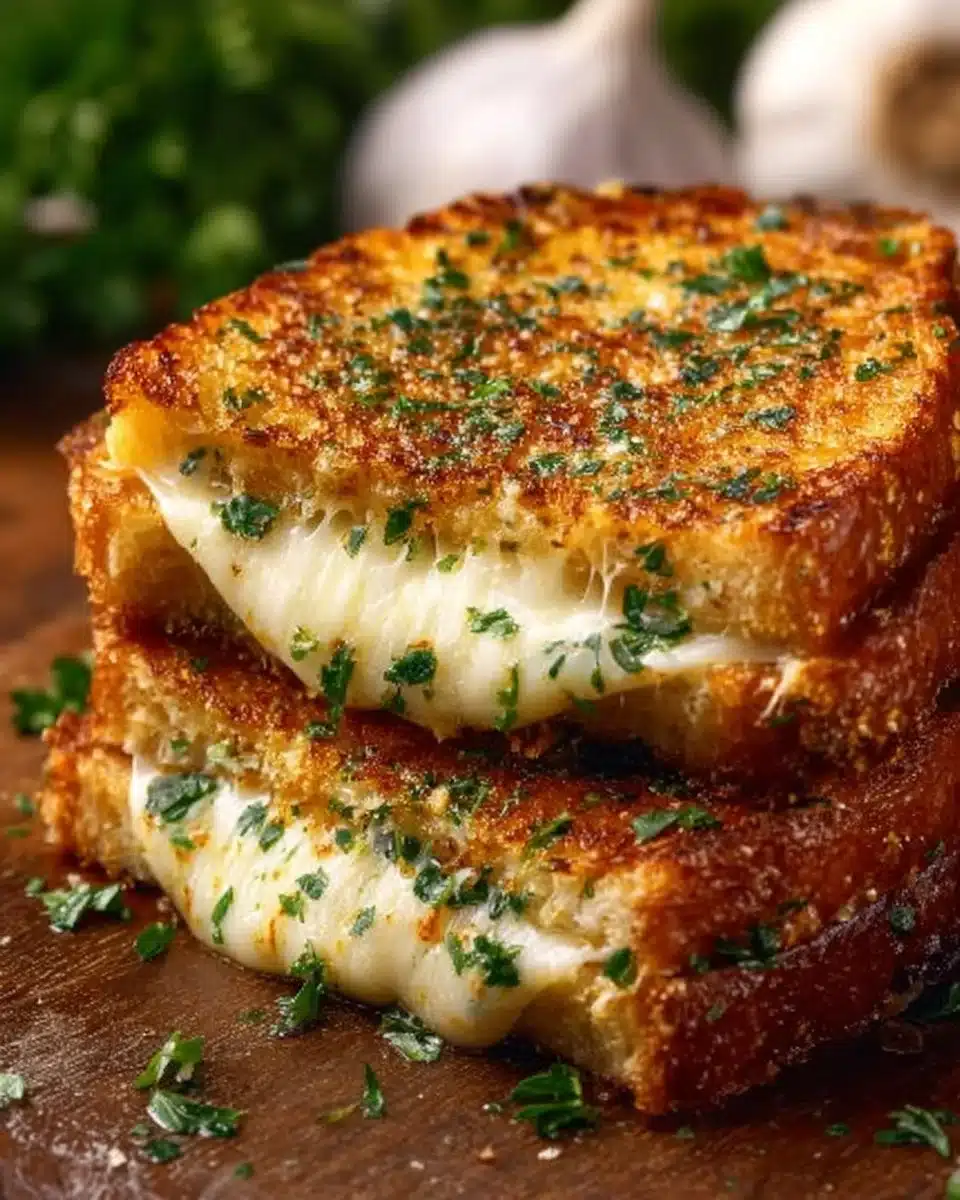
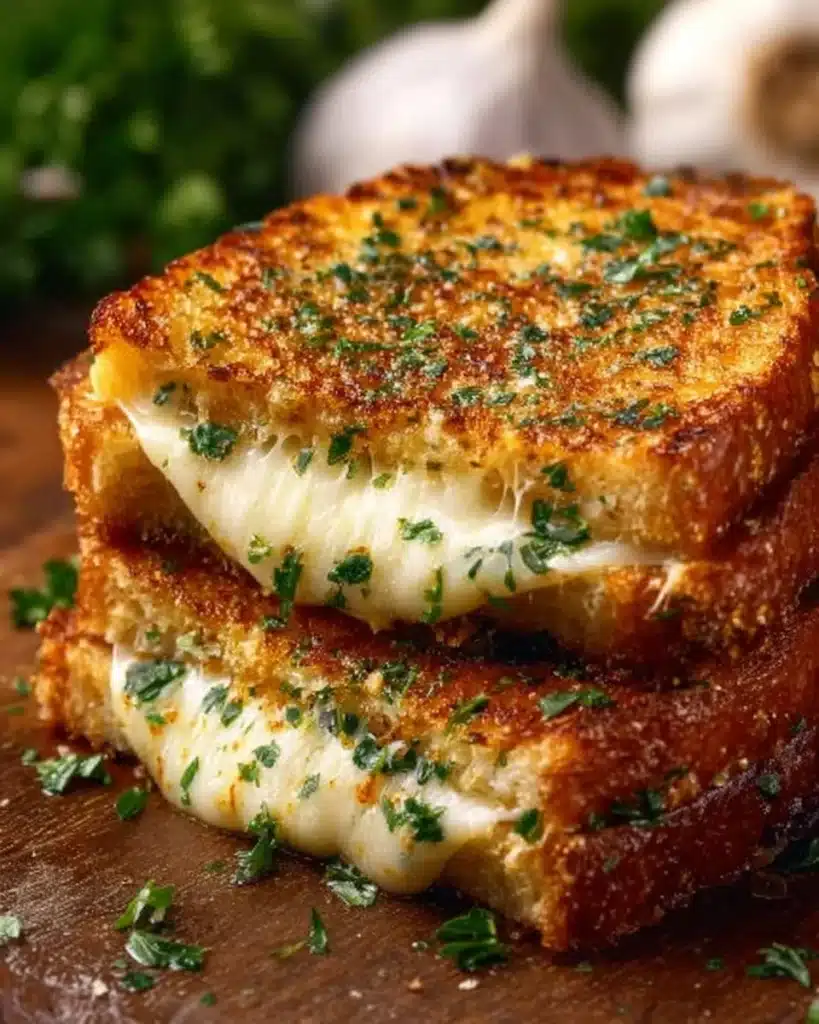
There’s something special about Garlic Bread Grilled Cheese the way its aroma fills the kitchen and makes everyone wander in for a taste. The first time I made this sandwich for my family, the sizzle of butter in the pan and the slow melt of cheese felt like a small celebration. If you love warm, comforting sandwiches and simple food that tastes like a hug, you are in the right place.
If you enjoy buttery, garlicky bread as much as I do, you might also like my take on buttery cheese garlic rolls, which use many of the same flavors and techniques.
Why You’ll Love Making This Garlic Bread Grilled Cheese
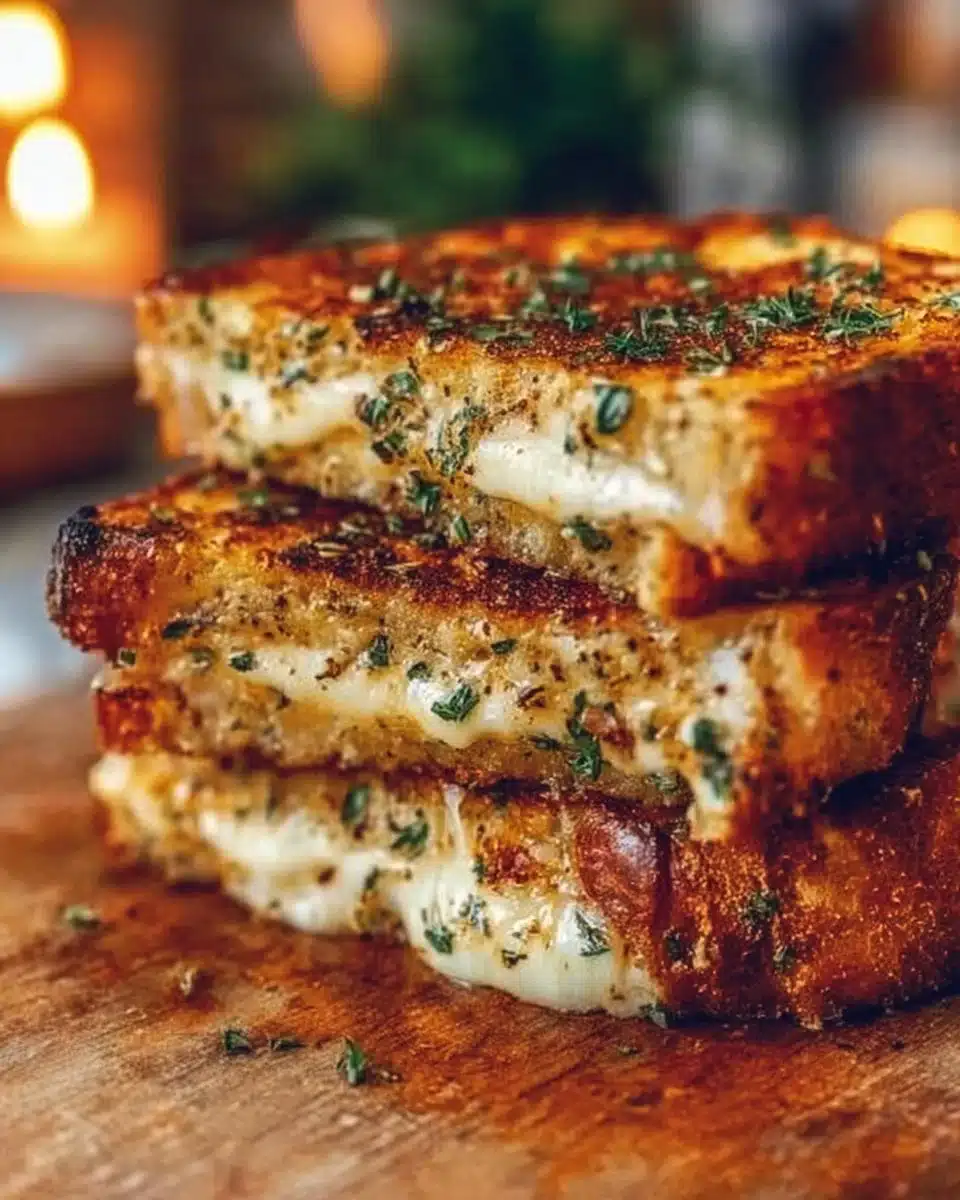
This sandwich is both familiar and a little fun. It takes the comfort of grilled cheese and borrows the bold garlic and herb notes of garlic bread. The result is crunchy, buttery bread wrapped around gooey, stretchy cheese with a hint of savory garlic in every bite.
It is easy for beginners, quick on weeknights, and useful for entertaining when you need something that pleases many tastes. You can make it with pantry staples, and the recipe scales up well if you are cooking for a group.
Step-by-Step: How to Make Garlic Bread Grilled Cheese
“Cooking isn’t about perfection. It’s about enjoying every delicious step.”
This section gives a short overview. We are making a simple garlic butter, spreading it on bread, and using low heat so the bread becomes golden while the cheese melts through. Keep your pan at a comfortable low-to-medium-low heat and watch for the smell and color of the bread as your cues.
Now let’s move into the details and the exact steps so you can feel calm and confident.
Ingredients You’ll Need for Garlic Bread Grilled Cheese
2 tablespoons butter, softened use real butter for rich flavor and easy spreading.
1/2 tablespoon garlic powder provides even garlic flavor without chopping fresh cloves.
1/2 teaspoon dried parsley adds color and a mild herb note; fresh parsley also works.
4 slices of bread choose a sturdy sandwich bread, sourdough, or Italian loaf slices.
1 cup shredded mozzarella and cheddar cheese blend a mix gives stretch and sharpness; grate fresh for best melt.
Pinch of salt to bring out flavors if your butter is unsalted.
Optional: 1 teaspoon olive oil a little oil in the pan gives extra crunch if you like a crisper crust.
Optional: Thinly sliced tomato or cooked bacon see variations below for ideas.
Notes on ingredients:
- Use softened butter so you can mix the garlic butter smoothly. If the butter is cold, it will clump and be hard to spread.
- The mozzarella-cheddar blend is forgiving. You can do all mozzarella for a stretchy sandwich or all cheddar for a sharper bite.
- Bread choice matters. Thicker slices hold more cheese but may take a little longer to heat through. A thin, firm slice crisps faster.
Directions: Cooking with Confidence
- In a small bowl, mix softened butter, garlic powder, and dried parsley until well combined.
- Spread the garlic butter mixture on one side of each slice of bread, covering all the way to the edges.
- Place two slices butter-side down and add half the cheese on each. Top with the other bread slices, butter-side up.
- Heat a skillet over low heat. Cook sandwiches for 4–5 minutes per side until golden brown and cheese is melted.
- Remove from pan, slice, and serve immediately.
Detailed guidance for each step with sensory cues:
- Mix the garlic butter
- Scoop the softened butter into a small bowl. Add the garlic powder and dried parsley.
- Stir until the mixture is smooth and uniformly speckled with green and pale garlic bits.
- Taste a tiny bit with your finger to check seasoning. If the garlic feels too faint, add a pinch more garlic powder. Remember the cheese will add salt too, so taste lightly.
- Spread the garlic butter evenly
- Use a butter knife or small offset spatula to spread the garlicky butter on one side of each bread slice.
- Cover the surface right to the edges so every bite has garlic flavor.
- If your bread is thick, consider spreading on both sides for extra richness. If bread is delicate, keep it to one side to avoid sogginess.
- Assemble the sandwiches
- Place two slices on a cutting board, butter-side down. This buttered side will touch the pan and crisp up.
- Pile half the shredded cheese on each bread slice in an even layer. Press gently so the layers are compact.
- If you are adding extras like tomato or bacon, add them now but keep them thin so the cheese melts around them.
- Top with the remaining bread, butter-side up. Press down gently but not so hard you squeeze out the filling.
- Cook low and slow for perfect melt
- Heat a heavy skillet or nonstick pan over low heat. If you choose to use olive oil, add a teaspoon and swirl it around.
- Add the sandwiches, butter-side down. You should hear a faint sizzle. If it crackles loudly, your pan is too hot.
- Cook for about 4 to 5 minutes on the first side. Watch the edges; when they turn golden brown and smell buttery, it is time to flip.
- Flip carefully using a spatula. If the sandwich resists, the cheese needs a little more time to melt.
- Cook the second side for another 4 to 5 minutes until that side is golden and the cheese is melty.
- Rest and slice
- Remove the sandwich to a cutting board and let it rest for one minute. This small pause helps the cheese set a little so it does not run out when you slice.
- Use a sharp knife and slice diagonally for a classic look. The cross-section should show a ribbon of molten cheese and a crisp crust.
Tips while cooking
- If your cheese is not melting through in the time given, lower the heat and cover the pan with a lid for 30 to 60 seconds to trap heat.
- If the bread browns too quickly before the cheese melts, the pan is too hot. Take it off the heat for a moment to cool and lower the burner.
How to Serve Garlic Bread Grilled Cheese and Make It Shine
Serve this sandwich hot and right away so the cheese is gooey and the outside is crisp. Pair it with a light bowl of tomato soup or a simple green salad to balance the richness.
Presentation ideas:
- Cut the sandwich on the diagonal and stack the two halves, leaning them on each other so the melted cheese is visible.
- Sprinkle a pinch of extra dried parsley or a few flakes of sea salt on the top right after cooking for a finished look.
- Serve on a warm plate to keep the sandwich warmer longer.
Pairing suggestions:
- Tomato soup is the classic combo. The acidity of the tomato cuts through the butter and cheese. A simple canned tomato soup dressed up with a splash of cream and a pinch of basil will be lovely.
- For a brighter side, try a quick arugula salad with lemon and olive oil. The peppery greens contrast the sandwich nicely.
- If you want to add a small treat, consider something sweet and spiced. For a cozy finish, try gingerbread cheesecake cookies for dessert. They are a friendly contrast to the savory sandwich.

How to Store Garlic Bread Grilled Cheese for Later
Leftovers can be saved, though this sandwich is best eaten fresh. If you need to store it, follow these steps for the best results.
Cool, then wrap
- Let the sandwich cool to room temperature but do not leave it out longer than two hours.
- Wrap each sandwich tightly in plastic wrap or store in an airtight container. This prevents the bread from drying out.
Refrigeration
- Store in the refrigerator for up to 2 days. The texture will change, as the bread softens and the butter hardens.
Reheating for the best texture
- Reheat in a skillet: This method brings back the crispy exterior. Place the sandwich in a pan over low heat, cover briefly to encourage the cheese to warm through, then remove the lid for a minute to crisp the bread.
- Reheat in the oven: Place the sandwich on a baking sheet at 350 F for 8 to 10 minutes until heated through. Flip halfway for even crisping.
- Avoid the microwave if you care about the crust. The microwave will melt the cheese but make the bread soggy.
Freezing
- Freeze only if you wrap tightly in foil and store in a freezer bag. Freeze up to one month.
- Reheat from frozen by placing the foil-wrapped sandwich in a 350 F oven for 20 to 25 minutes, unwrapping for the last few minutes to crisp.
Clara’s Tips for Success
- Use real, softened butter
- Real butter browns and crisps better than margarine. Bring it to room temperature so it spreads smoothly.
- Keep the heat low
- Low heat allows the cheese to melt fully without burning the bread. Patience gives a perfect sandwich.
- Grate your cheese
- Pre-shredded cheese often contains anti-caking agents that can slightly inhibit melting. Freshly grated cheese melts more smoothly.
- Taste and adjust seasoning
- If your butter is unsalted, add a pinch of salt to the garlic butter. Taste the mixture before spreading.
- Use a heavy pan
- A heavy skillet distributes heat evenly. Cast iron or a good nonstick pan makes flipping and browning easier.
Simple Variations to Try
- Tomato and basil
- Add a few paper-thin slices of tomato and a couple of basil leaves inside before grilling. This gives a Caprese-like twist.
- Bacon and pepper jack
- Add crisp cooked bacon and swap some cheddar for pepper jack for a smoky, spicy version.
- Mushroom and Swiss
- Sauté sliced mushrooms first, then add them with Swiss cheese for an earthy sandwich.
- Italian style
- Use sliced prosciutto, provolone, and a sprinkle of oregano. Brush with a touch of olive oil for Italian flavor.
- Vegan option
- Use plant-based butter, vegan cheese that melts well, and a sturdy bread. Cook the same way, watching melting times closely.
- Add herbs
- Fresh minced garlic and chopped parsley instead of garlic powder and dried parsley gives bright, fresh flavor. Use modest amounts so the garlic does not overpower.
Garlic Bread Grilled Cheese
Ingredients
Method
- In a small bowl, mix softened butter, garlic powder, and dried parsley until well combined.
- Spread the garlic butter mixture on one side of each slice of bread, covering all the way to the edges.
- Place two slices butter-side down and add half the cheese on each. Top with the other bread slices, butter-side up.
- Heat a skillet over low heat. Cook sandwiches for 4–5 minutes per side until golden brown and cheese is melted.
- Remove from pan, slice, and serve immediately.
Nutrition
Notes
Tried this recipe?
Let us know how it was!FAQs About Garlic Bread Grilled Cheese
Can I make this ahead of time?
Yes. Assemble the sandwiches and keep them in the fridge for a few hours until you are ready to cook. If you plan to store longer, wrap tightly and refrigerate for up to 2 days. For best results, cook just before serving.
Can I use fresh garlic instead of garlic powder?
Absolutely. Mince one small garlic clove and mix it into the softened butter. Fresh garlic is bolder; use less if you want a milder flavor. Keep in mind fresh garlic browns faster in the pan.
What bread works best for this sandwich?
Sturdy sandwich bread, sourdough, or Italian loaf slices are excellent. Thin delicate bread can become soggy, while very thick slices may need more time for the cheese to melt.
How do I get the cheese to melt without burning the bread?
Lower the heat and be patient. If needed, cover the pan for a short time to trap heat so the cheese melts while the bread browns slowly.
Is there a way to make it extra crispy?
Use a touch of olive oil in the pan or press the sandwich gently with a spatula while it cooks. Finish in a hot pan for 30 seconds if you want a crisper crust just before serving.
My cheese oozes out when I flip. How do I keep it inside?
Avoid overstuffing the sandwich and press the edges gently when assembling. Use a spatula to support the sandwich as you flip so the cheese does not spill out.
Final Encouragement or Closing Note
I hope this Garlic Bread Grilled Cheese helps you discover how simple and rewarding homemade cooking can be. Trust your senses: the golden color, the buttery aroma, and the pull of melted cheese are your cues that you are doing it right. Little adjustments are part of learning, and every sandwich you make will teach you something new.
Conclusion
If you want more inspiration for similar comfort-food ideas and variations on garlicky, cheesy treats, you might enjoy the version at Simply Delicious Garlic Bread Grilled Cheese which offers another friendly take on this pairing. For an alternative technique and professional tips, check out the recipe at Bon Appétit Garlic Bread Grilled Cheese Recipe to compare methods and find the one that fits your kitchen style.
You’ve got this. Take your time, enjoy the sizzle, and share the results.