

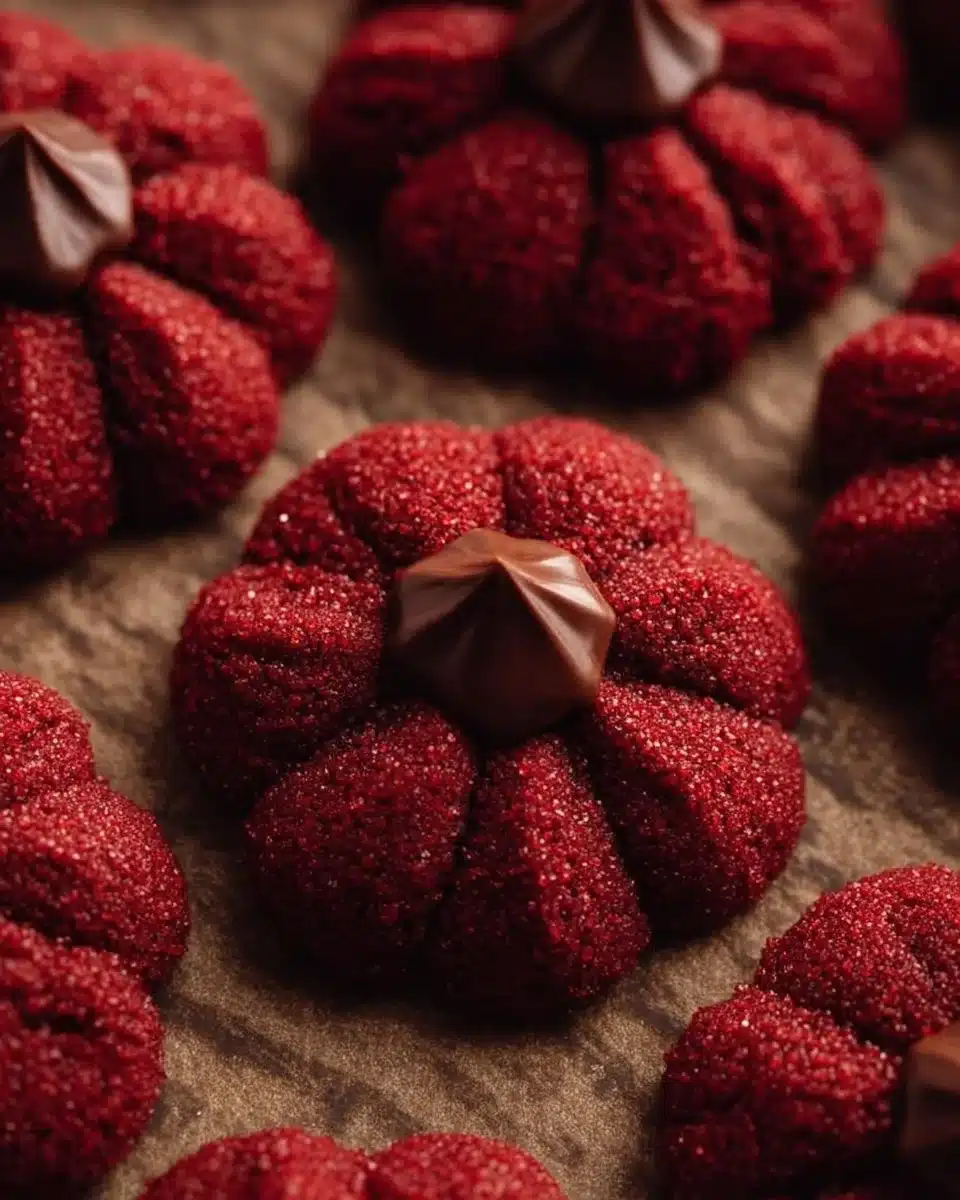
There’s something special about Hershey’s Red Velvet Blossoms the way their warm, cocoa-scented dough and glossy chocolate centers bring people together around the kitchen counter. Clara loves how these cookies feel both festive and familiar, an easy treat that looks fancy but forgives small mistakes. You’ll smell the butter and cocoa as they bake, and you’ll know you did something worth sharing.
If you enjoy playful red velvet desserts, you might also like this twist on classic holiday treats found at Grinch Oreo Balls with Red Velvet Oreos, which brings the same bright spirit to a different kind of cookie.
Why You’ll Love Making This Hershey’s Red Velvet Blossoms
These cookies are one of those recipes that feel like a celebration without requiring a day of baking. The dough is soft and quick to mix, the red sanding sugar gives a sparkling finish, and the Hershey chocolate kisses create a warm, melty center that makes every bite feel special.
I first made them in a small kitchen with a too-small mixing bowl and a loud oven that took forever to heat. Even then they turned out tender and cheery. They are forgiving because the dough is straightforward, and the chocolate kiss step is done right after baking so each cookie keeps a creamy pocket of chocolate melting into the soft cookie.
Step-by-Step: How to Make Hershey’s Red Velvet Blossoms
“Cooking isn’t about perfection. It’s about enjoying every delicious step.”
Overview: This recipe moves quickly. You will cream butter and sugars, add the egg yolk and flavorings, fold in dry ingredients, scoop and roll the dough in sanding sugar, then bake briefly and top with a chocolate kiss. Read the ingredients list once, gather everything, and line your baking sheet before starting. That small prep step keeps the flow calm and steady.
Prep and mindset
Start by putting out your ingredients so they are easy to reach. Softened butter is easier to cream, and measuring flour correctly keeps the cookies tender. Preheat the oven only when you are ready to bake so you can get the cookies into the heat immediately.
Equipment note
You don’t need fancy tools. A stand mixer or hand mixer speeds things along, but you can cream by hand with a sturdy spoon. A tablespoon or a small cookie scoop helps portion the dough evenly so the cookies bake the same way.
Ingredients You’ll Need for Hershey’s Red Velvet Blossoms
7 tbsp butter (salted or unsalted, softened) (use real butter for rich flavor)
1/2 cup brown sugar (packed)
2 tbsp granulated sugar
1 tsp vanilla extract
1 large egg yolk
1/4 tsp red food coloring gel (use gel for brighter color with less liquid)
1 cup all-purpose flour (spoon and level for accuracy)
1 tbsp cocoa powder (unsweetened)
1/2 tsp baking powder
1/4 tsp salt
1/4 cup red sanding sugar (for sparkle)
18 Hershey chocolate kisses (one per cookie)
Each ingredient is simple and easy to find. Fresh butter and real vanilla make a noticeable difference. If you want a subtler red tone, use less food coloring, but a small amount of gel goes a long way.
Directions: Cooking with Confidence
- Preheat the oven to 350F then line a large baking sheet with parchment paper then set aside.
- Make sure the rack is in the center of the oven so heat circulates evenly. Lining the sheet prevents sticking and helps the bottoms brown evenly.
- While the oven heats, pull the butter from the fridge if it is still cool so it stays soft and mixes smoothly.
- In a stand mixer, cream the butter, brown sugar, and granulated sugar together until smooth.
- Start on low to combine, then raise to medium speed and cream for about 2 to 3 minutes until the mixture is fluffy and no butter lumps remain.
- Scrape the bowl once so the mixture blends evenly. You should see a glossy, smooth texture.
- Add in the egg yolk, the vanilla, and the red food coloring and mix until combined.
- Add the egg yolk, then the vanilla, and then the gel food coloring in small droplets. Mix until the color looks even throughout.
- Taste a tiny bit of the dough if you want to check sweetness, then press your fingertip to see the texture. It should feel soft and slightly tacky.
- Add in the flour cocoa powder, baking powder, and salt, and mix just until the flour mixture disappears.
- Sift the cocoa and flour together if you want a lighter, lump-free dough. Then add the baking powder and salt.
- Mix on low speed and stop as soon as you see no dry streaks. Overmixing will tighten the dough and make the cookies dense.
- Using a tablespoon, scoop out 18 equally sized cookie dough balls, roll them in between the palm of your hands, then roll them in the red sanding sugar.
- Roll each scoop into a smooth ball with your fingertips. Then roll each ball gently in the red sanding sugar to coat.
- Placing uniform balls helps them bake at the same rate and look tidy on the baking sheet.
- Place the cookie balls on the prepared baking sheet, and bake for 10 minutes.
- Leave a couple of inches between cookies so they can spread slightly.
- The edges should be set but still soft in the center after 10 minutes. They continue to set as they cool, so avoid overbaking.
- Place a chocolate kiss in the center of each cookie as soon as you pull them out of the oven, press down gently.
- The heat from the cookie will gently soften the chocolate and allow it to nestle into a small well.
- Press just enough so the kiss sits snugly; do not press hard or the cookie will flatten too much.
- Let the cookies cool down on the baking sheet for 10 minutes before transferring to a cooling rack.
- Letting them rest helps the centers set and avoids breaking while moving them.
- After 10 minutes, transfer to a cooling rack so air can circulate and the bottoms stay crisp where you like them.
Each step is doable. If you need more time between steps, let the dough chill briefly in the fridge for 10 to 15 minutes. That extra chill makes rolling easier and slows spreading if your kitchen is warm.
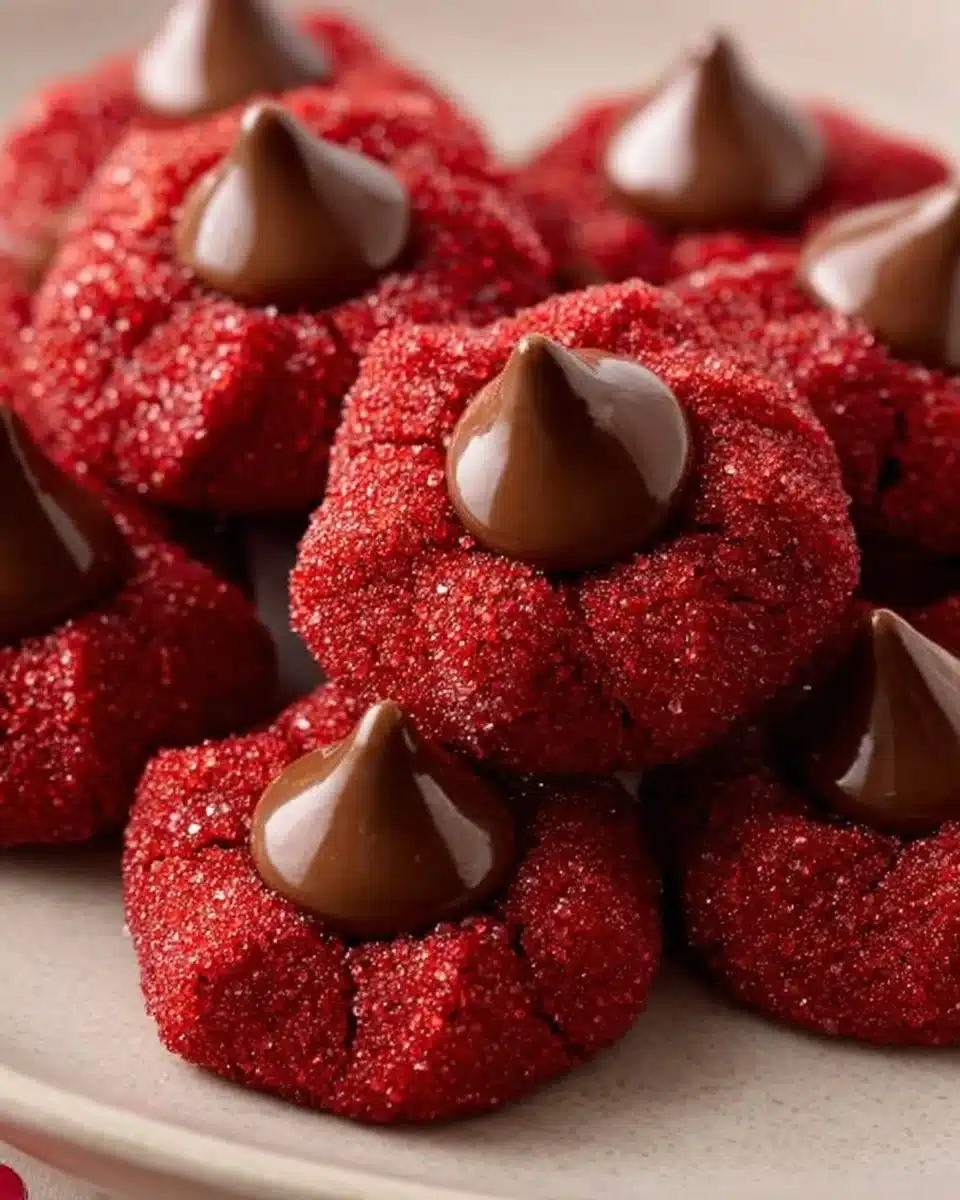
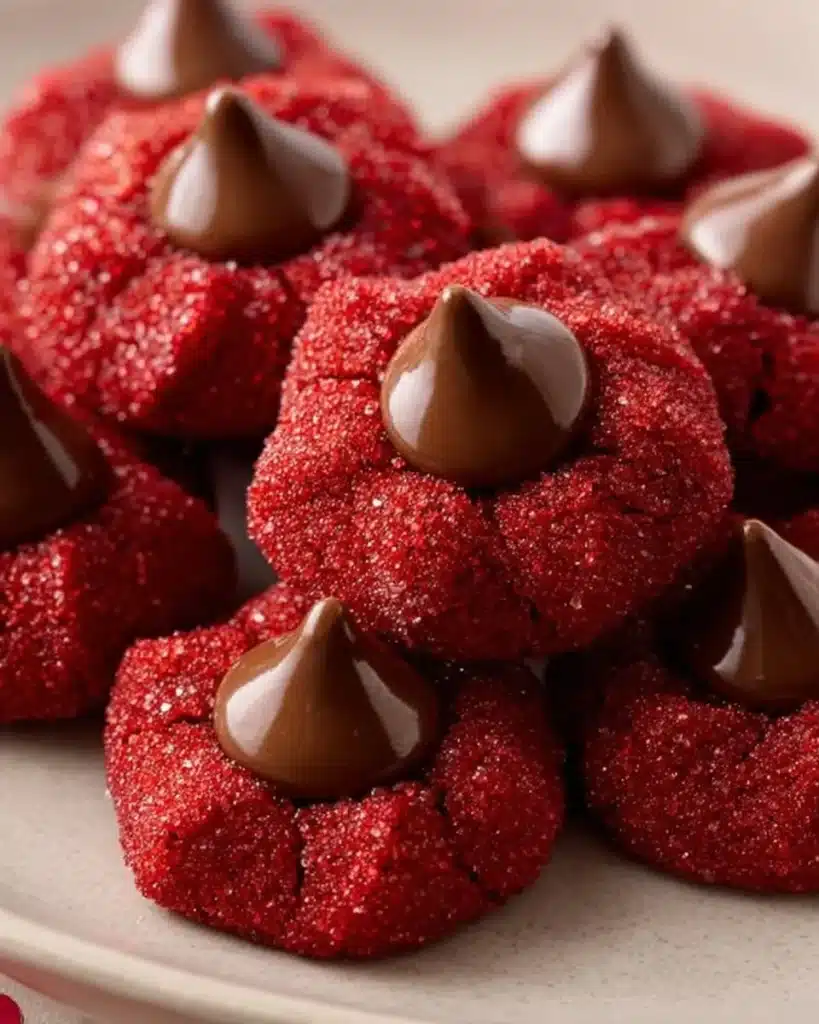
How to Serve Hershey’s Red Velvet Blossoms and Make It Shine
Presentation is simple but thoughtful. Arrange the cookies on a shallow platter in a single layer so the chocolate centers are visible. Add a few paper doilies or a scattering of extra red sanding sugar for sparkle.
Pair these cookies with hot coffee, a creamy milk, or warm tea. For a party, serve them on a tiered tray with small notes describing the cookie. If you serve them warm, they feel indulgent and cozy; if you serve them at room temperature, they hold their shape and are easier to pack.
For a homemade gift, stack three or four in a box lined with parchment and add a ribbon. The cookies travel well when fully cool and slightly firm.
How to Store Hershey’s Red Velvet Blossoms for Later
Store fully cooled cookies in an airtight container at room temperature for up to 4 days.
- Place a sheet of parchment between layers to prevent sticking and keep the chocolate center intact.
- If you want to keep them longer, freeze the cooled cookies in a single layer on a baking sheet until solid, then transfer to a freezer-safe container for up to 3 months.
- To thaw, place cookies on the counter for an hour or two. For a warm, fresh-baked feel, heat the cookie gently in a 300F oven for 4 to 6 minutes, or microwave a single cookie for 6 to 8 seconds. Be careful not to overheat the chocolate.
If the cookies soften after refrigeration, set them at room temperature for 20 minutes before serving. That brings back a pleasant texture without making them soggy.
Clara’s Tips for Success
- Use room-temperature butter. It creams easily and traps air with the sugar, giving the cookies a tender lift.
- Measure flour by spooning it into the cup and leveling off. Too much flour makes cookies dry and dense.
- Work quickly with the chocolate kisses. Press them in right out of the oven so they melt slightly and hold their glossy shape.
- If your kitchen is warm, chill the dough for 10 to 20 minutes before rolling so cookies do not spread too thin.
- Rotate the baking sheet halfway through baking if your oven has hot spots. This helps even browning.
These small habits make cookies more reliable and keep baking pleasant rather than stressful.
Simple Variations to Try
- Double Chocolate: Swap the 1 tablespoon of cocoa for 2 tablespoons and add 1/4 cup mini chocolate chips for an extra chocolate punch.
- Cream Cheese Filling: Press a small dot of cream cheese frosting into the well before adding the chocolate kiss for a soft tangy center.
- Peppermint Twist: During the holidays, press a peppermint kiss or sprinkle crushed candy cane over the top immediately after pressing in the kiss for a minty crunch.
- Nutty Crunch: Roll the dough balls lightly in finely chopped toasted pecans instead of sanding sugar for a toasty finish.
- Smaller Bites: Make mini blossoms by dropping teaspoon-sized dough portions and using Hershey’s mini kisses. Bake for 7 to 8 minutes.
If you love dramatic desserts, try combining flavors like blackberry or dark cherry in the accompaniment. For inspiration on dramatic cake textures and deep red velvet themes, see a creative take at Blackberry Velvet Gothic Cake.
Troubleshooting: Common Questions During Baking
- My cookies spread too much. Chill the dough for 10 to 20 minutes and reduce baking time by a minute next batch.
- The centers sank after adding the kiss. Press just enough so the kiss sits in the dough and allow the cookie to cool on the sheet for the recommended time.
- The color faded. Gel food coloring gives the brightest tone. Add tiny amounts gradually until you see the shade you like.
- The bottoms are too brown. Check oven temperature with a simple oven thermometer; some ovens run hot. Move rack higher if needed.
Small adjustments like chilling dough or checking oven temperature take away a lot of the guesswork and build your confidence.
Hershey’s Red Velvet Blossoms
Ingredients
Method
- Preheat the oven to 350°F and line a large baking sheet with parchment paper.
- In a stand mixer, cream the butter, brown sugar, and granulated sugar until smooth.
- Add the egg yolk, vanilla, and red food coloring, mixing until combined.
- Add the flour, cocoa powder, baking powder, and salt, mixing just until combined.
- Scoop out 18 equal portions of cookie dough, roll into balls, and coat in red sanding sugar.
- Place the cookie balls on the prepared baking sheet, leaving space for spreading.
- Bake for 10 minutes.
- Immediately press a chocolate kiss into the center of each cookie after removing from the oven.
- Let the cookies cool on the baking sheet for 10 minutes before transferring to a cooling rack.
Nutrition
Notes
Tried this recipe?
Let us know how it was!FAQs About Hershey’s Red Velvet Blossoms
Can I make this ahead of time?
Yes. You can shape the dough into coated balls and freeze them on a baking sheet until firm, then transfer to a freezer-safe bag. Bake from frozen, adding a minute or two to the baking time, then add the kiss right out of the oven.
Can I use unsweetened cocoa or Dutch-processed cocoa?
Unsweetened cocoa is fine. If using Dutch-processed cocoa, expect a slightly darker flavor. The recipe uses a small amount of cocoa, so the texture remains soft either way.
Can I replace the Hershey’s Kisses with another chocolate?
Yes. Use your favorite chocolates, but choose ones with a firm center that softens slightly when warmed. Chocolate discs or wrapped candies work too; unwrapped chocolates are easiest.
Do I need to use red sanding sugar?
The sanding sugar adds sparkle and a faint crunch, but you can use colored granulated sugar, regular granulated sugar, or roll the dough in powdered sugar for a different look.
How do I keep the cookies from sticking to the baking sheet?
Use parchment paper or a silicone baking mat. Both provide a non-stick surface and are easy to clean.
Final Encouragement or Closing Note
Baking Hershey’s Red Velvet Blossoms is about simple pleasures the warm scent as the oven door opens, the glossy kiss at the center, and the way a small batch can brighten a day. You do not need a lot of equipment or perfect timing. Follow the steps, trust your senses, and enjoy the process.
Conclusion
I hope this Hershey’s Red Velvet Blossoms recipe helps you discover how simple and rewarding homemade baking can be. You’ve got this.
For a similar homemade take with helpful photos, check out Easy Hershey’s Red Velvet Blossoms Cookies – Lifestyle of a Foodie, and for the classic inspiration straight from the brand, see the HERSHEY’S KISSES Red Velvet Chocolate Blossoms Recipe.