There’s something special about Garlic Aioli the way its aroma fills the kitchen and makes everyone wander in for a taste. It’s simple, bold, and comforting all at once. Clara often reaches for a jar when guests arrive and watches people’s faces light up at that first creamy, garlicky bite. If you’ve ever thought making your own aioli feels intimidating, this is your friendly nudge: you can do this, and it will taste far better than anything store-bought. Pair a dollop with warm rolls, or spread it on a sandwich and notice how it makes ordinary food feel like a small celebration. If you love buttery bread with garlic too, try pairing the aioli with these comforting rolls for a perfect snack: buttery cheese garlic rolls.
Why You’ll Love Making This Garlic Aioli
Homemade Garlic Aioli is one of those small kitchen wins that keeps showing up at the table. It’s fast to make, uses just a handful of ingredients, and can turn simple snacks into something special. I keep a jar in the fridge because it’s such a versatile companion: it brightens roasted vegetables, comforts fries, and gives sandwiches a gentle garlic embrace.
This recipe respects the garlic’s honest, pungent nature while smoothing it out with mayonnaise and lemon. You will learn to balance bold flavors and control intensity, so the aioli becomes familiar and friendly rather than overpowering. The best part is how flexible it is. A small tweak here or a splash of an extra ingredient there can shift the aioli from casual to fancy without a lot of fuss.

Step-by-Step: How to Make Garlic Aioli
“Cooking isn’t about perfection. It’s about enjoying every delicious step.”
Before you start, gather your tools: a small bowl, a whisk or fork, a microplane or garlic press, a measuring spoon, and a jar with a lid for storing. Having everything at hand makes the process calm and tidy. If you want a heartier pairing, this aioli goes beautifully beside a creamy soup on chilly nights; try it with a potato and cheddar bowl to make a simple dinner feel like a treat: cheddar garlic herb potato soup.
Overview: This aioli is built on mayonnaise for creaminess, raw garlic for punch, and lemon for lift. Mustard helps the emulsion stay steady while the olive oil adds a silky finish. We’ll mix, taste, rest, and adjust. You will learn sensory cues to guide your seasoning so each batch suits your palate.
Ingredients You’ll Need for Garlic Aioli
- 1 cup mayonnaise
Note: Use a good-quality mayonnaise for a clean, creamy base. If you like a richer taste, choose one made with real egg yolks. - 2 to 3 cloves garlic, minced or pressed
Note: Fresh garlic gives the best flavor. If you want a milder garlicky note, use 1 clove and let it steep longer in the mayo. - 1 tablespoon fresh lemon juice
Note: Fresh lemon brightens the aioli. Bottled juice can be used in a pinch but fresh is more vibrant. - 1 teaspoon Dijon mustard
Note: Dijon adds a touch of tang and helps the sauce hold together. - 1/2 teaspoon sea salt, adjusted to taste
Note: Start with less and add more after you rest and taste. - 1/4 teaspoon freshly ground black pepper
Note: Freshly ground pepper has more personality than pre-ground. - 2 tablespoons extra-virgin olive oil
Note: Olive oil adds richness; use a mild-flavored one if you want the garlic to shine.
Each ingredient plays a role. The mayonnaise is your canvas, garlic is the voice, lemon is the brightness, mustard is the glue, salt and pepper are the final details, and olive oil is the silk. Keep the ingredients simple, and let them work together.
Directions: Cooking with Confidence
- In a small bowl, combine mayonnaise, minced garlic, lemon juice, and Dijon mustard.
This is your base. Use a whisk or a fork and ensure the garlic is finely minced or pressed so it blends smoothly into the mayo. - Whisk with a steady, even motion until the mixture looks smooth and homogenous.
You want a uniform texture so every spoonful tastes balanced. Whisking also helps the flavors begin to marry. - Let the garlic sit for a moment to soften its edge.
Giving the mixture 5 to 10 minutes lets the lemon and mayo mellow the raw garlic. This short rest tames the sharpness and deepens the flavor. - Whisk until smooth and the garlic is evenly distributed.
After the brief rest, whisk again to reblend the ingredients. If bits of garlic remain, mash them gently against the side of the bowl with the back of the spoon. - Slowly drizzle in olive oil while whisking to emulsify and add richness.
Adding oil slowly helps the sauce become silkier. If you prefer a thinner aioli, add the oil in a steady stream until you reach the consistency you like. - Season with salt and pepper, then taste and adjust seasoning if needed.
Taste after a minute. Salt rounds out flavors and helps tame garlic. If it tastes flat, a few more drops of lemon brighten it; if it’s too sharp, a little more mayo softens it. - Cover and refrigerate for at least 15 minutes to allow flavors to meld.
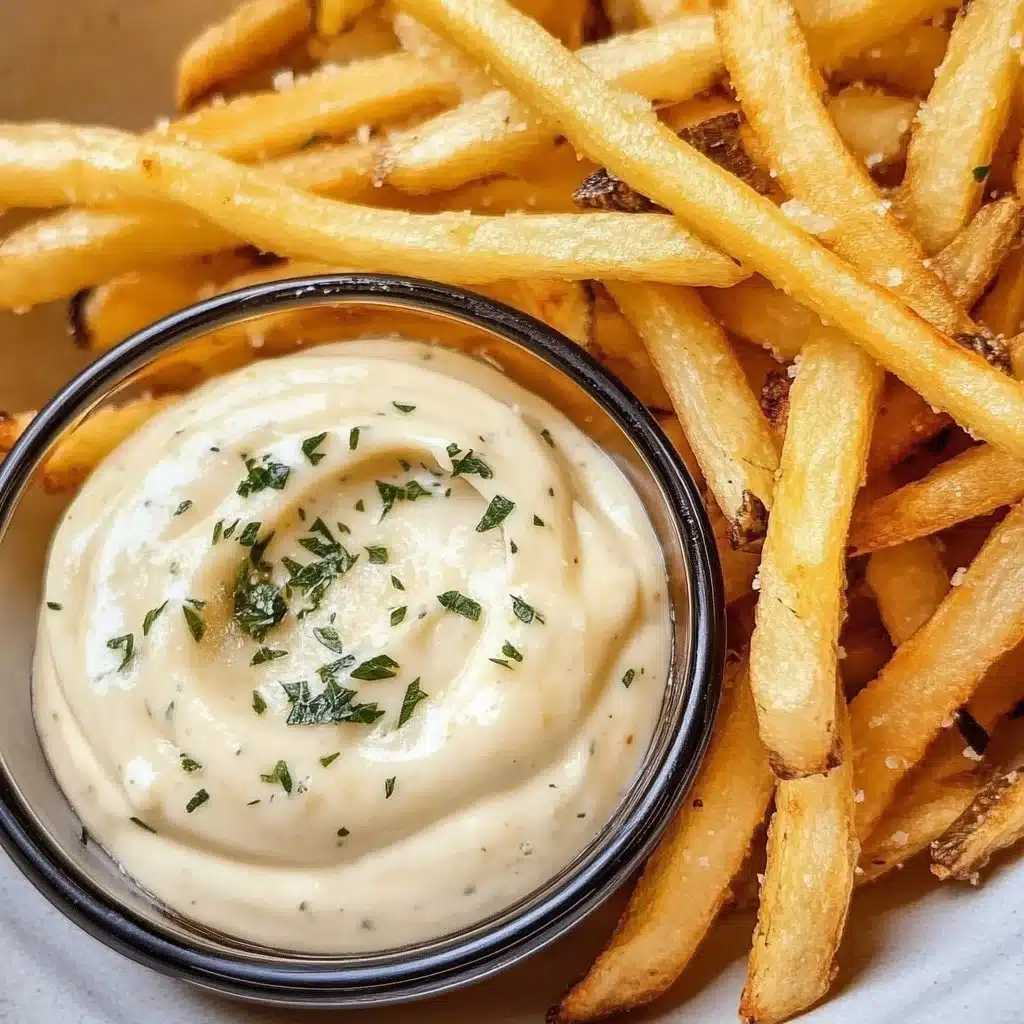
Chilling integrates the flavors and lets the garlic’s aroma settle. If you have the time, an hour is even better. The aioli tastes more rounded after resting. - Serve as a dip for fries, veggies, or as a spread for sandwiches.
Use a generous dollop where you want a garlic lift. Spread thinly on bread to avoid overwhelming other ingredients, or offer it on the side for dunking.
Small notes while you work: keep your garlic freshly minced and taste as you go. The goal is balance: not too sharp, not too flat. If the aioli looks thick, a teaspoon or two of water can loosen it without diluting flavor. If it becomes too watery, stir in a bit more mayo.
How to Serve Garlic Aioli and Make It Shine
Garlic Aioli is flexible and forgiving. Serve it alongside warm golden fries, spooned over roasted vegetables, or spread on a grilled chicken sandwich. For a casual snack, present the aioli in a small bowl with a drizzle of olive oil and a sprinkle of smoked paprika or chopped parsley. That visual touch makes it feel special without much effort.
Try these pairings: crisp potato wedges, steamed green beans, roasted Brussels sprouts, or a simple bowl of roasted mushrooms. Aioli also makes an excellent base for a composed plate with grilled fish and a squeeze of lemon. If you’re serving a spread, place the aioli near salty pickles or olives so guests can build flavors on their own.
For plating tips, keep portions small and focused. A ramekin with a smooth surface, a small spoon, and a few fresh herb sprigs make the aioli look intentional. When using as a sandwich spread, smear a thin layer on both slices of bread to keep things moist and balanced.
How to Store Garlic Aioli for Later
Store homemade Garlic Aioli in a clean, airtight jar or container. It will keep in the refrigerator for up to 5 days. Use a clean spoon each time you dip to avoid introducing bacteria. If you need to make it further in advance, remember that the garlic flavor will grow stronger over time, so you might prefer to add fresh garlic later if you plan to keep it more than two days.
If the aioli separates slightly, whisk it briskly or shake it in a jar to bring it back together. For safety, always keep it cold and do not leave it at room temperature for long periods. When reheating is necessary, avoid heating directly on the stove. Instead, let the aioli come to near room temperature and stir. If you want a warm garlic sauce, gently fold the aioli into hot melted butter for a warm drizzle over roasted vegetables or pasta; it pairs nicely with a creamy garlic butter pasta for a richer meal: creamy garlic butter pasta with ground beef.
Practical storage sizes: if you’re hosting, make a double batch and keep a small jar out for immediate use while refrigerating the rest. Label with the date so you know how fresh it is.
Clara’s Tips for Success
- Taste as you go. A little salt or lemon added at the end can make a big difference. Start small and build up.
- If raw garlic feels too strong, mince it finely and let it sit in the lemon juice for 5 minutes before mixing. This softens the bite.
- For a smoother texture, press the garlic into a paste with a pinch of salt on a cutting board before adding it to the mayo. The salt acts as an abrasive and helps release garlic oils.
- Use a mild olive oil if you want garlic to be the star. A very peppery oil can compete with the garlic’s voice.
- When making larger batches, always reserve some lemon juice and salt at the end for final adjustment. It’s easier to add than remove.
These are little shortcuts I use daily. They keep the work simple and the flavor balanced. Don’t be afraid to adjust to your taste.
Simple Variations to Try
- Herb Garlic Aioli: Stir in 1 tablespoon each of finely chopped parsley and chives for a fresh green note. Great with roasted potatoes.
- Spicy Garlic Aioli: Add 1/2 teaspoon smoked paprika and a pinch of cayenne or a teaspoon of sriracha for warmth. Perfect with burgers.
- Lemon-Thyme Aioli: Swap half the lemon juice for a teaspoon of finely chopped thyme. Use with grilled fish.
- Roasted Garlic Aioli: Roast one whole head of garlic, squeeze out the softened cloves, and mash into the mayo for a milder, caramelized garlic flavor. Use with roasted vegetables.
- Vegan Version: Replace mayonnaise with a full-fat vegan mayo and use olive oil as above. Check labels to match the flavor you prefer.
Variations are invitations to play. Start simple and keep notes so you can repeat the versions you love most.

Garlic Aioli
Ingredients
Method
- In a small bowl, combine mayonnaise, minced garlic, lemon juice, and Dijon mustard.
- Whisk until the mixture looks smooth and homogenous.
- Let the mixture sit for 5 to 10 minutes to mellow the garlic.
- Whisk again until smooth and garlic is evenly distributed.
- Slowly drizzle in olive oil while whisking to emulsify.
- Season with salt and pepper, taste, and adjust if needed.
- Cover and refrigerate for at least 15 minutes to allow flavors to meld.
- Serve as a dip for fries, veggies, or as a spread for sandwiches.
Nutrition
Notes
Tried this recipe?
Let us know how it was!FAQs About Garlic Aioli
Can I make this ahead of time?
Yes. Make it up to 3 to 5 days before you plan to serve it. The flavors will develop, and the garlic will mellow. Keep it refrigerated in a sealed container.
Is it safe to eat raw garlic in mayo?
Yes, when you use fresh, high-quality ingredients and refrigerate the aioli. Keep it chilled and use within 5 days. If you’re serving people with sensitive immune systems, check with them first.
My aioli tastes too strong. How do I fix it?
Try adding a little more mayo to soften the garlic, or a small squeeze of lemon to brighten and distract from the heat. Letting it rest in the fridge also calms strong garlic.
Can I use bottled garlic or garlic powder instead of fresh garlic?
Fresh garlic is best for complexity and texture. Bottled garlic or powder works in a pinch but the flavor will differ. If using garlic powder, start with 1/4 teaspoon and add more to taste.
How can I make this thicker or thinner?
To thicken, add a little more mayo. To thin, whisk in a teaspoon of warm water or lemon juice at a time until you reach the desired consistency.
Will this recipe work with homemade mayonnaise?
Absolutely. If you make homemade mayo, you’re already halfway there. Just mix in the garlic, lemon, mustard, and oil as directed and taste for seasoning.
Conclusion
I hope this Garlic Aioli helps you discover how simple and rewarding homemade cooking can be. You’ve got this, and a small jar of aioli will make weeknight meals feel cared for and special. For additional inspiration, you might enjoy this classic Garlic Aioli Recipe (Allrecipes) or a minimal four-ingredient take on the same idea with helpful tips in this Garlic Aioli Recipe (The Kitchn).