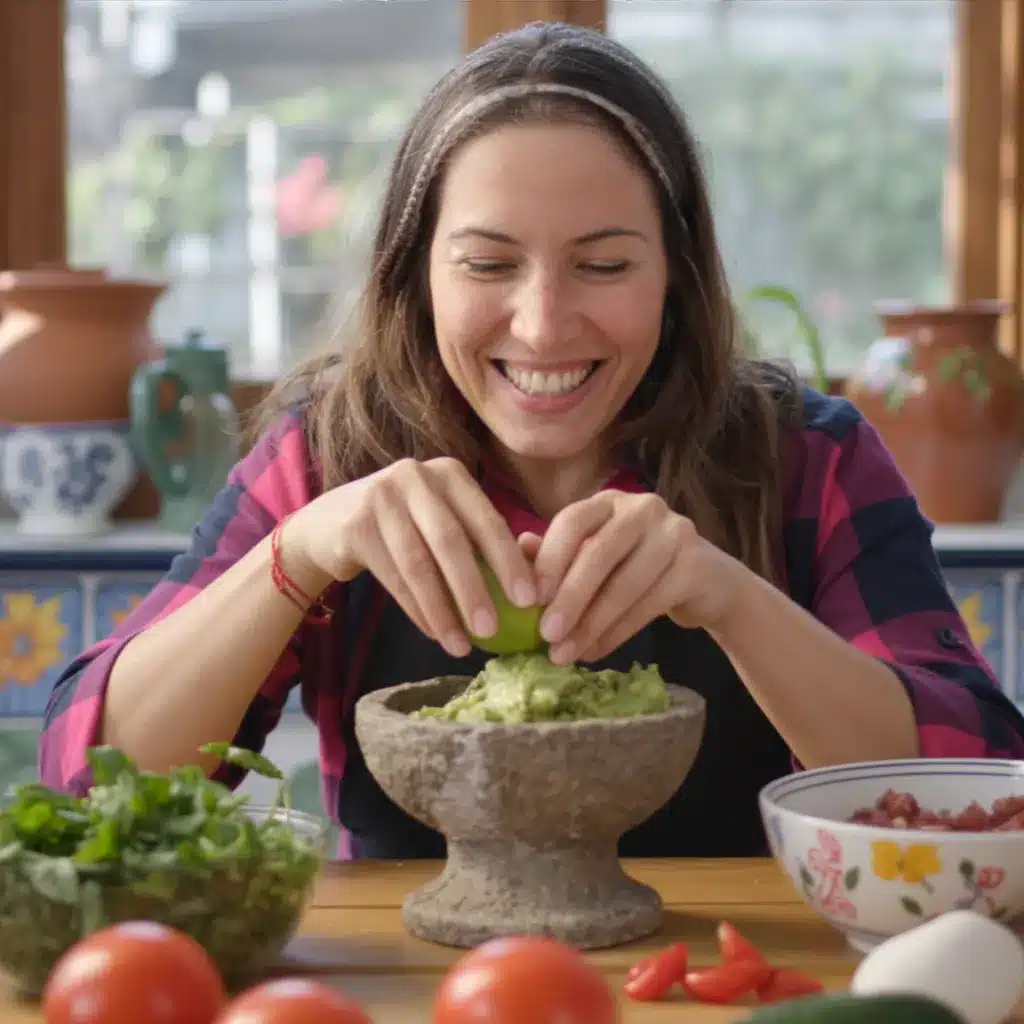
There’s something special about Homemade Aioli the way its garlic steam wakes up the kitchen and draws everyone closer with a promise of creamy, bright flavor. It is simple, comforting, and oddly celebratory in small ways. Clara here, and I want you to feel confident making this at home, whether you are a weekday cook or someone who loves weekend experiments.
If you enjoy small, satisfying projects in the kitchen, you might also like learning how to make a smooth, tangy coconut yogurt at home: easy homemade coconut yogurt recipe. It is small, friendly, and it pairs with the same relaxed kitchen habits that make aioli so approachable.
Why You’ll Love Making This Homemade Aioli or The Story Behind My Homemade Aioli
I started making aioli years ago because I wanted something quick to lift roasted vegetables and sandwiches. It turned out to be the little habit that transformed simple meals into treats. You do not need special tools, and you do not need to be precise to the last drop. A good garlic, a bright squeeze of lemon, and a steady stir will reward you every time.
This aioli is based on store-bought mayonnaise, so it is forgiving and safe for beginners. It is creamy, with a fresh lemon lift and a real garlic kiss. Use it as a dip, a spread, or a sauce to bring everyday food to life. It is also a lovely place to practice balancing tastes. A tiny pinch more salt, a splash more lemon juice, or a longer rest in the fridge will nudge the flavors in the direction you prefer.
Step-by-Step: How to Make Homemade Aioli or Your Kitchen Game Plan
“Cooking isn’t about perfection. It’s about enjoying every delicious step.”
Before we dive in, give yourself everything you need within arm’s reach. That small habit will make the work faster and more pleasant. You will need a mixing bowl, a spoon or a whisk, a microplane or knife for the garlic if you want it very smooth, and a jar or container for chilling.
If you plan to serve this aioli with bread or cheesy snacks, it plays wonderfully with warm, soft bread. Try it with these homemade cheesy breadsticks for a weekend treat: homemade cheesy breadsticks. The creamy aioli holds its own next to rich, melty bread.
Ingredients You’ll Need for Homemade Aioli
1 cup mayonnaise use a good-quality mayonnaise for best texture and flavor.
3 cloves garlic, minced fresh garlic gives the best bright kick; grate or crush if you want it very smooth.
1 tablespoon lemon juice fresh squeezed is best; it adds brightness and balances the garlic.
1 teaspoon Dijon mustard adds subtle tang and helps bind the flavors.
Salt to taste sea salt or fine kosher salt both work; add slowly and taste.
Pepper to taste freshly cracked black pepper adds a warm finish.
Directions: Cooking with Confidence
- In a bowl, combine the mayonnaise, minced garlic, lemon juice, and Dijon mustard.
Take your time adding the lemon and mustard so you can taste and adjust. You should notice a fresh, citrusy perfume right away. - Use a wooden spoon or a whisk and mix until smooth.
Stir patiently. If you prefer a silkier texture, use an immersion blender or a small food processor for a few seconds. - Stir until the sauce thickens slightly and all ingredients are well combined.
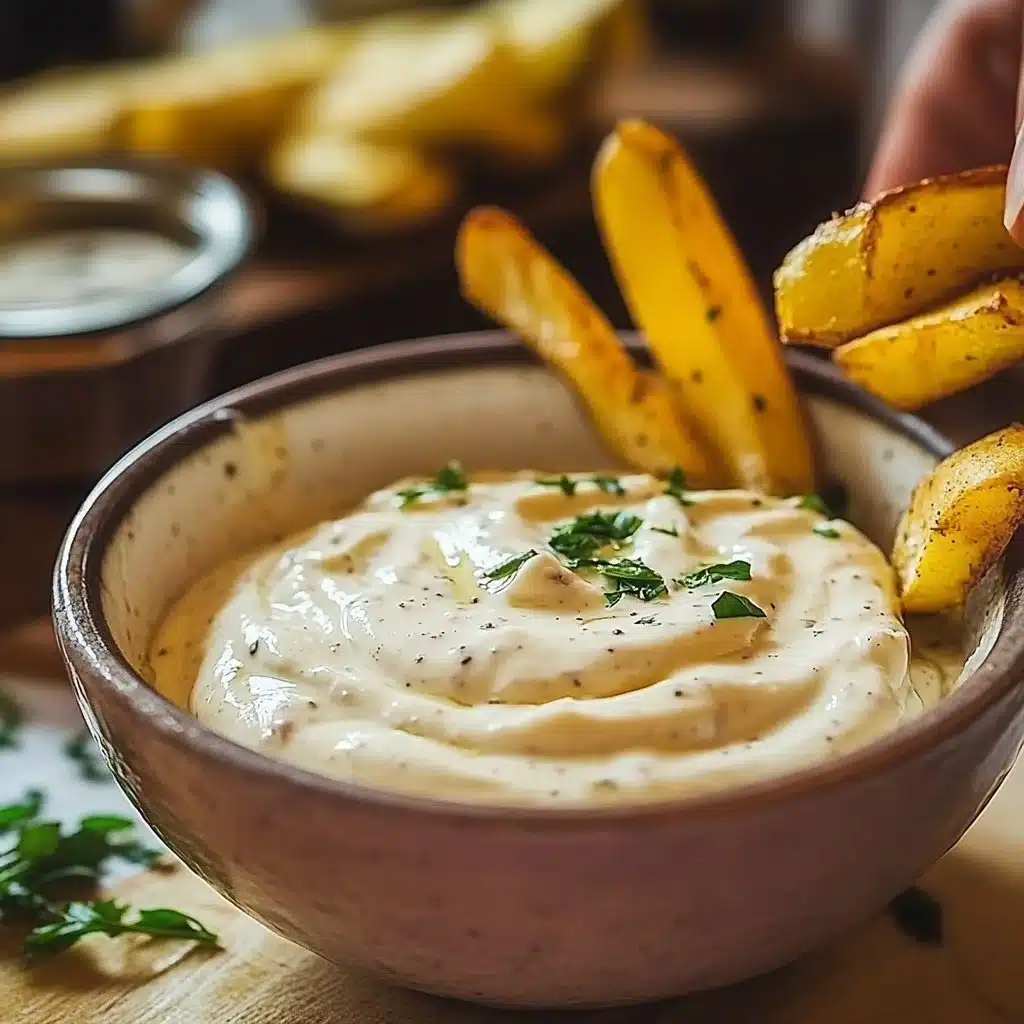
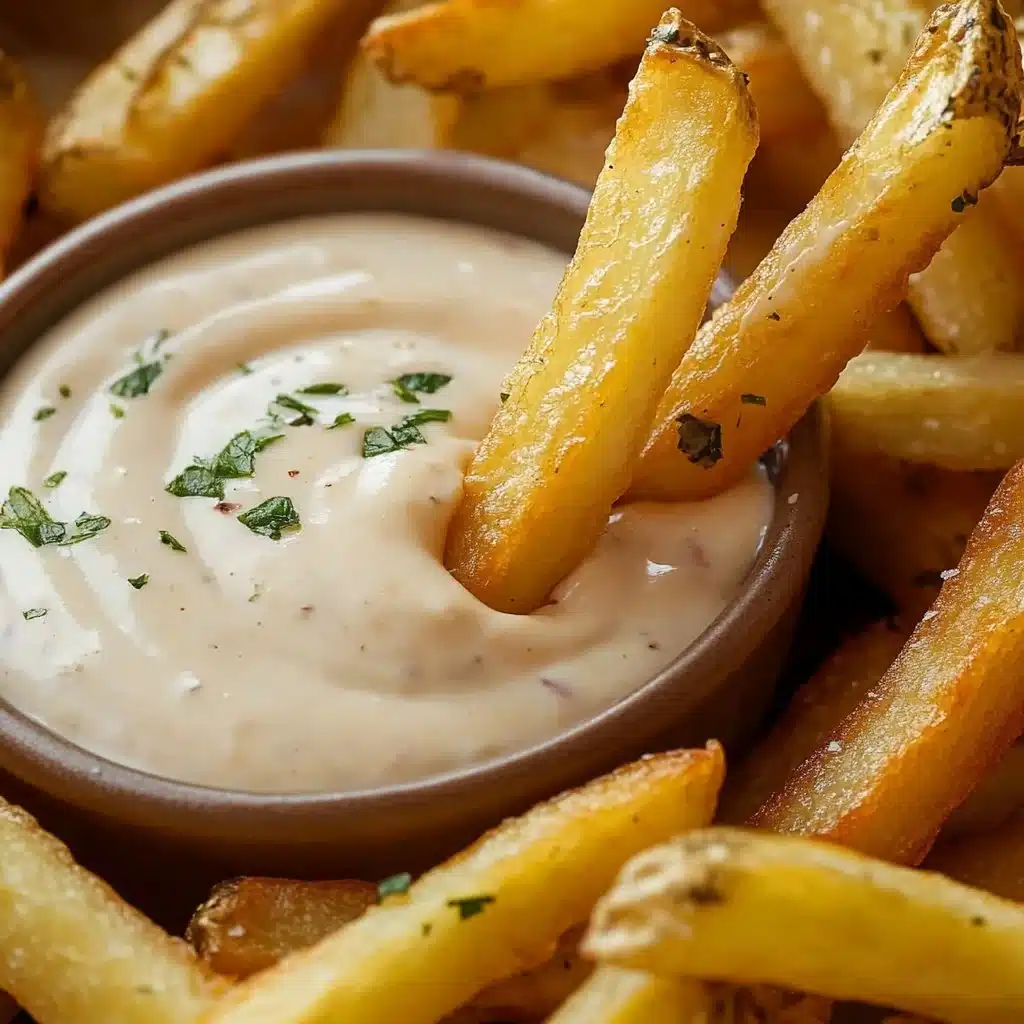
The consistency should be creamy and spreadable, not runny. If it feels too thick, add a tiny splash of water or more lemon juice and stir again. - Season with salt and pepper to taste.
Taste as you go. Salt is the single most effective way to sharpen and define the flavors. - Adjust garlic and lemon juice according to preference.
If you love garlic, add a little more. If you want a brighter, fresher finish, add another teaspoon of lemon. - Serve as a dip or condiment for various dishes.
Aioli pairs beautifully with roasted potatoes, fish, grilled vegetables, sandwiches, and even as a mirror for a simple charcuterie. - For a smoother finish, let the aioli rest covered in the refrigerator for at least thirty minutes before serving.
This rest lets the flavors calm down and meld together. The garlic loses its raw edge and becomes rounder. - Optional: fold in fresh herbs before serving.
Chopped parsley, chives, or dill are excellent choices. Fold them gently so you keep that creamy texture.
How to Serve Homemade Aioli and Make It Shine
Aioli is versatile and generous. Serve it in a small bowl on the side of roasted vegetables and roasted or steamed fish. Spread it lightly on both halves of a sandwich before assembling to add a silkiness that keeps bread from getting soggy. Use it as a dip for fries, roasted carrot sticks, or crisp artichoke leaves. For a simple party plate, spoon aioli into a shallow dish, sprinkle with smoked paprika and a few drops of good olive oil, and present it with warm bread or vegetables.
When plating, think about contrast. A little crunch on the plate, like toasted breadcrumbs or a crisp fennel salad, balances aioli’s creaminess. A thin ribbon of aioli makes a sandwich feel more composed. If you want to show off color, fold in a small amount of finely chopped herbs, or place the aioli beside bright roasted red peppers or green beans.

How to Store Homemade Aioli for Later
Aioli made from mayonnaise will keep well in the refrigerator, covered, for about 4 to 5 days. Use a clean jar or airtight container. Label it with the date if you like keeping a tidy fridge.
Store it near the middle shelf where the temperature is steady. Do not leave aioli out at room temperature for long periods. If you serve it at a party, bring a small portion to the table and keep the rest chilled in the fridge. If it separates a little after sitting, stir gently to bring it back together; do not heat the aioli to re-emulsify.
If you make an egg-based aioli from scratch (using raw egg yolks), the shelf life is shorter and you should follow food safety guidelines closely. Using commercial mayonnaise in this recipe gives you confidence and a longer, safer storage time.
For freezing, I do not recommend freezing aioli. Freezing will change the texture and cause it to separate. If you want to save garlic-forward flavor, mix garlic with a little olive oil and freeze that in small portions to add to freshly made mayonnaise when you need it.
Clara’s Tips for Success
- Use fresh garlic and adjust intensity. Fresh garlic is bold at first. If you prefer a milder, sweeter garlic note, smash the clove and let it sit for five minutes before mincing. That releases some of the harsh sulfur compounds and gives a friendlier garlic flavor.
- Grate the garlic for an ultra-smooth texture. A microplane grater turns garlic into a paste that blends seamlessly into the mayo, leaving no surprising chewy bits.
- Let the aioli rest. Thirty minutes in the fridge helps the flavors marry. Often you will find you need less salt after the flavors have settled.
- Taste constantly and adjust. Start with the basic amounts and then make small tweaks. One more squeeze of lemon or a pinch more salt will often be the exact right move.
- Keep a small jar of aioli on hand for a quick flavor boost. It is an easy way to make leftovers feel fresh and interesting.
Simple Variations to Try
- Roasted Garlic Aioli. Roast a head of garlic until soft, squeeze the cloves out, mash into a paste, and substitute this for the raw garlic. The flavor is sweet and mellow and wonderful with roasted meats.
- Herb Aioli. Stir in chopped parsley, chives, or tarragon for a green, bright change. Use a mix of herbs for complexity.
- Spicy Aioli. Add a teaspoon or two of Sriracha, harissa, or chipotle in adobo for heat and smoky depth. Start with a small amount and build.
- Anchovy Aioli. Mince a couple of anchovy fillets into the garlic for a classic aioli twist. The anchovy melts into the sauce and adds deep umami without tasting fishy.
- Smoky Paprika Aioli. Add smoked paprika and a drop of sweet smoked oil or a tiny drizzle of honey for a Spanish-inspired flavor that is excellent with grilled pork or potatoes.
- Lemon Zest and Dill. Add lemon zest and fresh dill for a bright, springy version that pairs perfectly with seafood.
Each variation starts from the same base and keeps the method the same: combine, whisk, season, and rest. That makes this recipe a great jumping-off point for creativity.
Homemade Aioli
Ingredients
Method
- In a bowl, combine the mayonnaise, minced garlic, lemon juice, and Dijon mustard.
- Mix until smooth using a wooden spoon or whisk. If you prefer a silkier texture, use an immersion blender or small food processor for a few seconds.
- Stir until the sauce thickens slightly and all ingredients are well combined.
- Season with salt and pepper to taste.
- For a smoother finish, let the aioli rest covered in the refrigerator for at least thirty minutes before serving.
- Adjust garlic and lemon juice according to preference.
- Serve as a dip or condiment for roasted potatoes, fish, grilled vegetables, sandwiches, or charcuterie.
Nutrition
Notes
Tried this recipe?
Let us know how it was!FAQs About Homemade Aioli
Can I make this ahead of time?
Yes. Prepare it up to two days in advance and keep it chilled. Let it rest in the fridge to let the flavors round out. Avoid leaving it at room temperature for more than a short serving period.
Is homemade aioli safe to eat?
This version uses store-bought mayonnaise, which is made from pasteurized eggs and is safe when refrigerated. If you choose to make aioli using raw egg yolks, follow strict food-safety practices and use very fresh eggs from a trusted source.
What if my aioli is too thick or too thin?
If it is too thick, stir in a teaspoon of warm water or a tiny splash of lemon juice until you reach the desired texture. If it is too thin, add a little more mayonnaise and whisk to thicken. Often a short chill will help thicken slightly.
How can I tone down the garlic if it is too strong?
Let the aioli rest in the refrigerator for at least thirty minutes. The raw edge of garlic will soften with time. You can also blanch garlic briefly in boiling water, then shock in ice water before mincing to reduce sharpness.
Can I use garlic powder instead of fresh garlic?
You can, but fresh garlic provides the best flavor and aroma. If you must use powder, start with a small pinch and increase slowly, because the powder is concentrated and behaves differently.
Extra Troubleshooting Tips
If the garlic leaves a bitter finish, it may be over-minced or bruised. Use a gentler grating or crush technique next time. If the aioli tastes flat, add a touch more acid such as lemon juice or a tiny splash of vinegar. If it tastes one-note, a small pinch of sugar can balance too much acidity.
How to Make Aioli Feel Special Every Time
Presentation counts. Serve aioli in small dipping bowls with a sprinkle of finishing salt, a dusting of smoked paprika, or a drizzle of good olive oil. Pair with hot, fresh bread or vegetables for contrast. When you place the bowl on the table, describe it simply: “Garlic aioli to brighten the potatoes.” People appreciate the friendly note.
A Note About Tools and Technique
You do not need a blender for this aioli, but an immersion blender or food processor will give a silkier finish quickly. When whisking by hand, use a stable bowl and a firm, patient wrist. If you use a blender, pulse briefly so the mixture does not warm. Keep everything cool and work in short bursts.
Pairing Ideas That Work Every Time
Aioli is friendly with many foods. Try it with:
- Roasted or fried potatoes for a classic hit.
- Grilled fish or shrimp for a citrusy contrast.
- Sandwiches and burgers to add richness without heaviness.
- Steamed artichokes instead of melted butter.
- Veggie sticks or crudités for a simple appetizer.
If you like soups with a creamy finish, a small spoonful of aioli can sometimes be whisked into hot soups to add silkiness, but taste carefully so you do not overpower delicate broths. If you are curious about hearty soups, you might enjoy making a cozy pot of chicken and gnocchi, which pairs well with a side of simple condiments: homemade chicken and gnocchi soup.
Final Encouragement or Closing Note
I hope this Homemade Aioli helps you discover how simple and rewarding homemade cooking can be. You do not need to be perfect to make something beautiful in your kitchen. Start with these basic steps, taste as you go, and remember that small changes will make it unmistakably yours. You have a friendly, reliable sauce ready to brighten weekday meals and weekend gatherings. You’ve got this.
Conclusion
Making aioli at home is one of those tiny kitchen wins that pays off again and again. If you want to see another straightforward take on garlic aioli with clear instructions, check out this helpful Garlic Aioli Recipe (4 Ingredients) from The Kitchn: Garlic Aioli Recipe (4 Ingredients) | The Kitchn. For a different voice and some additional tips on homemade aioli, this guide from House of Nash Eats is a useful reference: How to Make Homemade Aioli Recipe – House of Nash Eats.
I believe a little curiosity and a few good tools will turn this recipe into a favorite. Keep tasting, keep adjusting, and most importantly, enjoy the process.