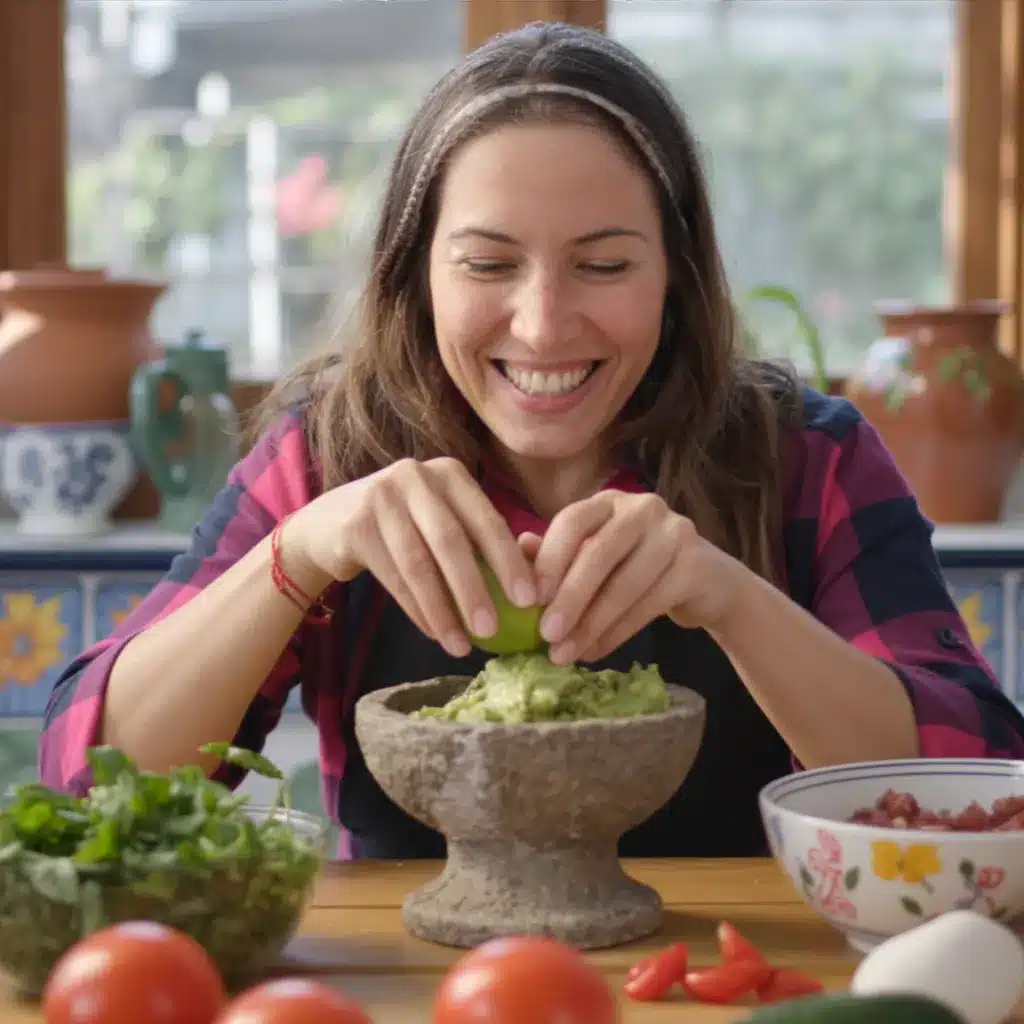
There’s something special about How To Make The Best Homemade Garlic Aioli the way its soft garlic perfume fills the kitchen and makes people wander in for a taste. It is simple, confident cooking that turns a few pantry staples into a silky sauce that brightens fries, fish, roasted vegetables, sandwiches, and so much more.
If you are the kind of cook who loves a small win that feels big, making aioli at home will quickly become one of those wins. It is forgiving, fast, and full of personality. Keep reading and Clara will walk you through every step so you feel calm, capable, and eager to serve.
In case you are building a full comfort meal, this sauce pairs beautifully with a bowl of creamy soup like the best creamy potato soup for chilly evenings.
Why You’ll Love Making This How To Make The Best Homemade Garlic Aioli or The Story Behind My How To Make The Best Homemade Garlic Aioli
I learned this aioli on a quiet Sunday in my kitchen when I wanted something bright and garlicky to go with simple roasted potatoes. It took only a few minutes, a few gentle whisk strokes, and then 30 minutes of patient waiting in the fridge. The first taste was creamy, tangy, and just garlicky enough to make the potatoes sing.
You will love this because it is:
- Fast to prepare with ingredients that live in most kitchens.
- Customizable so you can dial up garlic, lemon, or herbs.
- A small technique that makes you look like a seasoned home cook.
Make it once and you will start seeing places to use it. Brush it on grilled shrimp, dollop it on a burger, thin it with a little water and use it as a salad dressing. That is the beauty of homemade aioli: a little effort leads to a lot of deliciousness.
Step-by-Step: How to Make How To Make The Best Homemade Garlic Aioli or Your Kitchen Game Plan
“Cooking isn’t about perfection. It’s about enjoying every delicious step.”
Before you start, set out your ingredients and tools. You will need a small mixing bowl, a whisk, and a sharp knife for the garlic. If you have a small food processor or an immersion blender, that can make things even smoother and faster. If not, a bowl and whisk will do just fine.
Overview in three lines:
- Prep the garlic and bring mayo to room temperature.
- Whisk in oil slowly for a silky texture.
- Add lemon and pepper, chill to let flavors marry.
Ingredients You’ll Need for How To Make The Best Homemade Garlic Aioli
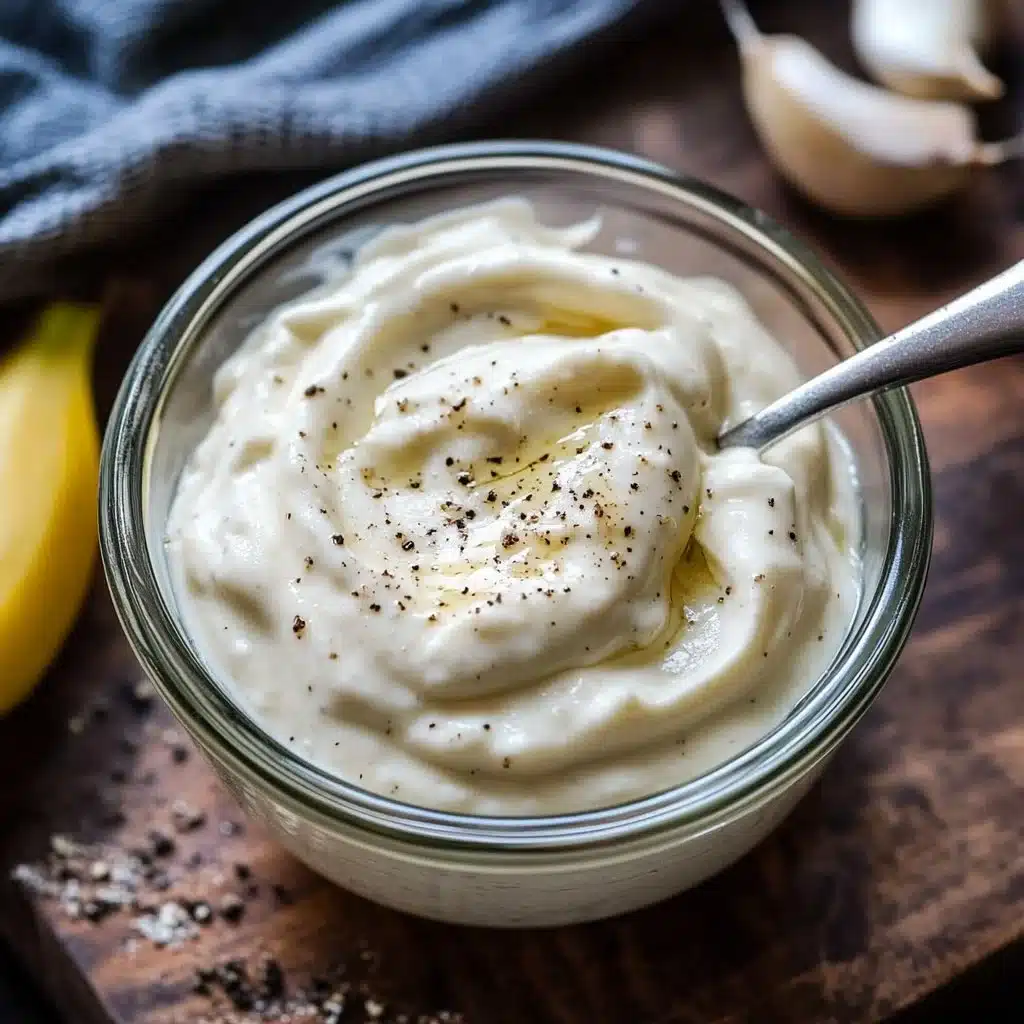
6 Tablespoons mayonnaise use full-fat mayo for the creamiest texture and best mouthfeel.
2 Tablespoons olive oil choose a mild extra-virgin olive oil or a light olive oil to avoid overpowering bitterness.
2 cloves garlic, minced fresh garlic gives the brightest flavor; if you are very sensitive, use one clove and add more later.
1 teaspoon lemon juice fresh lemon juice brightens the aioli; bottled lemon can work in a pinch.
1/4 teaspoon coarse ground pepper fresh-cracked pepper adds a gentle bite; adjust to taste.
Small optional extras to keep on hand:
- A pinch of salt if your mayonnaise is low-salt.
- A teaspoon of Dijon mustard for extra depth and stability.
- A splash of water to thin if you want a dressing consistency.
Directions: Cooking with Confidence
- Put the mayonnaise in a small mixing bowl and let it sit at room temperature for a few minutes.
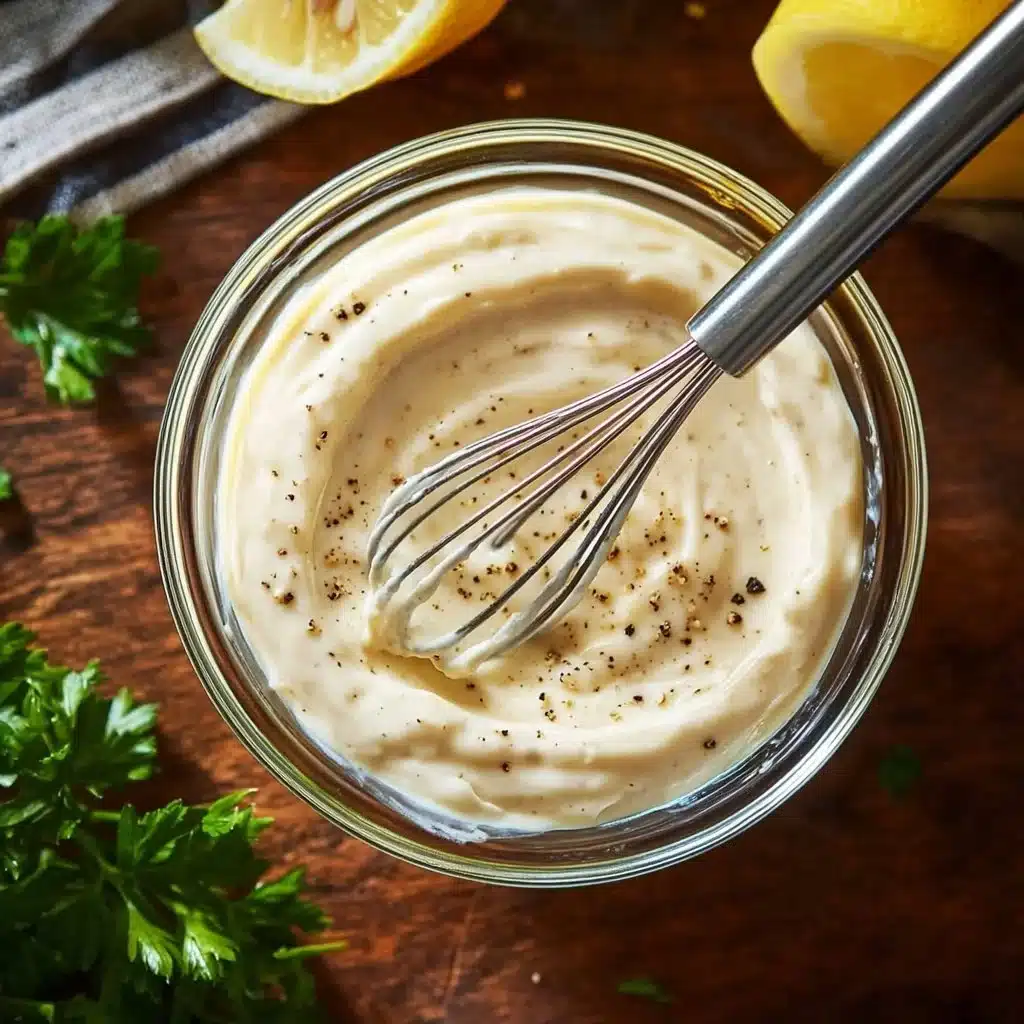
Letting the mayo warm slightly helps it blend more smoothly with the oil and lemon. This step takes only a short time and makes whisking easier. - Add the minced garlic and slowly drizzle in the olive oil while whisking, creating a smooth texture.
Take your time here. Whisk in the oil in a thin stream to keep the mixture from separating. If you prefer, pulse a food processor or use an immersion blender for an ultra-smooth finish. - Squeeze in fresh lemon juice and add coarse ground pepper, whisking until well mixed.
Taste as you go. Lemon brightens but does not need to overpower. Add a pinch of salt if the flavor needs balance. - Cover and refrigerate for at least 30 minutes before serving to let flavors meld.
This is the patience step. Chilling gives the garlic time to mellow and the flavors to become cohesive. If you are in a hurry, 15 minutes will still taste good. - Serve chilled or at room temperature with various dishes.
Bring the aioli to room temperature if it has been refrigerated for a long time. That makes the texture silkier and the flavors more pronounced.
A few practical notes while you work:
- If the aioli seems too thick, thin with a teaspoon of water at a time until you get the texture you want.
- If it breaks (looks oily and separated), whisk in a teaspoon of cold water or add a spoonful of mayonnaise and whisk until it comes together again.
- Use a microplane to grate garlic if you want the flavor distributed more evenly without noticeable pieces.
How to Serve How To Make The Best Homemade Garlic Aioli and Make It Shine
Garlic aioli is generous in its uses and forgiving in its presentation. Keep it simple or make it the star of a small platter.
Serving ideas:
- As a dip for fries, potato wedges, and roasted vegetables. A small bowl in the center works perfectly.
- Dolloped on grilled fish or shrimp just before serving for a glossy, flavored finish.
- Spread on toasted bread and top with vegetables or cured meats for an easy open-faced sandwich.
- Thinned with a little water or extra lemon to dress a salad of bitter greens or roasted root vegetables.
- Serve alongside roasted chicken or pork for a bright contrast.
Pairing tips:
- Pair with vegetables that have char for a smoky contrast.
- Add a sprinkle of smoked paprika or chopped herbs on top for color and depth.
- For a casual dinner, serve aioli with a tray of oven-roasted potatoes and a sheet-pan chicken. If you are planning a larger, cozy meal, this sauce fits well with slow-cooked dishes like my crockpot garlic parmesan chicken pasta for a comforting spread.
How to Store How To Make The Best Homemade Garlic Aioli for Later
Homemade aioli is best when fresh, but you can store it safely for a few days with simple care.
Storing in the refrigerator:
- Store in an airtight container or a small jar. Press a piece of plastic wrap directly on the surface to reduce air exposure, then seal the lid.
- Keep for up to 3 to 4 days. Because of the raw garlic and mayonnaise base, fresh is best and flavor will be strongest in the first two days.
Freezing:
- I do not recommend freezing aioli. Freezing changes the texture of mayonnaise-based sauces and can cause separation when thawed.
Reheating:
- Serve cold or bring to room temperature. Do not heat aioli. If you want a warm garlic sauce, use a different recipe that starts with a warm base.
Freshness cues:
- Smell it. Garlic should be present but not harsh.
- Look at texture. If the sauce appears watery or separated beyond repair, it is better to discard it.
- When in doubt, trust your senses. Food safety is more important than saving a small batch of sauce.
Clara’s Tips for Success
- Use fresh garlic and taste as you go. Fresh garlic changes as it sits, so start modest and add if you want more.
- Warm your mayo slightly. Cold mayonnaise can make whisking harder and cause an uneven texture. A few minutes at room temperature helps.
- Add the oil slowly. A slow drizzle while whisking or processing keeps the sauce smooth and prevents breaking.
- If the aioli breaks, rescue it with a teaspoon of cold water or a little extra mayo and vigorous whisking.
- Keep a small jar of aioli in the front of the fridge so you reach for it first. It will make weeknight dinners feel special.
If you are making aioli to pair with meats, remember it brightens rich flavors. I often make a small batch for pot roast or grilled steak. For a hearty meal idea, try pairing aioli with a simple seared roast after following a tenderizing method like this one on how to make bottom round steak tender for confident results how to make bottom round steak tender.
Simple Variations to Try
Garlic aioli is a perfect blank canvas. Try these easy changes for a different mood.
Classic lemon-garlic:
- Stick to the basic recipe and add an extra splash of lemon for brightness.
Herb aioli:
- Fold in finely chopped parsley, chives, or tarragon after chilling. Herbs add fresh color and a garden note.
Smoky paprika aioli:
- Stir in 1/2 teaspoon smoked paprika for color and a gentle smoky flavor that pairs beautifully with fries and grilled vegetables.
Spicy sriracha aioli:
- Add 1 teaspoon sriracha or your favorite hot sauce for a spicy kick. Adjust to taste.
Roasted garlic aioli:
- Roast a whole head of garlic until soft, squeeze out the cloves, mash, and use in place of raw garlic for a mellow, sweet garlic flavor.
Mustard aioli:
- Whisk in 1 teaspoon Dijon mustard for a touch of sharpness and better emulsification.
Each variation keeps the same basic method. Add new elements gently, taste, and then adjust. Small changes can give the sauce a brand new personality without extra fuss.

Garlic Aioli
Ingredients
Method
- Put the mayonnaise in a small mixing bowl and let it sit at room temperature for a few minutes.
- Add the minced garlic and slowly drizzle in the olive oil while whisking until smooth.
- Squeeze in fresh lemon juice and add coarse ground pepper, whisking until well mixed.
- Cover and refrigerate for at least 30 minutes before serving to let flavors meld.
- Serve chilled or at room temperature with various dishes.
Nutrition
Notes
Tried this recipe?
Let us know how it was!FAQs About How To Make The Best Homemade Garlic Aioli
Can I make this ahead of time?
Yes. You can make aioli up to 3 to 4 days ahead and keep it chilled. The flavor settles and can actually taste more rounded after a few hours. Keep it covered in the fridge.
Is it safe to use raw garlic in aioli?
Yes, using fresh garlic is safe for most people when stored properly. If you have a weakened immune system or are pregnant, consult your doctor about raw ingredients. Always keep aioli refrigerated and use within 3 to 4 days.
What if my aioli is too thick or too thin?
If it is too thick, whisk in a teaspoon of water at a time until you reach the desired consistency. If it is too thin, add a tablespoon of mayonnaise and whisk to thicken. Patience and small adjustments are the key.
Can I use a blender or food processor?
Absolutely. A small food processor or immersion blender creates a very smooth aioli with less effort. When using these tools, still add the oil slowly and pulse to control the texture.
How can I mellow the garlic flavor?
Mellowing raw garlic can be done a few ways. Let the aioli rest in the fridge for an hour or more. Use a single clove instead of two. Or try roasted garlic for a sweeter, gentler flavor.
Final Encouragement or Closing Note
Making aioli is one of those small kitchen skills that pays off every time you use it. It requires little time, gives lots of flavor, and makes everyday food feel special. Clara believes in simple, steady steps: prepare your ingredients, whisk with confidence, chill briefly, and taste with curiosity.
You might find yourself making a double batch to keep in the fridge. Or you might discover a favorite variation that becomes your signature. Either way, this recipe gives you a delicious tool and the confidence to use it. You’ve got this.
Conclusion
If you want another short recipe to compare technique, check out this straightforward Garlic Aioli Recipe (4 Ingredients) from The Kitchn which offers a slightly different approach for busy cooks. For a different take and a useful comparison of two methods, read the Homemade Garlic Aioli Sauce Two Ways article at The Food Charlatan to see other small tweaks that change texture and flavor.
I hope this How To Make The Best Homemade Garlic Aioli helps you discover how simple and rewarding homemade cooking can be. You’ve got this.