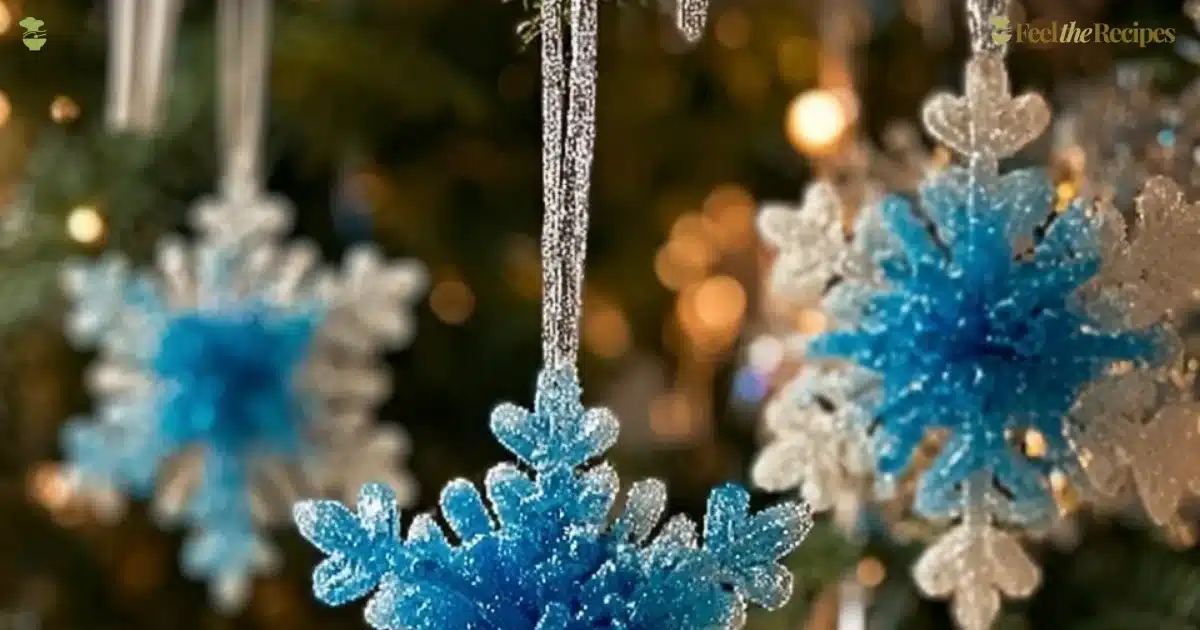
There is a quiet kind of peace that arrives when hands are slow and patient, shaping a simple thing into something gentle and bright. In my kitchen-turned-studio, the sunlight pools on the table and I breathe as I stir a warm mixture, thinking of small joys and the way a homemade ornament can hold a memory. Making Baking Soda Snowflake Keepsakes is less about speed and more about presence; it is a small ritual that brings comfort, grounding, and the soft satisfaction of creation.
If you would like to explore a related project that grows crystalline forms in surprising ways, you might enjoy a nearby method that shows how baking soda can transform into delicate shapes like trees through patient observation, which you can find in the growing tree tutorial linked for thoughtful comparison: growing tree ornament tutorial.
There is warmth here, even though what we are making is white and frosty. The act of pouring, waiting, and choosing a ribbon to tie on becomes a slow offering to yourself and to anyone you plan to hang these for. Today I will walk with you through every step of making Baking Soda Snowflake Keepsakes. Take your time. Breathe as you stir. Let the simple chemistry and the quiet pace be part of the comfort.
A Gentle Recipe for Body & Soul or Why This Baking Soda Growing Snowflake Ornaments Brings Comfort and Nourishment
There is something nourishing about small, focused acts. Even though these ornaments are not food, the practice of making them invites the same calm we find when simmering a soup or kneading dough. Each step asks for softness, attention, and a willingness to wait. That is where the comfort comes from.
Making Baking Soda Snowflake Keepsakes offers a gentle rhythm. You measure, you dissolve, you shape, and you watch as a surface changes. The small, crystalline textures that form feel like a soft kind of alchemy. For families, this can be a shared moment a way to create keepsakes while telling stories, singing a slow song, or simply sitting in companionable silence. For one person, this can be a peaceful afternoon project, an exercise in mindfulness and quiet hands.
This method is forgiving. It does not demand precision the way some recipes do. If your loops are not perfectly symmetrical, if your glitter scatters a little, it is all part of the charm. The key is to be present. Let the process be the reward. If you are curious about different crystal shapes and want more inspiration, a gentle, colorful cousin to this project explores rainbow-like formations and can spark new ideas: rainbow crystal forest method.
This is a recipe that soothes. It asks you to watch, to wait, and to notice small transformations. It asks you to remember that creating is a kind of care for oneself and for others. Keep these ideas close as we move into the practical part of the project.
Step by Step: How to Prepare Baking Soda Growing Snowflake Ornaments
“Cooking is a quiet way of caring for yourself and the ones you love.”
Begin by setting a comfortable pace. Gather your materials, clear a small space with a soft towel underneath to catch drips, and make a cup of tea if you like. The act of preparing the workspace is part of the ritual. Take your time.
- In a bowl, mix the baking soda and very hot water until fully dissolved. Stir slowly until everything feels balanced and smooth. Use a wooden spoon or a gentle whisk, and breathe as you stir, noticing the steam rising like a soft cloud.
- If you’d like, add some glitter for extra sparkle. Sprinkle a small amount and fold it in carefully. The glitter catches light like frost and adds a little joy. Remember that a little goes a long way.
- Create a snowflake shape using a pipe cleaner and place it in a shallow dish. Bend and twist the pipe cleaner gently until the shape feels pleasing. You can make a classic snowflake with six arms or a more abstract star. Let the bending be a slow, meditative motion.
- Pour the dissolved baking soda solution over the snowflake shape until it’s covered. Pour steadily and with care, watching as the liquid settles around each arm. The solution should fill the shallow dish and make contact with all parts of the pipe cleaner.
- Let it sit and dry for several hours or overnight. Place the dish in a stable spot where it will not be disturbed. This is the quiet waiting time. As the solution dries, tiny crystals will form and grow, capturing the shape you made.
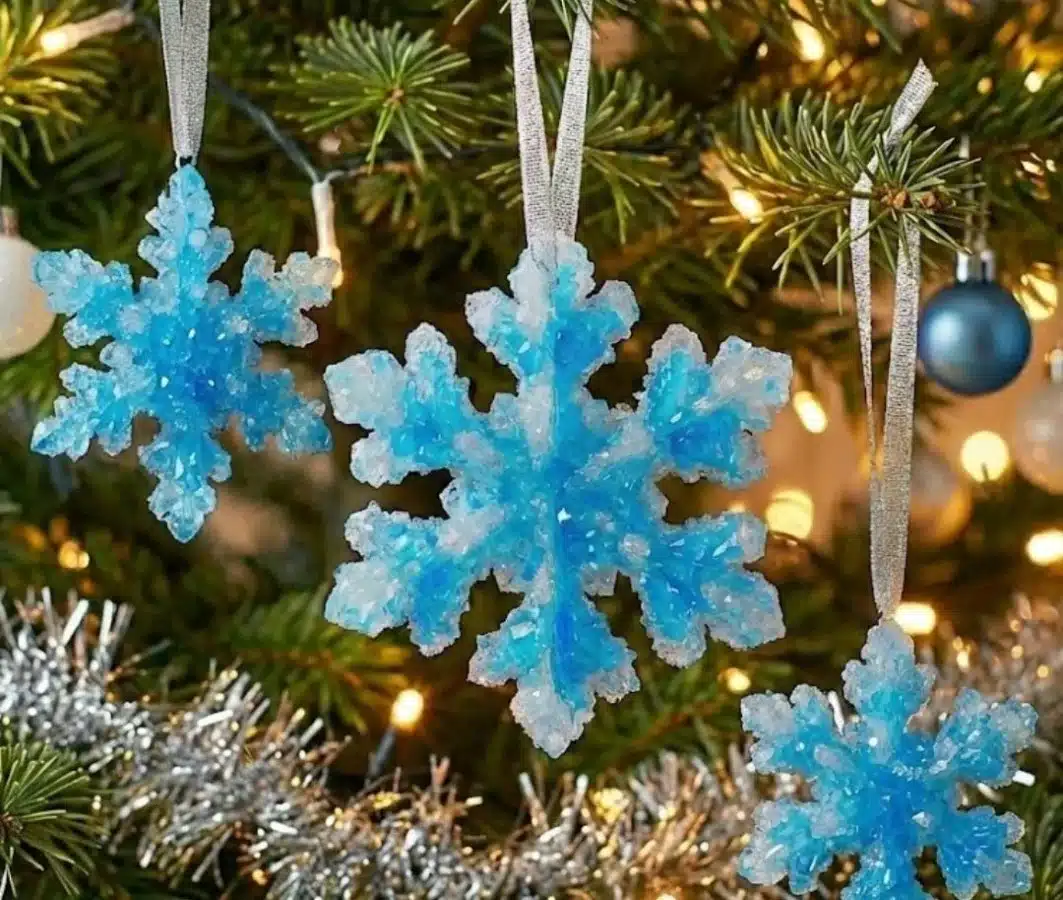
- Once dried, gently remove the snowflake from the dish, attach a string or ribbon, and hang it up. Use a small loop of ribbon tied with a gentle knot. The ornament is fragile and beautiful. Handle it with a soft touch. When it hangs, light will catch the crystals and the glitter, if you used any, giving the piece a quiet luminosity.
As you work, remind yourself that each step is small and kind. If a piece cracks or a crystal shifts, it is not failure; it is texture, a mark of a handmade object. If you want to try variations, the recipe below offers peaceful alternatives.
Wholesome Ingredients You’ll Need for Baking Soda Growing Snowflake Ornaments
- 1 cup of baking soda
- 1 cup very hot water
- String or ribbon for hanging
- Optional: glitter for sparkle
- Pipe cleaners for shaping snowflakes
- A shallow dish or tray for each ornament
- A soft towel to protect your work surface
Use ingredients and materials with care. Choose ribbon that feels nice against your fingers. If you have white pipe cleaners, they will disappear under the crystals; if you prefer a hint of color peeking through, pick a subtle shade. If your home has natural light, choose a place where the ornaments can catch it. For a slightly different approach, you might compare the technique to others that encourage growth in curious ways; a bright example is this rainbow crystal project that plays with color and patience: rainbow crystal forest inspiration.
A note on water: very hot water helps the baking soda dissolve fully. If your water is too cool, the solution may not form as smoothly. Be mindful when handling hot water; let it cool slightly if you prefer to work safely with bare hands.
Step-by-Step How to Prepare Baking Soda Snowflake Keepsakes
- Prepare your space. Lay a towel down on your table, set out your shallow dishes, and place the pipe cleaners, ribbon, and glitter within easy reach. Give yourself a quiet moment to settle in.
- Measure and warm. Measure 1 cup baking soda and 1 cup very hot water. Pour the water slowly into the baking soda while stirring gently. Hold the spoon as you would cradle a warm cup.
- Shape the snowflake. Bend the pipe cleaner into the snowflake design you like. Press gently so the arms are connected. The pipe cleaner acts as a scaffold for the crystals to form upon.
- Place in the dish. Set the shaped pipe cleaner in the shallow dish and make sure it lies flat. Center it if you would like symmetrical drying.
- Pour the solution. Slowly pour the dissolved baking soda solution into the dish so the pipe cleaner is fully submerged. Pour until the dish is filled enough to touch all the pipe cleaner surfaces.
- Watch and wait. Place the dish in a safe, quiet place. The drying time varies with humidity and temperature but allow several hours or overnight. Check in gently; avoid moving the dish until the surface is fully solid.
- Finishing the ornament. When the crystal shell feels dry and firm, lift the pipe cleaner snowflake carefully. Trim any stray edges of pipe cleaner if needed, and attach a length of ribbon for hanging. Tie a simple bow or loop and breathe a small sigh of satisfaction.
Let the process be restful. If a step requires patience, lean into that calm rather than speeding through. The best ornaments are those made with quiet attention.
How to Serve Baking Soda Growing Snowflake Ornaments with Intention
Serving these ornaments is really about presenting them with grace rather than placing them on a plate. Think of the moment of giving or hanging as a quiet ceremony. Choose a ribbon color that complements the room. Place the ornament on a linen napkin for a soft tableau, or tied to a wrapped gift as a personal touch. Let the recipient know a little about the making “I made this while listening to rain” or “I thought of you as I folded these arms.”
When you hang a Baking Soda Snowflake Keepsakes in a window, watch how the light shifts. The tiny crystals capture the sun and send it back in soft flecks. If giving as a present, write a short note about the time you spent creating it. The intention behind the object is as important as the object itself. Invite those who receive it to hang it in a special place where it can be seen and remembered.
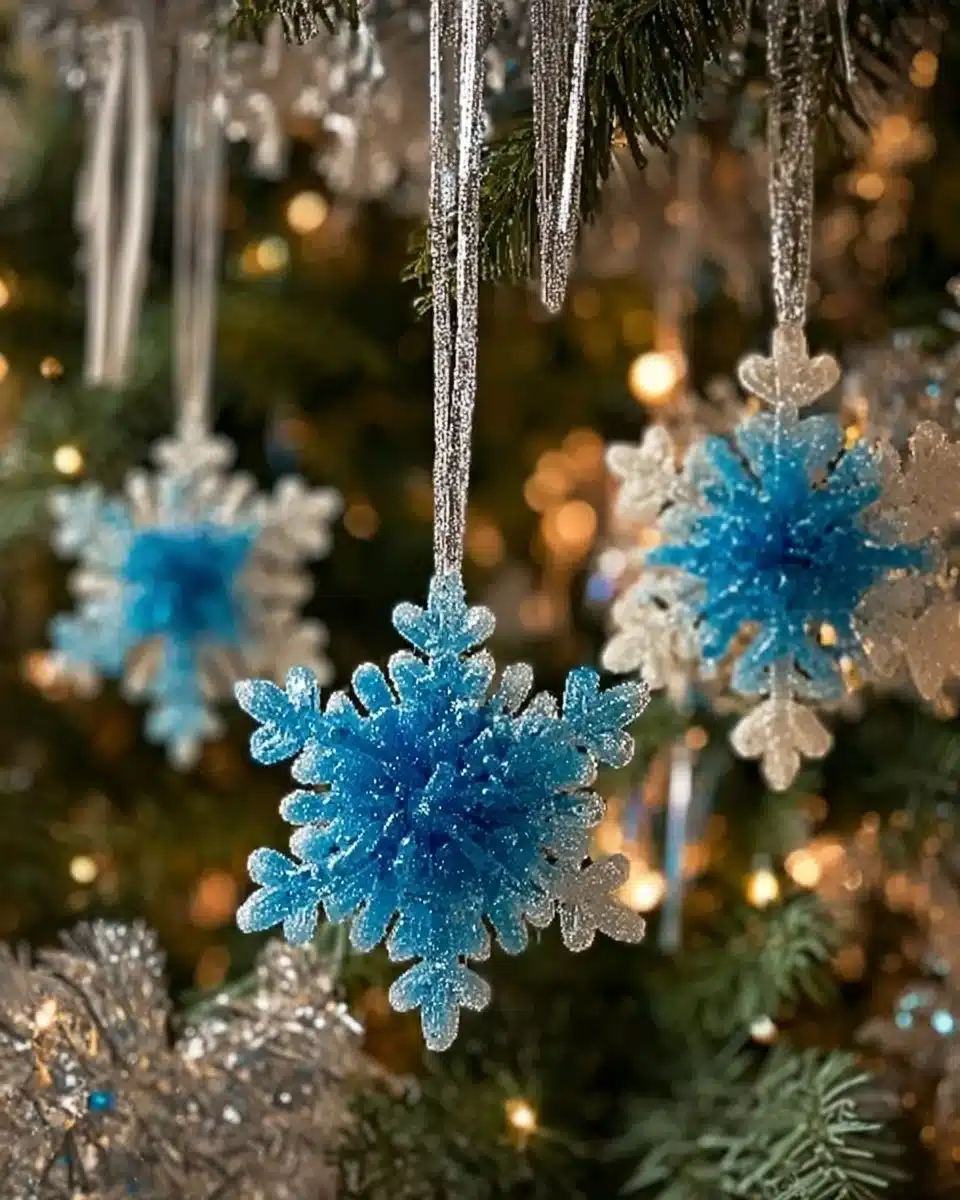
If you display a collection, space them out so each one has its own air. A small branch works beautifully to hold several, letting them swing gently like memories in motion. When you share these pieces, you are sharing a moment of stillness and care.
How to Store Baking Soda Growing Snowflake Ornaments the Right Way
Storing these ornaments is simple and gentle. Lay each piece on soft tissue or cloth, and place them in a shallow box. If they are fragile or particularly jeweled with glitter, separate them with paper dividers so they do not touch.
Keep them in a dry, cool place. Avoid areas with high humidity, which can soften or dissolve the crystals over time. If you live in a damp climate, consider silica packets in the box to help keep things dry.
If you plan to keep them long-term, handle them as you would any delicate keepsake: with clean hands and patient movements. Over time, their surface may pick up a little dust; a soft, dry brush can gently lift away particles without damaging the crystalline texture.
If you are storing a partial project, cover the dish with a breathable cloth rather than sealing it tightly. That allows the last bit of moisture to evaporate slowly and protects the growth you have already encouraged.
Mama Lila’s Helpful Tips
- Use warm, calm hands. When forming pipe cleaner shapes, move slowly and breathe. This steady rhythm makes the shapes more deliberate and the experience more meditative.
- Try white or neutral pipe cleaners if you want the crystals to take center stage. Colored pipe cleaners add personality but may show through if crystals are thin.
- Add just a touch of glitter or mica for a natural shimmer. Too much can weigh down the surface or cause clumping. A pinch is enough to catch light.
- If a snowflake cracks while removing it, gently press the pieces back into place and allow another hour to set. Small repairs are part of handmade life.
- If you want more texture, consider sprinkling a dry layer of very fine sea salt or powdered sugar on top before it fully sets, then tap gently to remove excess. The salt can leave tiny ridges that look like frost.
From my own kitchen, I can say that these small rituals became a way to pause during busy seasons. When the world felt loud, I would take a single cup of hot water and a scoop of baking soda, and the act of hands forming, waiting, and finishing would pull me back into the body and the present.
Peaceful Variations to Explore
- Herb-scented edges: Tie a tiny sprig of lavender or rosemary to the ribbon after it dries for a subtle aromatic note. The herbs will not be part of the crystal itself but add to the ritual of hanging.
- Mini-glow accents: Use a small strip of reflective thread woven through the ribbon for a quiet glimmer in evening light.
- Color-swirled cores: Dip the pipe cleaner in a diluted food coloring solution before shaping to add a faint wash of color through the center of the crystals. Keep the color gentle so it reads like dawn.
- Layered shapes: Make small snowflakes and larger ones to create a mobile. Suspend several from a branch so they float at different heights.
- Seasonal scents: After drying, lightly mist the ornament with a diluted essential oil spray and let dry, creating a scent memory that is part of the piece.
If you want to deepen your practice of slow crafting, you may enjoy exploring other projects that use time as an ingredient. A related practice that combines slow growth with bright color is explained in the rainbow crystal forest project, which can inspire new color ideas: rainbow crystal forest project.
These variations are invitations to play without pressure. Each one offers a different mood or memory. Let them guide you to a version that feels like home.
Common Questions About Baking Soda Growing Snowflake Ornaments
Q: Can I make this ahead of time?
A: Yes. These ornaments can be made a few days ahead of when you plan to use or give them. Store them in a dry box and handle gently. The quiet time only deepens the meaning.
Q: Can I use other materials besides pipe cleaners?
A: You can try thin wire for a more rigid frame or small twigs for an earthy, natural look. Be mindful that different materials will affect how crystals form and how fragile the final piece is.
Q: What if the crystals do not form well?
A: Sometimes crystals are slow to appear if the solution was not hot enough or if the dish was disturbed during drying. Try again with slightly hotter water and choose a stable spot for drying.
Q: Is glitter necessary?
A: No. Glitter is optional. The beauty of Baking Soda Snowflake Keepsakes often comes from the simple, delicate crystals themselves. If you use glitter, use it sparingly and enjoy the extra sparkle as a gentle accent.
Q: Are these ornaments safe for children to make?
A: With supervision, yes. Children can help stir and shape, but be careful with very hot water. Allow adults to handle the hot mixing and pouring steps. Let children decorate with safe materials like ribbons and soft craft bits.
If you want a project with slightly different materials but a similar pace, the growing tree tutorial offers a comparative look at how shapes and patience create beauty: growing tree recipe for comparison.
Each question is an opportunity to slow down and consider what you most want from this making calm, company, gift-making, or the simple joy of watching crystals appear. Trust the process. Trust your hands.
The Quiet Science Behind the Craft
Understanding in plain, gentle terms why this works can deepen your appreciation. Baking soda dissolves in hot water, creating a solution. As the water evaporates, the dissolved baking soda comes back together and forms tiny, hard crystals. The pipe cleaner acts as a scaffold, giving the forming crystals a surface to attach to. Light, air, and time all play roles. No pressure, no complicated chemistry just a small, graceful transformation.
Think of it as a slow weather change on a tiny scale. The surface transitions from liquid to solid, and those tiny changes give the ornament texture and presence. When you know this, you can see how small shifts in temperature, the amount of solution, or how still the drying place is will affect the look. This knowledge is not meant to complicate things, but to help you respond with curiosity and care.
Preparing for a Gathering or Gift-Making Session
If you plan to make these with others, set a slow pace for the gathering. Make a playlist of calming music, prepare a tray of warm tea and light snacks, and arrange materials so everyone can reach them. Encourage participants to move gently and to enjoy conversation or silence, whichever feels right.
Choose a workspace with natural light if possible. A soft tablecloth and a bowl of spare ribbons make the table welcoming. Remind everyone that perfection is not the goal; presence is. If you are gifting the ornaments, write a small note to include with each one, sharing a memory or a wish of warmth.
For a community event, prepare extra bowls and enough pipe cleaners so each person can make multiple pieces. Provide small tags and soft pencils so everyone can personalize their keepsakes.
Final Reflection or Closing Note
I hope this Baking Soda Snowflake Keepsakes brings you the same peace and warmth it brings to my home each time I create it. There is a quiet power in small, intentional acts. May this slow, simple ritual give you a moment of calm, a memory to hold, and a gentle way to show care for yourself and for others.
When you hang your finished piece, pause for a breath and let the little light it returns remind you that beauty often grows in stillness. Take your time. Be kind with your hands. Keep making, and keep the practice of slow care alive in your kitchen and in your heart.

Baking Soda Snowflake Keepsakes
Ingredients
Method
- Prepare your workspace by laying a soft towel on the table.
- Gather and set out all materials, including the pipe cleaners, ribbons, and glitter.
- In a bowl, mix 1 cup of baking soda with 1 cup of very hot water until fully dissolved, stirring gently.
- Optionally, add a small amount of glitter for sparkle and fold it in carefully.
- Bend and twist the pipe cleaner into a pleasing snowflake shape.
- Place the shaped pipe cleaner into a shallow dish.
- Pour the baking soda solution over the shaped snowflake until fully submerged.
- Let it sit to dry for several hours or overnight in a stable and undisturbed spot.
- Once dried, gently remove the ornament from the dish.
- Attach a string or ribbon for hanging and handle the ornament carefully.