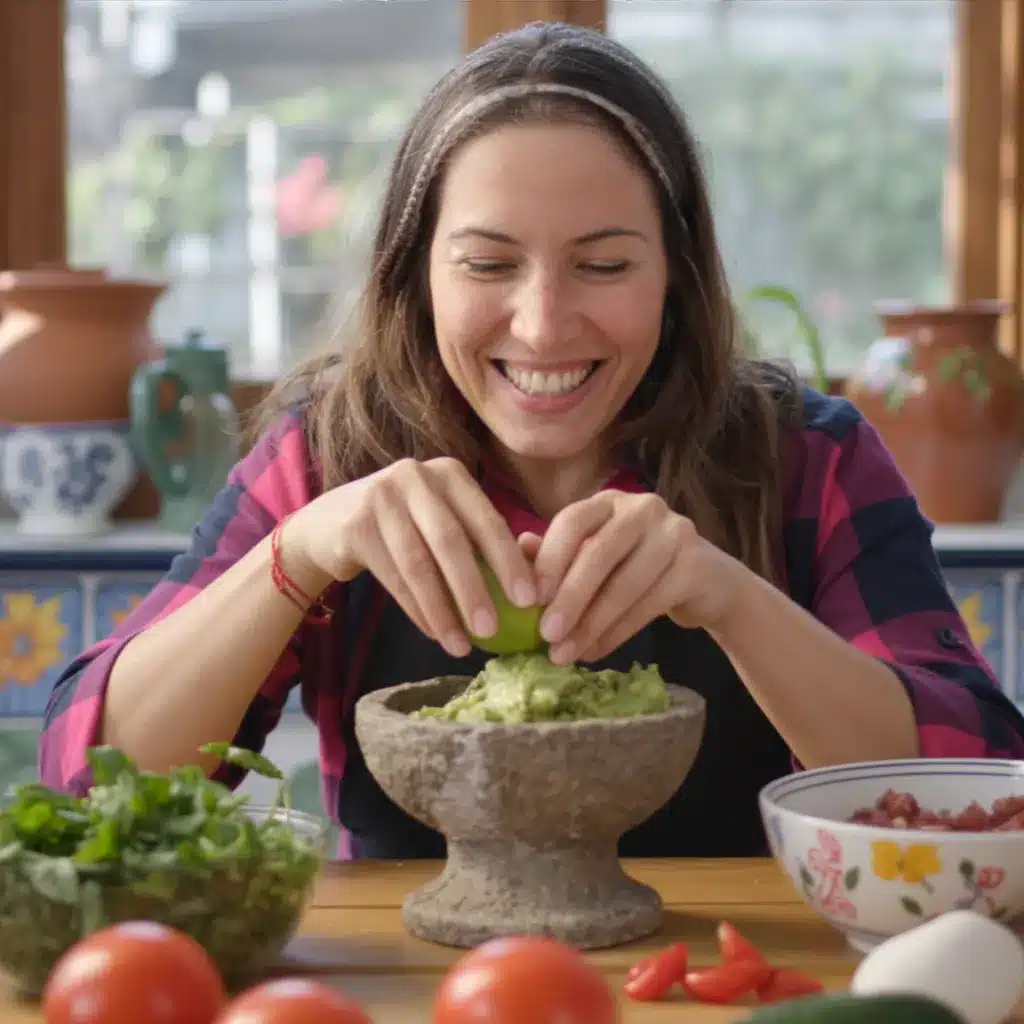
There is a quiet kind of peace that comes when a simple, slow project fills the windowsill with light and small, gleaming growths. In my kitchen I set a clear jar by the pale curtain and watch night and morning trace new edges of glass and crystal. Working with paper petals and a warm, mineral solution feels like tending a tiny garden, as gentle and unhurried as making tea for someone you love.
If you enjoy this patient craft that brings sparkle and comfort, you might also appreciate a similar, grounding activity like the baking soda growing tree tutorial, which uses everyday pantry ingredients to create quiet wonder.
A Gentle Recipe for Body & Soul
This is not only an activity. It is a small ritual that invites you to slow down and hold a space of care in your hands. Mama Lila learned to love these tiny crystal blossoms on soft afternoons when the sun warmed the counter and the radio played old songs. There is a steady kindness to the process: measuring, pouring, waiting, and the soft delight when a structure appears like frost on paper.
This Mama Lilas Crystal Blossom Recipe supports a meditative practice. While it is fundamentally a craft, the habits it encourages are familiar to anyone who cooks slowly at home. You will measure thoughtfully, keep your workspace attentive and clean, and notice the small changes that unfold hour by hour. The result feels like a small gift to yourself or to someone who sits quietly beside you.
Why it brings comfort and nourishment The act of creating something by hand can feel healing. Watching crystals form invites presence. Measuring warm water, stirring until the solution is clear, and arranging petals with care are all slow, grounding actions. If you think of the kitchen as a place to feed body and soul, this project is like a cup of warm broth for the spirit. It asks you to be gentle, to breathe as you stir, and to let curiosity lead.
This Mama Lilas Crystal Blossom Recipe also offers a soft lesson in patience. The most satisfying growths appear when we refuse to rush them. Place the jar in a quiet corner, and trust time to do its gentle work.
Wholesome Ingredients You’ll Need for Mama Lilas Crystal Blossom Recipe
White or light-colored absorbent paper (coffee filters or paper towels) Clear glass jar or small clear vase Alum powder or a crystal-growing packet Hot water (nearly boiling) Spoon for stirring Small scissors Measuring spoons or a kitchen scale Food coloring or watercolor (optional) Tweezers or chopsticks Paper towel or tray to protect your work surface Small clip or clothespin (optional) Safety items: oven mitts or heat-resistant gloves
Mindful note: use clean, new paper so the crystals can attach evenly. If you like, work near a small vase of fresh herbs or a sprig of lavender to bring a calming scent to your space. These gentle additions carry their own quiet energy and make the moment more nourishing.
For a playful color exploration, you can follow techniques similar to the ones in the rainbow crystal forest guide, adapting tints and gradients to the paper petals you prepare.
Step by Step: How to Prepare Crystal Growing Flower
“Cooking is a quiet way of caring for yourself and the ones you love.”
- Prepare your petals by cutting the paper into petal shapes. Cut deliberately and simply. Mama Lila likes rounded petals that suggest a soft, open bloom. Use small scissors and take your time.
- Make the crystal solution by measuring about two parts hot water to one part alum and stirring until mostly dissolved. Stir slowly until everything feels balanced. Warm water helps the alum dissolve more fully, and slow stirring keeps the solution clear and calm.
- Pour the hot solution into the clear jar until it fills about two thirds and let it cool. Set the jar on a tray to catch any drips and allow the temperature to lower until it is warm but not scalding.
- Attach petals for dipping using tweezers or a clip. Use tweezers to keep fingers cool and steady. If you want layered growth, attach multiple petals so their tips just touch the surface.
- Dip the petal into the solution, letting its tip sit just above the liquid if you want gradient growth. For full coverage, immerse the petal gently and withdraw it slowly. For gradients, let only the tip kiss the solution and watch where crystals find their first footholds.
- Place the jar in a steady spot, free from drafts and direct sunlight. A quiet windowsill with soft light is perfect. Direct sun can change evaporation and alter growth patterns.
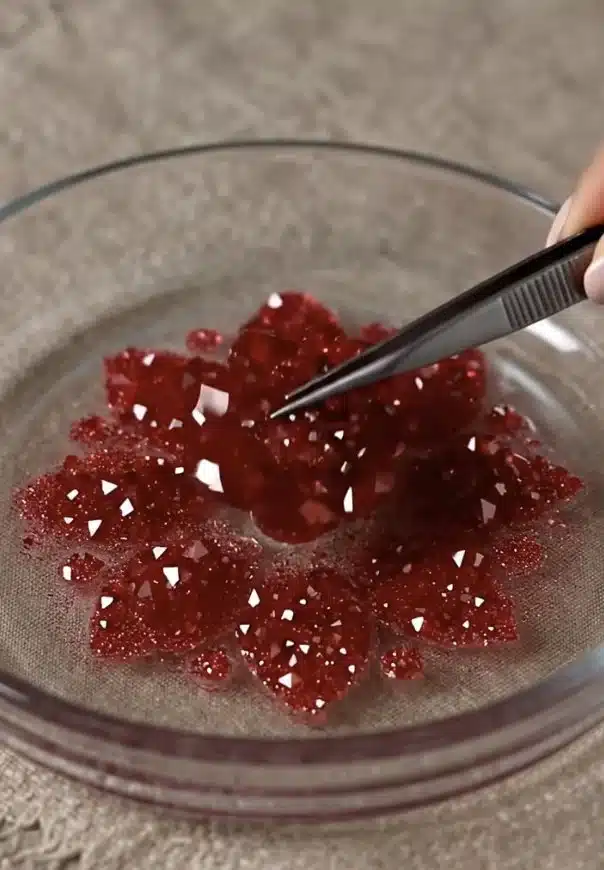
- Observe the first hours for crystalline seeds forming; check gently and infrequently. The first delicate threads often appear like frost. Look without disturbing; curiosity is best practiced as brief and kind glances.
- Let crystals mature for two to five days based on desired density. Two days yields delicate veining. Three to five days brings denser, more jewel-like accumulations. Decide what feels right for your heart.
- Remove and dry the petals on a protected tray. Use tweezers and place each petal on a paper towel or waxed paper so the crystals can set fully without being handled.
- Optionally seal or display the crystals with a light coat of craft sealer. If you want them to last, a gentle seal will protect the fragile formations. Test a small piece first to be sure you like the finish.
- Clean up the workspace responsibly, diluting leftover solution before disposal. Stir in extra water until the mineral concentration is mild before pouring down the drain, and wipe the jar carefully. Wear gloves when handling concentrated solutions.
Each step can be taken as an invitation to slow down. Breathe as you measure. Notice the way steam lifts off the water. Let the process feel nurturing, like tending a small indoor garden.
How to Serve Mama Lilas Crystal Blossom Recipe with Intention

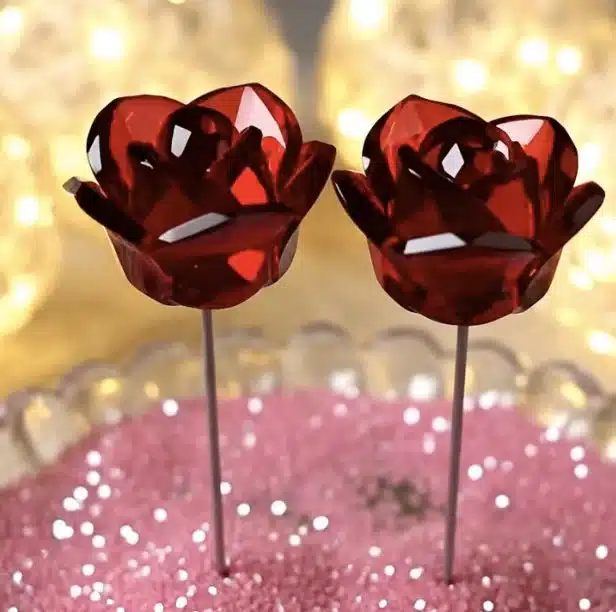
Serving, in this gentle craft, means choosing the right way to present the finished blossoms so they speak of care. Arrange a few dried, crystal-kissed petals in a shallow dish, on a small wooden tray, or inside a glass cloche where light can catch each facet. Place them by a bedside lamp, on a special shelf, or on a gift card for someone who could use a little calm.
When you present these pieces, speak softly about the time you spent making them. A simple sentiment like, “I made this while thinking of you,” carries more warmth than any ornate package. If you are using them in a decorative arrangement, balance textures. A pair with a small sprig of eucalyptus or a ribbon of linen feels like an offering.
Think about ritual: a small bell or a piece of cloth can transform an ordinary display into a mindful practice. Invite the person who receives them to sit with the work for a few minutes, to touch if they wish, and to notice what the shapes inspire. Serving is not just showing; it is creating a moment of connection.
How to Store Mama Lilas Crystal Blossom Recipe the Right Way
Store finished blossoms in a dry, shaded place to preserve their delicate formations. A small box lined with acid-free tissue or a shallow dish with a lid will keep dust at bay. Avoid places with high humidity or wide temperature swings.
If you want to keep the pieces long term, a light spray of clear craft sealer helps preserve them. Let the sealer dry completely before storing. If you keep them in a display case, open it occasionally so the pieces can breathe and you can enjoy them anew.
If you plan to give away several at once, wrap each one in tissue paper and place them in a shallow tray so they do not rub. Crystals are fragile in their own quiet way. Treat them with the same gentle care you would afford a fragile ornament or a hand-thrown clay cup.
Mama Lila’s Helpful Tips
- Work with intention and small batches. Make three to six petals at a time so your attention is not stretched thin. Small batches let you observe growth and learn subtle differences without feeling overwhelmed.
- Try paper thickness for variety. Thin coffee filters make delicate, lace-like formations. Slightly thicker paper yields bolder crystals. Test a petal of each to see which speaks to you.
- If you want deeper color, add food coloring sparingly. A drop or two in the solution gives a gentle tint. If you prefer a watercolor wash, paint the dry paper lightly before dipping and let it dry completely.
- Keep a little notebook nearby. Note the time you set the jar, the room temperature, and any changes. Over a few attempts you will see patterns and learn how small shifts affect the bloom.
- Mind your safety and the disposal of materials. Alum is a mineral compound used in many crafts. Keep it away from children and pets, wear gloves if your skin is sensitive, and dilute the leftover solution before disposal.
For creative inspiration that pairs well with these calm projects, you might enjoy learning how to transform ordinary shells into glittering treasures. It is a gentle companion activity that uses similar patience and light touch.
Peaceful Variations to Explore
Soft gradient petals Prepare your petals with a light watercolor wash at the tip, then dip so the colored edge draws more crystals. The result feels like a sunrise caught in glass.
Layered bloom clusters Attach several petal layers at varying heights with a tiny clip. Each layer will grow at a slightly different rate, creating a fuller, more garden-like form.
Mini bouquet display Place several finished petals on thin stems of wire wrapped in floral tape and set them in a narrow vase. The sparkle will catch on the glass as a little winter bouquet.
Herb-infused staging Lay a thin bed of dried rosemary or lavender under your finished crystals in a shallow bowl. The scent will be subtle and comforting without touching the crystals themselves.
Seasonal palettes In autumn, use muted amber tints. In spring, pick soft pastels. The season can guide your color choices and the mood of the display.
These peaceful variations keep the project feeling fresh, while still honoring the gentle pace it invites. Take your time with one idea until you feel the joy of discovery, then try another.
FAQs About Mama Lilas Crystal Blossom Recipe
Can I make this ahead of time?
Is this safe for children to do? What should I do if crystals are cloudy or slow to form? Can I make larger crystal formations? How do I safely dispose of leftover solution?
Can I make this ahead of time?
Yes. You can prepare the petals and grow the crystals a day or two before you plan to display them. The formations often look even more complete after a day to rest. Store finished pieces in a dry place until you are ready to present them.
Is this safe for children to do?
Children can take part with careful supervision. Have an adult measure hot water and handle the alum solution. Let children help cut petal shapes and arrange finished pieces. Emphasize calm, steady movements and wash hands after handling.
What should I do if crystals are cloudy or slow to form?
Cloudy or delayed growth usually comes from cooler temperatures or insufficient dissolution. If the jar cools too fast, gently warm the environment by moving it to a slightly warmer room. Always make sure the alum is mostly dissolved before cooling. Small seeds of growth will often form even if the first day seems slow.
Can I make larger crystal formations?
Yes, but larger formations often require more concentrated solutions and longer time. Work in a larger jar and allow several days for growth. Be mindful that higher concentrations may be more sensitive to disturbance.
How do I safely dispose of leftover solution?
Dilute the remaining solution with plenty of water before pouring it down your household drain. Check local guidelines if you have specific concerns. Wipe surfaces with water and mild soap and keep the area ventilated. Use gloves when handling concentrated mixtures.
These answers come from years of gentle practice. If you try multiple versions, you will learn your little kitchen’s rhythms and preferences. Trust your hands and your pace.
A Little Science, Explained Kindly
If you are curious about why crystals form, the idea is simple and quiet. When you dissolve a mineral like alum in hot water, the warm liquor holds more of the mineral in solution. As it cools and water begins to evaporate, the mineral becomes too concentrated and begins to organize itself into repeating patterns. Those repeating units become the tiny, glittering crystals you see.
Think of it like making a slow sugar syrup for candy. When conditions are just right, the sugar decides to arrange itself into neat, repeating shapes. The paper acts like a scaffold where crystals find a place to begin. You do not need to understand every detail to enjoy the process; a small curiosity about the how can deepen the pleasure of watching.
Gentle Troubleshooting
If crystals are sparse Try increasing the ratio slightly or allow more time. Check that the jar is not too cool and that the solution was well dissolved.
If the paper tears or collapses Use slightly thicker paper or add a small support like a thin leaf skeleton underneath so the paper can bear the weight of growing formations.
If colors run or bleed Let any added color dry fully before dipping. Tiny amounts of food color tend to behave best; too much can affect crystal formation.
If growth is uneven Ensure the jar sits level and free from drafts. Slight movement during the first hours can bias growth toward one side.
Troubleshooting is part of learning. Approach each little issue as a teacher that helps you refine the practice, not a failure. The calmest projects are the ones we adapt to with gentle curiosity.
Supplies and Care in Mama Lila’s Kitchen
I like to keep a small kit just for these projects: a clean jar I only use for craft growth, a small set of measuring spoons, a pair of tweezers, and a tiny cloth bag for dried petals. Store your kit together so when the mood to create arrives, everything is ready. Keep a folded tray or an old placemat under the jar to keep the table safe.
After a session, wash the jar and spoons with warm soapy water and dry everything thoroughly. Wipe your work surface and tuck the kit away. Having a ritual of tidying helps the project feel whole and complete.
Final Reflection or Closing Note
I hope this Mama Lilas Crystal Blossom Recipe brings you the same peace and warmth it brings to my home each time I set it on the sill. Take your time with each step. Breathe as you stir. Let the tiny formations teach you patience and quiet joy.
May these small, luminous blossoms remind you that gentle care, offered in small moments, can create surprising beauty. Keep a cup of tea nearby, and savor the soft satisfaction of making something by hand for someone you love.
Crystal Blossom
Ingredients
Method
- Prepare your petals by cutting the paper into petal shapes. Use small scissors and take your time.
- Make the crystal solution by measuring about two parts hot water to one part alum and stirring until mostly dissolved.
- Pour the hot solution into the clear jar until it fills about two thirds and let it cool.
- Attach petals for dipping using tweezers or a clip.
- Dip the petal into the solution, letting its tip sit just above the liquid for gradient growth.
- Place the jar in a steady spot, free from drafts and direct sunlight.
- Observe the first hours for crystalline seeds forming; check gently and infrequently.
- Let crystals mature for two to five days based on desired density.
- Remove and dry the petals on a protected tray.
- Optionally seal or display the crystals with a light coat of craft sealer.
- Clean up the workspace responsibly, diluting leftover solution before disposal.