
Mama Lila’s Blue Crayon Suncatchers
There is a soft calm that comes when a small project is held in quiet hands, sunlight spilling across the table and a child beside you humming as they choose a shade of blue. Making Mama Lila’s Blue Crayon Suncatchers feels a little like making a warm cup of tea for the soul. It is simple, restorative, and it fills a room with color and gentle attention.
In my kitchen-studio, where the windows catch the morning and the late light pools on the counter, I often set out the crayons and molds like I am arranging herbs before a slow simmer. Each sliver of wax holds memory and possibility. If you like crafts that soothe while they surprise, you may also enjoy a guide to making soft, flexible suncatchers from homemade bioplastic that pairs beautifully with this project when you want a different texture in your craft repertoire.
Possible Headings: A Gentle Recipe for Body & Soul or Why This DIY Blue Crayon Suncatchers Brings Comfort and Nourishment
There is comfort in repetition, and there is nourishment in small, careful acts. Mama Lila’s Blue Crayon Suncatchers are not food in the usual sense, yet they feed the same parts of us that need tending. The ritual of peeling, shaving, and melting is slow and centering. Gathering a few basic tools, placing the tray in the oven, and watching the wax ease into a glossy pool becomes a meditation.
This craft offers more than a pretty window ornament. It invites connection. If you make them with someone you love, the work becomes a shared rhythm. If you make them alone, the process can hold your attention like a quiet conversation with yourself. The cool blue tones bring a sense of calm into a home. The translucence when the sun kisses the finished pieces is like liquid memory, and it has a way of making the ordinary hours feel special.
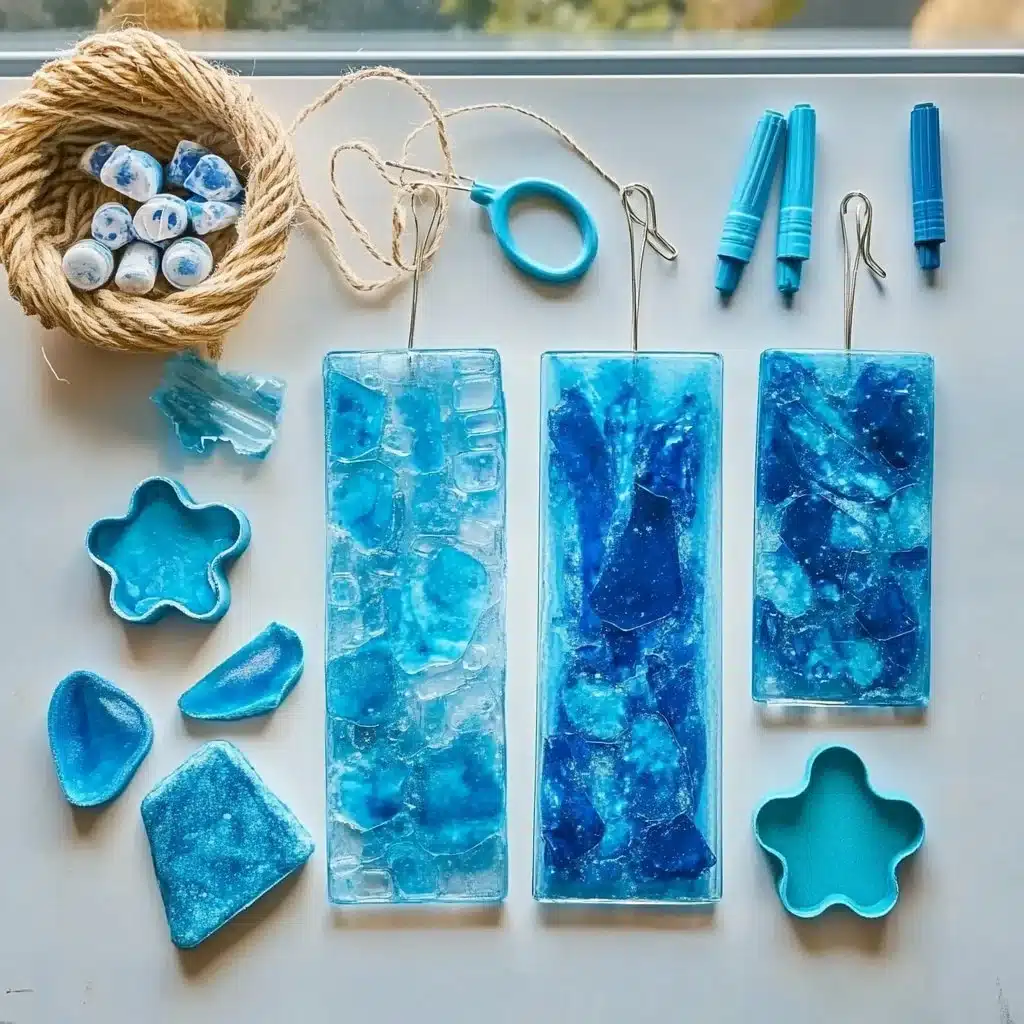
Wholesome Ingredients You’ll Need for DIY Blue Crayon Suncatchers
- Crayons in shades of blue, peeled and chopped or shaved.
- A silicone mold or an oven-safe shallow tray.
- Parchment paper or a silicone mat for ease of cleanup.
- A sharp knife, peeler, or grater for creating shavings.
- A small metal spoon or wooden craft stick for arranging wax.
- A toothpick or skewer for nudging small bits and releasing air bubbles.
- Thin string, ribbon, or fishing line for hanging, optional.
- A hole punch tool or a metal skewer for making hanging holes once set, optional.
- A towel and a heatproof surface for cooling clearly.
Mindful note: use fresh, clean materials and a calm workspace. Preparing your tools, like washing a jar before filling it, prepares your mind. Take a breath and gather everything gently. If you cherish delicacy, you might choose thinner ribbons or softer string to let the suncatchers sway like notes in a slow song.
Step-by-Step: How to Prepare DIY Blue Crayon Suncatchers
“Cooking is a quiet way of caring for yourself and the ones you love.”
- Preheat your oven to a low setting, around 200 to 225°F. This gentle heat will melt wax slowly and safely. Take your time and trust the slow rise of warmth.
- Prepare your workspace by laying a heatproof towel and placing parchment paper or a silicone mat beneath your mold. A calm, clean surface keeps the process smooth and steady.
- Peel the crayon wrappers and shave or chop crayons into small pieces. Arrange the colors by tone: pale sky, cornflower, teal, and deep navy. Each piece will melt into the next like watercolor.
- Arrange blue shavings in the mold in a single layer, leaving tiny gaps to allow light to pass. Think of the layout as composing a soft painting. Breathe as you place each piece.
- Add a second layer if you desire deeper color or a more textured look. Gently vary the shades so the finished piece has depth and quiet movement.
- Place the mold on a baking tray and slide it into the oven. Check every three to five minutes so you can guide how the wax flows. Slow and steady is the kindest approach to heat.
- Use a spoon or skewer to nudge unmelted bits for even spread. Be gentle; the melted wax will come together with little encouragement. This is a time for small adjustments, not force.
- Remove the mold when the wax looks smooth and shiny. The surface should read like a calm pool, without ripples or unmelted islands. Let it rest for a moment on the towel.
- Allow the wax to cool fully until solid to the touch. This may take from thirty minutes to an hour depending on size. Patience here ensures clean edges and a glossy finish.
- Trim any rough edges and attach string or ribbon for hanging. If you want a hole, use a skewer while the wax is still warm but mostly set, or after it cools, use a hole punch carefully. Each suncatcher will hang like a small promise in the window.
These steps are reliable and gentle. If any part feels rushed, stop, breathe, and return with softness. Crafting is not a race. Let the process be an act of steady care.
Preparing Mama Lila’s Blue Crayon Suncatchers with Care
Settle comfortably before you begin. A warm mug or a small playlist of quiet music can make the work feel like a ritual. Lay out your materials within easy reach. A woven basket for scraps makes a tidy home for leftover bits and keeps the table serene.
If you are making these with children, invite them to describe the shades out loud. Ask what each color reminds them of. The storytelling turns a simple assembly into a memory. Keep a small bowl of soapy water nearby for quick cleanups of sticky fingers. Encourage patience. When a child wants the wax to melt faster, remind them that slow heat keeps the colors soft and honest, like a slow-brewed soup.
If you prefer a sunnier palette or seasonal hues, you can adapt the same method. The care you take, the small moments of attention, is what makes these pieces feel woven with meaning. Practice helps. The first piece is always learning; by the third or fourth, you will notice your hands remembering the rhythm.
How to Serve DIY Blue Crayon Suncatchers with Intention
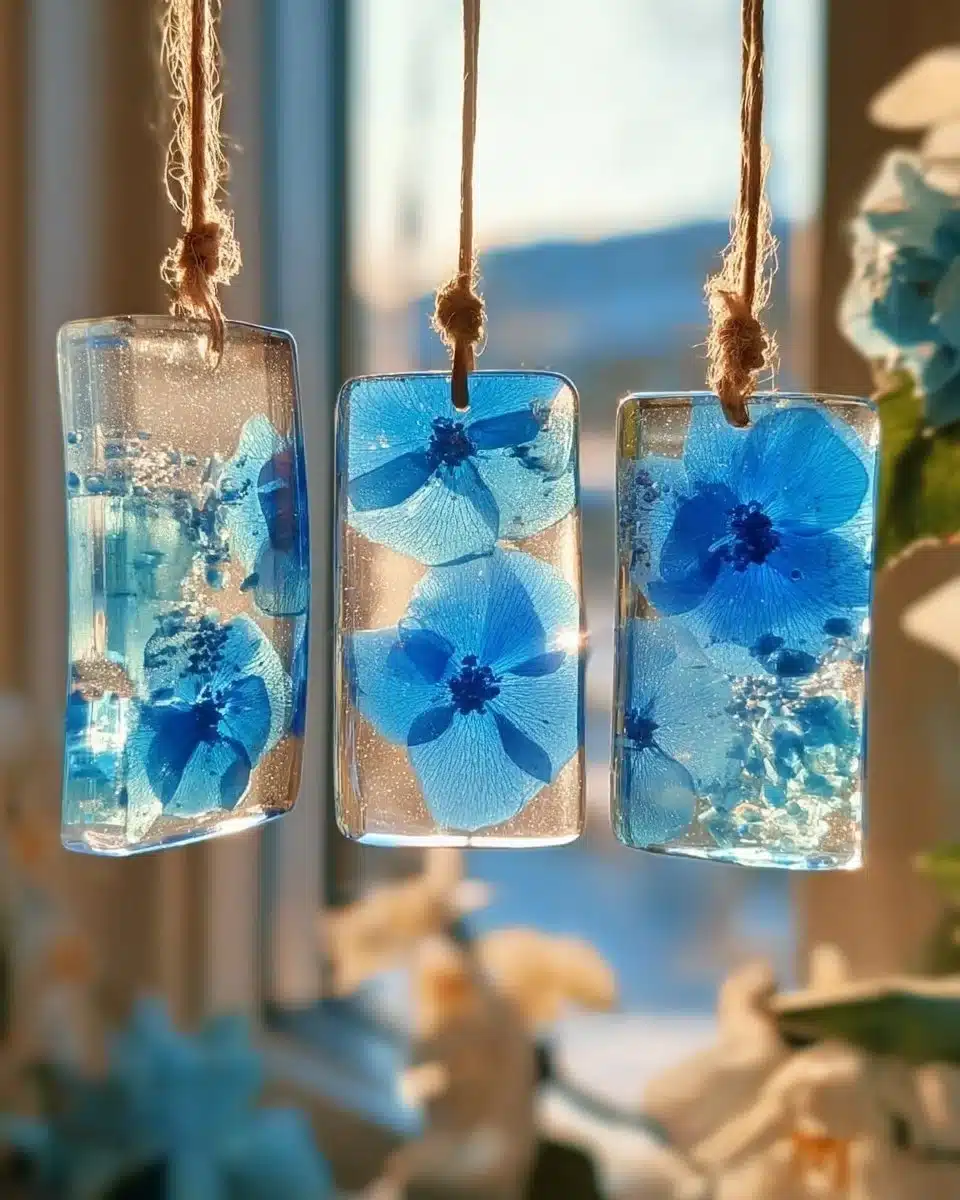
Presenting your suncatchers is like placing a single flower in a clear glass. Think about where the light is soft but persistent. A kitchen window that faces morning sun, a hallway that gathers afternoon rays, or a bedroom where the dawn slips in are lovely spots.
When you hang the suncatchers, allow a little space between them. Sunlight loves to wander through transparent layers, and the air between pieces lets shadows and colors overlap like gentle conversation. If you give them a bit of movement, they will play with light as a slow dance.
Wrap each one in tissue paper if you plan to gift them. Tie with a ribbon and include a small note that speaks to the calm intention behind the piece. You might write, “Made slowly with sun in mind,” or “May this blue bring quiet moments.” Serving these as gifts is a way of offering warmth without urgency.
If you are creating a small display, consider a simple branch in a jar as a hanger. The organic line of wood contrasts with the glossy wax, and the overall effect is quietly elegant. Place a small bowl of dried lavender or a sprig of rosemary nearby to bring another layer of sensory comfort.
How to Store DIY Blue Crayon Suncatchers the Right Way
Store finished suncatchers flat in a box lined with parchment if you will keep them for a season. Wax can be delicate to pressure and heat; keep them away from windowsill surfaces that get too hot or from cramped places where they might be pressed.
If you plan to keep them for a long time, wrap each in tissue and tuck into a cool, dry drawer. They will keep their color and shape best in a space that is stable rather than variable in temperature. If storing between projects, label the box gently so the memory of each shade is easy to recall.
If a piece softens slightly in warmth, move it to a cooler place and let it rest. Do not force reshape with heat; patience and gentle pressing on a cool surface will bring it back to form. Treat these pieces as you would a delicate jar of preserves, honoring the slow craft that made them.
Mama Lila’s Helpful Tips
- Use a variety of blue tones for depth. A mix of light, mid, and dark blues creates a layered feeling that the sun will love. Try adding a touch of pearly or metallic blue crayon for a soft shimmer.
- Work in thin layers. Thinner pools of wax cool more evenly and reduce the chance of bubbles. If you see small air pockets, a quick nudge with a skewer while the wax is still warm will smooth the surface.
- Recycle leftover shavings into new pieces. Gather scraps into a small jar labeled “craft wax” and return them to a mold for a beautiful, variegated piece. This is my favorite way to remember that nothing is waste in a gentle kitchen-studio.
- For kids, pre-shave crayon pieces and let them arrange colors. It keeps the hot work adult-only and the playful placement child-friendly. Make a ritual of cleaning hands together afterward with warm soapy water and soft towels.
- If you want a lighter, airier feel, mix in small bits of translucent crayon or conditions that melt at a slightly lower temperature. Test one small piece first to ensure the combination holds together as you hope.
These tips are simple but reliable, born from many slow afternoons where I learned to respect the wax and the quiet. If you are curious for more small craft ideas that pair well with these suncatchers for a cozy afternoon, you might enjoy the gentle sweetness of cottage cheese bites and simple baking projects that bring family together for light treats alongside your crafting.
Peaceful Variations to Explore
- Layered Ombre Blues: Arrange crayons in gradations from the palest blue to deep navy. Melt slowly to keep the bands distinct, then let them blur where they meet for a sky-like effect.
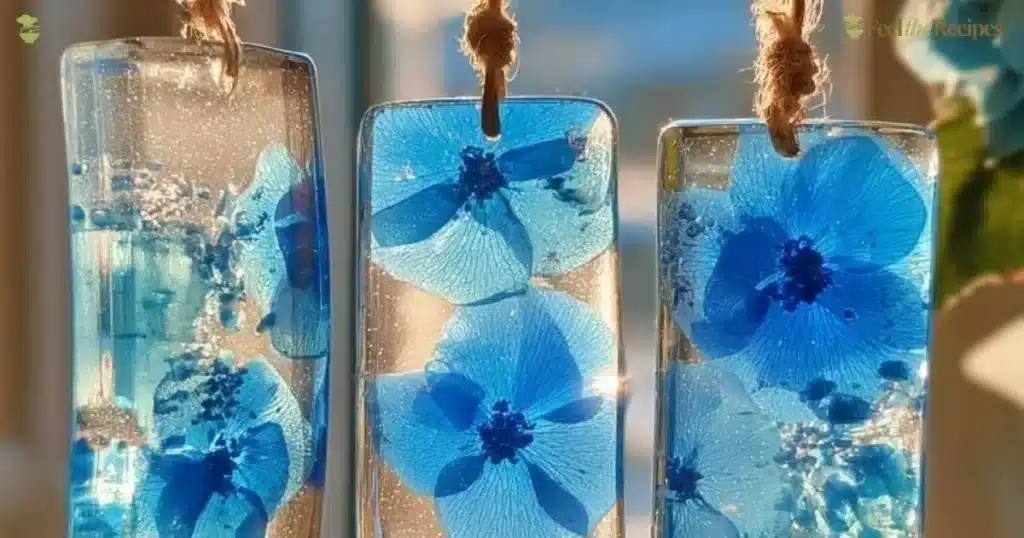
- Embedded Botanicals: Press tiny, dry-flower petals or paper cutouts lightly into the warmed wax. Use only thoroughly dried botanicals to prevent moisture. The botanical shape will float slightly inside when the wax cools.
- Mixed Media: Combine wax with thin strips of translucent plastic or pressed tissue to create textures. These add tactile contrast and invite a gentle curiosity when sunlight moves through.
- Tiny Window Frames: Use small, reused picture frames as molds. Place wax within and allow a border to form against the frame, creating a framed miniature window to hang.
- Seasonal Blue: For winter, choose inky, deep blues with a single fleck of silver. In spring, go for aqua and sky blues with little pearl accents. Each season brings a different calm to the palette.
If you enjoy exploring variations, you might also try a sweeter project like soft, nostalgic cookies that pair with a slow afternoon of crafting. The balance of quiet hands and warm baking makes a day feel whole for a comforting plate after your work.
Tools of the Trade and Gentle Safety Notes
Simple tools are all you need. A small baking tray and silicone molds do most of the work. If you use a shallow tray, you can create larger panes that catch more light. Silicone molds give you soft edges and easy release. When handling heated wax, respect the material. Use oven mitts and place hot items on heatproof surfaces.
Avoid direct stovetop melting unless you are practiced with a double boiler setup. An oven at low heat keeps the process slow and predictable. Always supervise children and keep a small bowl of cool water and a towel nearby for any quick needs. These precautions help your craft remain a restful, safe experience.
FAQs About DIY Blue Crayon Suncatchers
Q. Can I use any crayons for this project?
A. Yes, most standard wax crayons work well. Try to use crayons that are not oil-based or specialty markers. If a crayon smells strong when melting, remove that piece. Trust your senses. If anything makes you uneasy, step back and choose a different color.
Q. How long do the suncatchers take to cool completely?
A. Cooling time varies by size and thickness. Small shapes may be set in about 30 minutes. Larger panes might need an hour or more. Allow the pieces to rest undisturbed until they are fully solid for the clearest, most stable result.
Q. Can I hang them outdoors?
A. They can hang in a sheltered porch or covered area but avoid direct, prolonged exposure to high heat. Extreme sun can soften the wax. Indoors by a sunny window gives the best honor to the colors without risking deformation.
Q. Will the colors fade over time?
A. Wax crayons are quite stable. With gentle care and avoidance of harsh heat, the colors will remain vivid for seasons. Keep them away from damp storage and direct hot sunlight when they are not displayed.
Q. Can I make shapes with cookie cutters or stencils?
A. Yes. Pressing cookie cutters into a soft, barely-cooled sheet will create neat edges, or pour into similar-shaped molds. Work gently and patiently for the best definition.
These questions come from many afternoons of answering the same small curiosities from friends, neighbors, and little helpers. I hope these answers feel honest and steady.
A Small Ritual for Crafting Together
Before you begin each session, light a small candle off to the side, or simply open a window for fresh air. Invite everyone to wash their hands, then set intentions. You could say, “We will make something that catches the light,” and pause for a breath. Softly name one hope for the piece. It could be as simple as “May this color soothe” or “May this bring a smile.”
As you work, remind yourself to move slowly. If a child becomes impatient, offer a simple task like sorting shades or threading ribbon. These small roles are practice in patience and focus. When the pieces come away from the mold clear and glossy, celebrate with a small clap or a warm sip of tea.
Crafting like this is not only about the object. It is about how you move through an hour with tenderness, about how you practice being present. The suncatchers are a gentle souvenir of that time.
Final Reflection or Closing Note
I hope Mama Lila’s Blue Crayon Suncatchers brings you the same peace and warmth it brings to my home each time I make them. Let the work be slow. Let the sunlight do the rest. Hold each color with kindness and remember that making by hand is an act of quiet generosity toward your own life. Thank you for inviting this small ritual into your day.
Blue Crayon Suncatchers
Ingredients
Method
- Preheat your oven to a low setting, around 200 to 225°F.
- Prepare your workspace by laying a heatproof towel and placing parchment paper or a silicone mat beneath your mold.
- Peel the crayon wrappers and shave or chop crayons into small pieces, arranging them by tone.
- Arrange blue shavings in the mold in a single layer, leaving tiny gaps to allow light to pass.
- Add a second layer if desired for deeper color or texture.
- Place the mold on a baking tray and slide it into the oven, checking every three to five minutes.
- Use a spoon or skewer to nudge unmelted bits for even spreading.
- Remove the mold when the wax looks smooth and shiny.
- Allow the wax to cool fully until solid to the touch.
- Trim any rough edges and attach string or ribbon for hanging.