
There’s something special about Oogie Boogie Pudding Dirt Cups the way its aroma fills the kitchen and makes everyone wander in for a taste. It’s a delightful treat that brings back childhood memories of Halloween and the joy of crafting something playful and delicious. The mix of creamy pistachio pudding layered with crunchy Oreo cookies and topped with gummy worms gives a whimsical twist to dessert. This recipe is not just fun to make; it’s also easy to prepare and sure to impress friends and family.
Why You’ll Love Making This Oogie Boogie Pudding Dirt Cups
Creating Oogie Boogie Pudding Dirt Cups is all about joy and creativity. With its vibrant colors and playful themes, this dessert is perfect for gatherings, especially around Halloween. Kids will love the idea of having “dirt” cups with gummy worms, and it’s a fantastic way to make memories in the kitchen. Plus, the components are straightforward, making this recipe accessible even for beginners. You’ll be able to share a treat that is not only delicious but also brings everyone together for some lighthearted fun.
Step-by-Step: How to Make Oogie Boogie Pudding Dirt Cups
“Cooking isn’t about perfection. It’s about enjoying every delicious step.”
To get started, gather your ingredients and find your favorite mixing bowls and cups. Once you have everything ready, you can smoothly transition into the excitement of making your Oogie Boogie Pudding Dirt Cups. Let’s dive right into the ingredients to set the stage for your fun cooking adventure.
Ingredients You’ll Need for Oogie Boogie Pudding Dirt Cups
- 3.4 oz box pistachio pudding mix – this will provide that lovely green color and nutty flavor.
- 2 cups cold milk – essential for mixing the pudding and making it creamy.
- 1 cup whipped topping (optional, for creamier texture) – folding in whipped topping gives the pudding an extra richness.
- 12 Oreo cookies (crushed) – these will create the “dirt” layer and add a delightful crunch.
- Gummy worms – one for each cup to create that fun, spooky look.
The ingredients are simple, and you might already have some of them at home. Don’t worry if you don’t have the exact ingredients; there are options to swap that can still make your pudding cups delicious.
Directions: Cooking with Confidence
Now that you have your ingredients, we can move on to the fun part: making the dessert. Here are the step-by-step instructions that will guide you through the process:
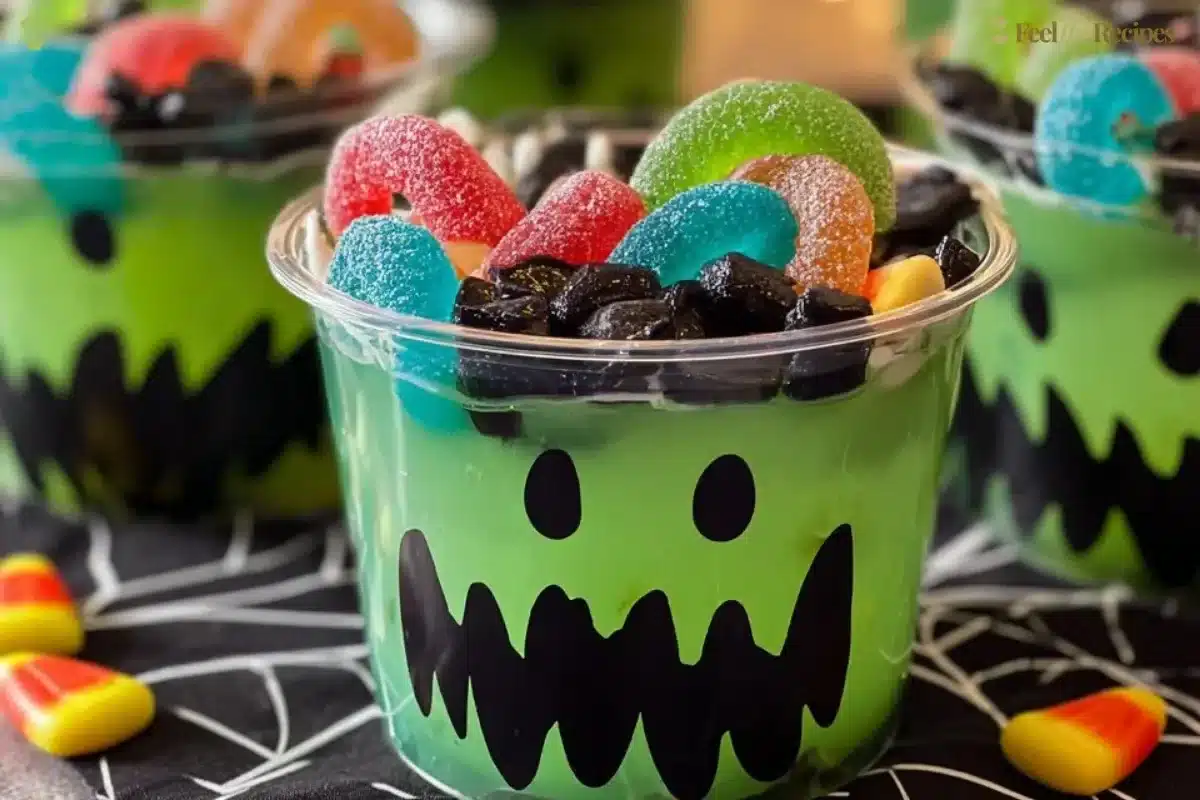
Prep the cups – Start by using a permanent marker to draw Oogie Boogie’s face on each clear plastic cup. Let them dry while you prepare the pudding. It’s an enjoyable way to get creative and personalize each cup.
Make the pudding – In a medium bowl, whisk together the pistachio pudding mix and cold milk for about 2 minutes. Keep whisking until the mixture has thickened. If you want an extra creamy texture, feel free to fold in whipped topping at this point.
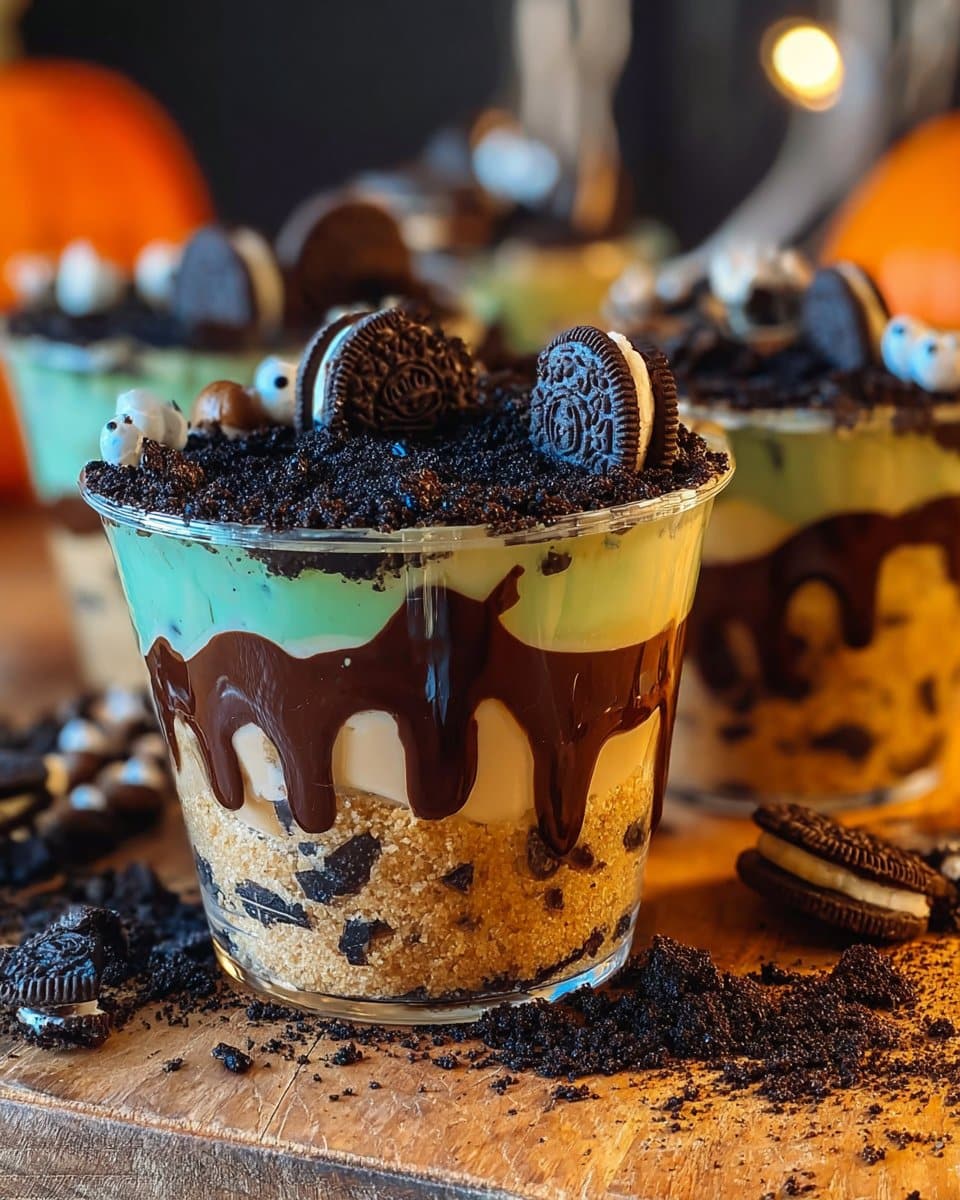
Assemble the dirt cups – Spoon the green pudding into each decorated cup, filling around ¾ full. Take your time with this step; it’s where the magic starts to happen.
Add the dirt layer – Sprinkle crushed Oreos evenly over the top of the pudding. This layer represents the dirt and adds a satisfying crunch.
Finish with worms – Now for the fun part! Decorate the top of the dirt with gummy worms crawling out. This touch gives your pudding cups an inviting and playful look.
Chill the cups – Refrigerate the cups for at least 30 minutes before serving. This helps them set nicely and makes them refreshingly cold.
Each of these steps is designed to keep things simple and fun. Don’t rush; enjoy each moment in the kitchen.
How to Serve Oogie Boogie Pudding Dirt Cups and Make It Shine
Serving your Oogie Boogie Pudding Dirt Cups can be just as fun as making them. Here are a few serving ideas that will bring out the best in your dessert:
- Arrange the cups on a festive platter or Halloween-themed tablecloth to create a cheerful presentation.
- Consider putting out additional gummy worms on a side plate for a playful buffet-style experience.
- For a more elegant approach, you could use small mason jars instead of plastic cups for a rustic look.
- Pair them with other Halloween treats, such as sugar cookies shaped like bats or ghosts, for a complete themed dessert table.
The vibrant green of the pudding against the dark crushed Oreos makes for a striking visual. Each cup can be a little piece of art.
How to Store Oogie Boogie Pudding Dirt Cups for Later
If you happen to have leftovers (which can be hard to believe because they disappear quickly), here are some easy storage tips. Place the cups in an airtight container and store them in the refrigerator. They will stay fresh for up to 2 days.
When you want to serve the cups again, there’s no need to prepare anything extra. Just remove them from the fridge, and they are ready to delight again!
Clara’s Tips for Success
To help you get the best results, here are some of my top tips:
- Choose quality ingredients: Opt for real pistachio pudding mix for a more authentic flavor.
- Customize the cups: Let kids decorate their own cups with faces, or use stickers to personalize them.
- Save some Oreos for topping: It’s always good to have extra crushed Oreos on hand for those who want a little more “dirt” on their pudding.
- Think ahead for events: Make the pudding mix a day in advance so you can assemble quickly on the day of your event.
Discover What’s Trending Now
Wondering what recipes are stealing the spotlight?
Check out our Recipe Trends page for fresh ideas, seasonal favorites, and dishes people can’t stop talking about.
See what’s hot in the kitchen this week and bring the buzz straight to your table!
Simple Variations to Try
The beauty of Oogie Boogie Pudding Dirt Cups is the room for creativity. Here are a few variations you can try:
- Other pudding flavors: Swap the pistachio for chocolate or vanilla pudding for a different spin.
- Add fruits: Layer in some chopped bananas or strawberries for added texture and natural sweetness.
- Make a layered effect: Create a beautiful layered look by alternating layers of pudding and Oreos.
- Use different candies: Instead of gummy worms, top with spooky gummy bats or pumpkin candies for a themed treat.
Experimentation with these variations can transform your pudding cups into personalized delights everyone will adore.
Oogie Boogie Pudding Dirt Cups
Ingredients
Method
- Using a permanent marker, draw Oogie Boogie’s face on each clear plastic cup and let them dry.
- In a medium bowl, whisk together the pistachio pudding mix and cold milk for about 2 minutes until thickened.
- Fold in the whipped topping for extra creaminess, if desired.
- Spoon the green pudding into each decorated cup, filling around ¾ full.
- Sprinkle crushed Oreos evenly over the top of the pudding.
- Decorate with gummy worms crawling out from the top of the dirt.
- Refrigerate the cups for at least 30 minutes before serving.
Nutrition
Notes
Tried this recipe?
Let us know how it was!FAQs About Oogie Boogie Pudding Dirt Cups
Satisfying your curiosity is part of the fun, so let’s answer some common questions about Oogie Boogie Pudding Dirt Cups:
Can I make this recipe ahead of time?
Yes! You can prepare the pudding a day in advance and assemble the cups just before you want to serve them. This will save you time and allow for a fresh, creamy treat.
What if I can’t find pistachio pudding mix?
No worries! You can substitute it with any instant pudding mix you like, such as vanilla, chocolate, or even butterscotch for a different flavor experience.
How long do these cups stay fresh?
Once assembled, Oogie Boogie Pudding Dirt Cups can be kept in the refrigerator for up to 2 days. Just cover them to keep them fresh.
Can I use homemade whipped cream instead of whipped topping?
Absolutely! Homemade whipped cream adds a wonderful lightness and flavor, so feel free to make your own.
What can I use instead of Oreo cookies?
If you want a gluten-free option, look for gluten-free cookies or try crushed graham crackers.
Final Encouragement or Closing Note
I hope this Oogie Boogie Pudding Dirt Cups helps you discover how simple and rewarding homemade cooking can be. Creating this dessert is about getting in the kitchen, having fun, and maybe even getting a little messy. You can do this, and the smiles you bring to your family and friends will make it all worth it. Enjoy your cooking adventure and happy indulging!
Stay Connected with Feel the Recipes
Love cooking and sharing good food? Let’s stay connected! Clara posts new recipes, helpful tips, and little moments from her kitchen every day to keep you inspired.
Join our growing community of home cooks who believe food is meant to be simple, joyful, and shared around the table.
👉 Facebook: Follow us on Facebook
📌 Pinterest: Explore our boards for endless recipe inspiration
🐦 X (Twitter): @feeltherecipes for quick tips and updates
📸 Instagram: @feeltherecipes for fresh photos and behind-the-scenes peeks
Let’s keep cooking, creating, and sharing. Whether you’re here for classic comfort food or something new to try, we’re just a click away.