

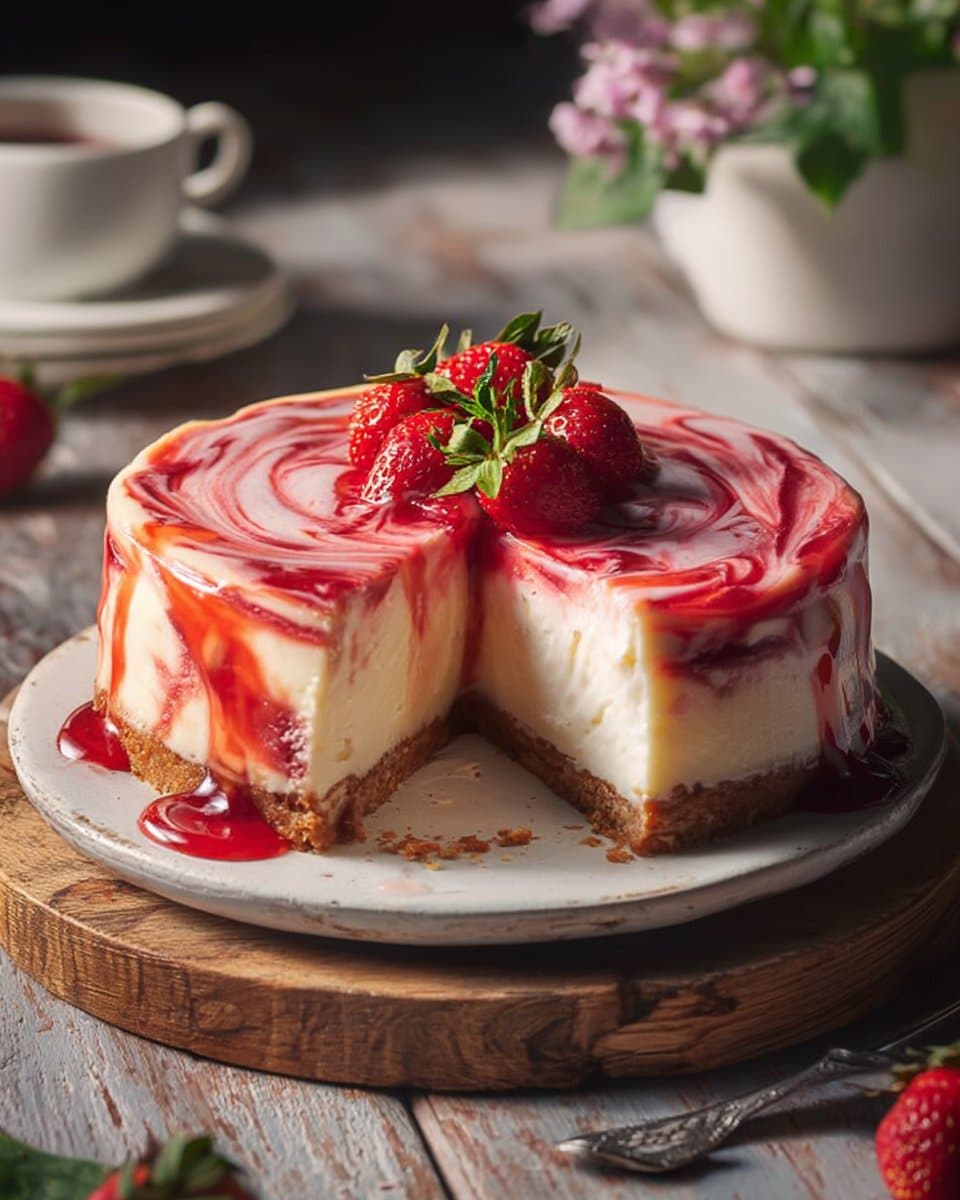
There’s something special about Strawberry Swirl Cheesecake. The way its aroma fills the kitchen makes everyone wander in for a taste. Whether it’s a family celebration or a casual weeknight treat, this cheesecake brings a warmth and joy that goes beyond its delicious flavor. Today, I’m excited to take you through a delightful cooking journey with this recipe. With simple steps and tips sprinkled throughout, you’ll be creating a stunning dessert that not only looks impressive but also tastes heavenly.
Why You’ll Love Making This Strawberry Swirl Cheesecake
Making Strawberry Swirl Cheesecake is a rewarding process. It combines a creamy, indulgent filling with a sweet and tangy strawberry sauce that swirls throughout. Everyone loves it, and it’s surprisingly easy to make.
This cheesecake is perfect for both beginners and seasoned bakers. Each step builds confidence in your baking skills while allowing you to create something beautiful. Plus, this dessert can be made ahead of time, making it a great option for gatherings. It also brings a smile to faces and gives a taste of homemade goodness that you simply can’t get from store-bought cakes.
We’ll dive into the details, but the best part is the satisfaction you’ll feel when you cut that first slice.
Step-by-Step: How to Make Strawberry Swirl Cheesecake
“Cooking isn’t about perfection. It’s about enjoying every delicious step.”
Let’s get started on our Strawberry Swirl Cheesecake. We’ll break it down into manageable steps, ensuring you feel comfortable and confident from the very beginning. First, we’ll gather our ingredients.
Ingredients You’ll Need for Strawberry Swirl Cheesecake
For the Strawberry Sauce:
- 1 ½ cups fresh or frozen strawberries, hulled
- ¼ cup granulated sugar
- 1 tablespoon lemon juice
- 1 tablespoon cornstarch mixed with 1 tablespoon water
For the Crust:
- 1 ½ cups graham cracker crumbs
- ⅓ cup granulated sugar
- ½ cup unsalted butter, melted
For the Cheesecake Filling:
- 24 ounces (3 blocks) cream cheese, softened
- 1 cup granulated sugar
- 3 large eggs
- 1 teaspoon vanilla extract
- 1 cup sour cream
- ¼ cup heavy cream
Make sure to use real butter for a rich flavor in the crust. If you can, opt for fresh strawberries to enhance the sauce, but frozen works just fine as well. Trust me, the creamy texture of the cheesecake will pair beautifully with the fresh-tasting strawberry sauce.
Directions: Cooking with Confidence
Now, let’s dive into the cooking process! Follow these steps carefully, and soon you’ll be the proud creator of a delicious Strawberry Swirl Cheesecake.
- Make the Strawberry Sauce. In a small saucepan over medium heat, combine the strawberries, sugar, and lemon juice. Cook until the strawberries soften, about 5-7 minutes.
- Create the Strawberry Puree. Use a potato masher or fork to break the strawberries into a puree. This will create a lovely texture that you’ll swirl into the cheesecake.
- Thicken the Sauce. Stir in the cornstarch slurry and cook for 1-2 minutes, until thickened. Remove from heat and let it cool completely. If you prefer a smoother sauce, you can strain it through a fine sieve after it cools.
- Prepare the Oven. Preheat your oven to 325°F (160°C). This temperature is perfect for baking your cheesecake without it cracking.
- Make the Crust. In a medium bowl, mix the graham cracker crumbs, sugar, and melted butter until evenly combined.
- Shape the Crust. Press the mixture firmly into the bottom of a 9-inch springform pan, creating an even layer. Make sure it’s well-packed so it holds together after baking.
- Bake the Crust. Bake for 8-10 minutes, then remove and set aside to cool. You want it slightly golden, but not too brown.
- Mix the Cheesecake Filling. In a large bowl, beat the cream cheese and sugar together with an electric mixer until smooth and fluffy, about 2-3 minutes. This combination is what gives your cheesecake its creamy texture.
- Add Eggs Gradually. Add the eggs one at a time, mixing after each addition. This ensures a smooth filling with no lumps.
- Combine Remaining Ingredients. Mix in the vanilla extract, sour cream, and heavy cream until just combined. Avoid overmixing, as this can cause your cheesecake to crack.
- Pour the Filling. Pour the cheesecake filling onto the prepared crust, smoothing the top with a spatula for an even layer.
- Swirl in the Strawberry Sauce. Drop spoonfuls of the cooled strawberry sauce onto the cheesecake. Then, use a knife or skewer to swirl the sauce into the filling, creating a beautiful marbled effect.
- Set Up a Water Bath. Place the springform pan into a larger baking dish. Fill the dish with 1-2 inches of hot water. The steam created during baking will keep the cheesecake moist and help prevent cracking.
- Bake the Cheesecake. Bake for 55-65 minutes, or until the edges are set and the center jiggles slightly when shaken. The jiggle is important it indicates the cheesecake is perfectly creamy.
- Cool Gradually. Turn off the oven and crack the door open. Allow the cheesecake to cool in the oven for 1 hour. This gradual cooling helps it set without cracking.
- Cool at Room Temperature. Remove from the water bath and let the cheesecake cool completely at room temperature.
- Refrigerate. Refrigerate for at least 6 hours, or overnight, for the best texture. This waiting time allows the flavors to meld and the filling to firm up.
- Release the Springform. Run a knife around the edges of the pan before releasing the springform. This step helps to avoid any sticking.
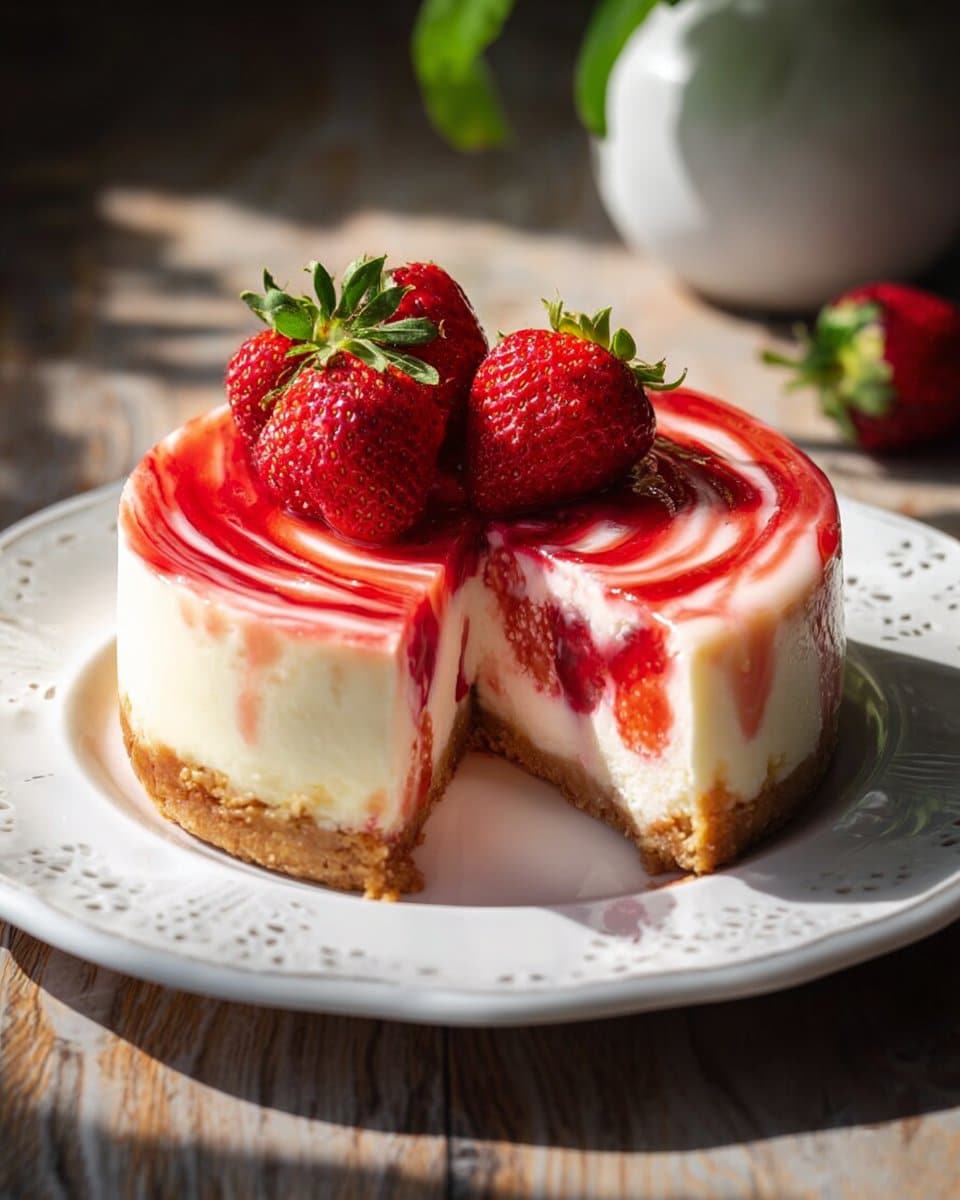
- Slice and Serve. Slice and serve with additional strawberry sauce or fresh strawberries for garnish. Each slice reveals the beautiful swirl and creamy goodness of your hard work.
How to Serve Strawberry Swirl Cheesecake and Make It Shine
Serving your Strawberry Swirl Cheesecake is just as enjoyable as making it. Here are some simple ideas to elevate your presentation while keeping it approachable.
First, consider serving each slice with a drizzle of the reserved strawberry sauce on the plate. This will enhance the berry flavor and add a vibrant color that is visually appealing.
You can also top each slice with fresh strawberries for a refreshing bite. Arrange them artfully along the side or place a few on top of the cheesecake to make it look professional.
For a touch of elegance, you could add a dollop of whipped cream on the side. It’s easy to make at home just whip some heavy cream with a bit of sugar until soft peaks form.
Lastly, a sprinkle of graham cracker crumbs on top can provide a nice texture contrast and a hint of nostalgia.
How to Store Strawberry Swirl Cheesecake for Later
Storing your Strawberry Swirl Cheesecake properly is crucial to maintaining its freshness and flavor. Here are some simple guidelines.
Once your cheesecake has set in the refrigerator, cover it lightly with plastic wrap or aluminum foil. This will protect it from absorbing odors from other foods.
It’s best consumed within 3-4 days for the freshest taste. If you anticipate keeping it for longer, consider freezing it. Wrap the cheesecake in plastic wrap tightly, then place it in an airtight container or freezer bag.
To thaw, simply move it to the refrigerator a few hours before you plan to serve it. This will help maintain the creamy texture.
If you do choose to reheat slices, do so gently in the microwave. Warm them for a short time, checking every 10 seconds to avoid overheating.
Clara’s Tips for Success
Here are some practical tips to make your baking experience as smooth as possible:
- Use Room Temperature Ingredients. Ensure your cream cheese and eggs are at room temperature before mixing. This helps create a smoother filling without lumps.
- Don’t Overmix. When adding the eggs or other ingredients, just mix until combined. Overmixing can incorporate too much air, leading to cracks as it bakes.
- Check for Cracks. If your cheesecake cracks during baking, it’s okay. You can cover it up with additional strawberry sauce when serving.
- Add Flavors. Consider adding a bit of almond extract along with the vanilla for a deeper flavor profile that complements the strawberries.
- Experiment with Toppings. Try different fruits or even chocolate shavings on top of your cheesecake. It’s a fun way to make every cheesecake unique.
Discover What’s Trending Now
Wondering what recipes are stealing the spotlight?
Check out our Recipe Trends page for fresh ideas, seasonal favorites, and dishes people can’t stop talking about.
See what’s hot in the kitchen this week and bring the buzz straight to your table!
Simple Variations to Try
While the classic Strawberry Swirl Cheesecake is fantastic, you can play around with variations to suit your taste. Here are a few creative ideas:
- Berry Swirl Mix. Replace the strawberries with other berries like raspberries or blueberries for a different flavor. You can also mix multiple berries for a colorful masterpiece.
- Chocolate Cheesecake Base. Add melted or cocoa powder to the cheesecake filling for a chocolate version. Strawberries and chocolate make a delightful pairing.
- Nutty Crust. Modify the crust by adding finely chopped nuts like almonds or pecans for added texture and flavor.
- Citrus Twist. Mix some orange or lemon zest into the filling for a refreshing pop of citrus. This adds brightness to the cheesecake and complements the strawberries beautifully.
- Swapping Creams. Try using mascarpone in place of some cream cheese for a richer flavor. It will provide a new layer of creaminess that’s hard to resist.
Strawberry Swirl Cheesecake
Ingredients
Method
- In a small saucepan over medium heat, combine the strawberries, sugar, and lemon juice. Cook until the strawberries soften, about 5-7 minutes.
- Use a potato masher or fork to break the strawberries into a puree.
- Stir in the cornstarch slurry and cook for 1-2 minutes until thickened. Remove from heat and let it cool completely.
- Preheat your oven to 325°F (160°C).
- In a medium bowl, mix the graham cracker crumbs, sugar, and melted butter until evenly combined.
- Press the mixture firmly into the bottom of a 9-inch springform pan.
- Bake for 8-10 minutes, then remove and set aside to cool.
- In a large bowl, beat the cream cheese and sugar together with an electric mixer until smooth and fluffy, about 2-3 minutes.
- Add the eggs one at a time, mixing after each addition.
- Mix in the vanilla extract, sour cream, and heavy cream until just combined.
- Pour the cheesecake filling onto the prepared crust, smoothing the top with a spatula.
- Drop spoonfuls of the cooled strawberry sauce onto the cheesecake and swirl with a knife.
- Place the springform pan into a larger baking dish and fill with 1-2 inches of hot water.
- Bake for 55-65 minutes, or until the edges are set and the center jiggles slightly.
- Turn off the oven and crack the door open. Allow the cheesecake to cool in the oven for 1 hour.
- Cool completely at room temperature, then refrigerate for at least 6 hours or overnight.
- Run a knife around the edges of the pan before releasing the springform.
- Slice and serve with additional strawberry sauce or fresh strawberries.
Nutrition
Notes
Tried this recipe?
Let us know how it was!FAQs About Strawberry Swirl Cheesecake Recipe
Can I make this ahead of time?
Yes! This cheesecake keeps beautifully in the refrigerator. You can make it up to 2 days before serving for the best flavor.
What if my cheesecake cracks?
Don’t worry too much! If your cheesecake cracks during baking, it still tastes delicious. Cover it with strawberry sauce when serving to disguise any imperfections.
Can I freeze leftovers?
Absolutely! Just wrap the cheesecake properly and freeze. It will keep for up to three months. Thaw it in the fridge before enjoying.
Can I substitute ingredients?
Yes, feel free to swap the sour cream for Greek yogurt or coconut cream for a dairy-free option. The filling will still turn out creamy.
Why do I need a water bath for cheesecake?
Baking the cheesecake in a water bath provides moisture and helps it cook evenly, preventing cracks and ensuring a smooth texture.
Final Encouragement or Closing Note
I hope this Strawberry Swirl Cheesecake Recipe helps you discover how simple and rewarding homemade cooking can be. You’ve got this. Remember, every step is part of a delicious journey. So roll up your sleeves, enjoy the process, and savor every bite of your creation. Your kitchen adventure awaits!
Stay Connected with Feel the Recipes
Love cooking and sharing good food? Let’s stay connected! Clara posts new recipes, helpful tips, and little moments from her kitchen every day to keep you inspired.
Join our growing community of home cooks who believe food is meant to be simple, joyful, and shared around the table.
👉 Facebook: Follow us on Facebook
📌 Pinterest: Explore our boards for endless recipe inspiration
🐦 X (Twitter): @feeltherecipes for quick tips and updates
📸 Instagram: @feeltherecipes for fresh photos and behind-the-scenes peeks
Let’s keep cooking, creating, and sharing. Whether you’re here for classic comfort food or something new to try, we’re just a click away.