
There’s something special about Chocolate Filled Cookies — the way their warm chocolate scent drifts through the house and makes everyone pause what they are doing. They are a small, joyful project that proves an impressive dessert does not need to be complicated. Whether you bake for company, school lunches, or a quiet night on the couch, these cookies are a hug in pastry form. If you enjoy a bakery-style treat, you might also like the tender, chewy cookies found in my bakery-style chocolate chip cookies for another easy crowd-pleaser.
Why You’ll Love Making This Chocolate Filled Cookies or The Story Behind My Chocolate Filled Cookies
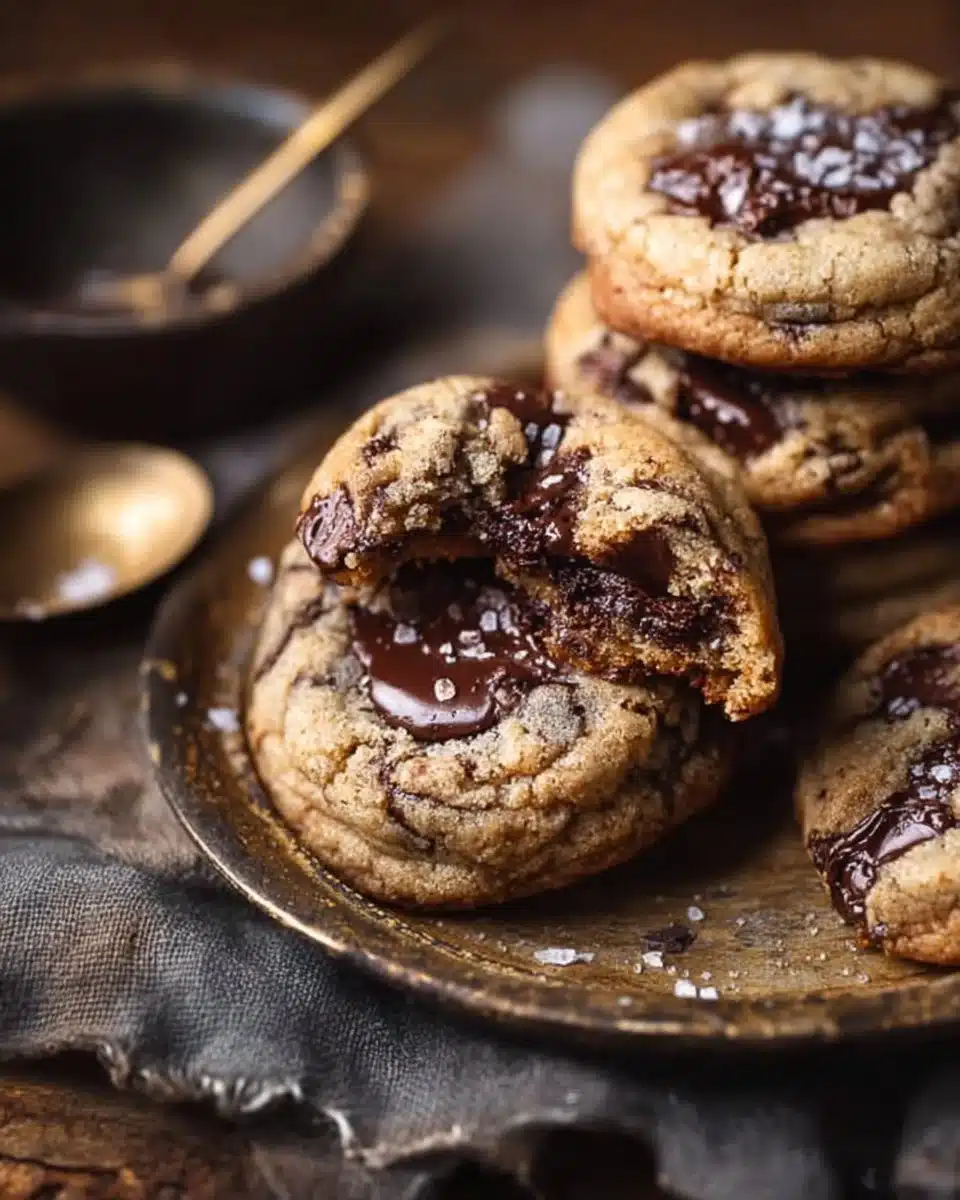
I started making Chocolate Filled Cookies on a rainy afternoon when I wanted to make something comforting but a little bit showy. They came out gooey, chocolate-streaked in the center, and perfectly golden at the edges. Friends immediately asked for the recipe. Since then I have simplified the process so anyone can make them at home without fuss.
These cookies are worth it for three reasons. First, the prep is straightforward, with a few steps you can do ahead. Second, the contrast between the slightly crisp edge and the molten center is a crowd-pleaser. Third, they freeze beautifully, so you can bake a few or mass-produce for later.
Step-by-Step: How to Make Chocolate Filled Cookies or Your Kitchen Game Plan
“Cooking isn’t about perfection. It’s about enjoying every delicious step.”
Before you begin, gather everything in one place. Measure the flour using the spoon-and-level method for accurate texture. Keep the cookie filling in the freezer while you make the dough. A chilled filling prevents it from oozing out during baking and gives you that clean, molten center when you break into the cookie.
This recipe makes roughly 16 to 20 cookies depending on how full you scoop them. Plan about 2 hours from start to finish, most of which is chilling time where the dough rests and flavors develop.
Ingredients You’ll Need for Chocolate Filled Cookies
1 cup chocolate hazelnut spread (Nutella) — use a tablespoon measure for scooping and freezing the filling.
12 tbsp unsalted butter (melted and cooled to room temperature) — use real butter for rich flavor.
1 cup light brown sugar (packed) — adds moisture and chew.
1/4 cup granulated sugar — helps with spread and subtle crisp.
1 large egg (room temperature) — brings structure and shine.
1 tbsp vanilla extract — fresh vanilla makes a big difference.
1 3/4 cup + 2 tbsp all-purpose flour (See notes for measuring below) — measure by spooning into the cup and leveling.
1 tsp baking soda — gives a gentle lift.
1 tsp fine sea salt — balances sweetness.
1 1/8 cup mini chocolate chips or finely chopped chocolate bar — choose good-quality chocolate for flavor.
Notes for measuring flour: Spoon the flour into your measuring cup and level it with a straight-edged knife. Don’t scoop directly with the measuring cup; that packs the flour and makes cookies dense.
Directions: Cooking with Confidence
-
Scoop the chocolate filling. Scoop the Nutella by the teaspoon onto a parchment-lined tray. Chill in the freezer until frozen solid, about 20-30 minutes.
- Use a leveled teaspoon for consistent centers. Drop them about 1 inch apart on the parchment so they freeze without sticking. If the Nutella is very soft, put the jar in the fridge for a few minutes first.
-
Whisk the sugar and butter. Whisk the sugar and brown sugar into the melted butter vigorously for 1 minute until combined.
- The mixture should look smooth and glossy. There is no need for electric mixers here; a strong whisk or fork will do. This step helps dissolve some of the sugar and creates a tender crumb.
-
Mix in the wet ingredients. Whisk in the egg and vanilla extract.
- Whisk until the batter looks cohesive and slightly thicker. The egg gives structure and a bit of lift. If your egg is cold, let it sit at room temperature for a few minutes first.
-
Mix in the dry ingredients. Fold in the flour, baking soda, and salt until almost combined, then fold in the chopped chocolate. Cover and chill the bowl in the fridge for 30 minutes.
- Fold gently until you see no streaks of flour. Overmixing will develop gluten and make cookies tough. The dough will look shaggy when you first fold. A short chill firms it up and reduces spread while improving flavor.
-
Scoop the cookie dough. Scoop dough with a 2-tablespoon cookie scoop, flatten, add frozen chocolate filling, seal, and roll into a round shape.
- Press the flattened dough into a small disc about 2 inches across. Add one frozen Nutella ball in the center and fold the dough around it, pinching seams closed. Roll in your palms to make a neat ball.
-
Chill the stuffed cookies. Place the cookie dough balls on a parchment-lined baking sheet. Freeze until frozen solid, about 1-2 hours minimum. Then preheat the oven to 350 F/180 C.
- Freezing helps the cookies hold their shape and keeps the filling molten inside instead of leaking out during baking. If you are short on time, 1 hour in the freezer can work, but 2 hours is best.
-
Bake! Bake the cookies spaced 2 inches apart for 10-12 minutes or until the edges are golden brown and the middle is puffy but still pale and underbaked. Let the pan cool on a wire rack for about 15-20 minutes, then remove and enjoy!
- The centers should still look slightly soft when you take them out; they will continue to set as they cool. If you like a firmer center, add 1-2 minutes to the time but watch closely.
-
Store baked chocolate filled cookies in an airtight container at room temperature for 2-3 days. The filled cookie dough balls can be frozen and stored in an airtight container or freezer bag for up to 3 months.
- Label the container with the date. To reheat frozen baked cookies, warm them in a 325 F/160 C oven for 5-8 minutes until warmed through.
Each step above is designed so you feel guided and encouraged. If something goes slightly off, there are easy fixes later in the article.
How to Serve Chocolate Filled Cookies and Make It Shine
Presentation is simple and satisfying. Arrange 3 to 4 cookies on a small plate, leaving a little space so the chocolate center can be admired when you break one apart. A dusting of powdered sugar makes them look special without much effort. For a cozy touch, serve with a small bowl of apple slices or a mug of milk.
If you want to be a little fancier, warm the cookies for 3 minutes in a 325 F/160 C oven and serve alongside vanilla ice cream. Scoop a warm cookie over a small scoop of ice cream so the gooey center meets the cold cream. It is a classic contrast of temperatures and textures.
Pair them simply: black coffee or a cup of mint tea complements the rich chocolate. For gatherings, a platter with a variety of cookie types, including a buttery shortbread or some fruit-based cookies, creates balance.

How to Store Chocolate Filled Cookies for Later
Short-term storage: Keep baked cookies in an airtight container at room temperature for 2 to 3 days. Add a small piece of bread to the container to help maintain softness. Replace the bread every day if you keep them longer.
Refrigeration: You can refrigerate for up to 5 days, but the texture changes slightly and they become firmer. Warm gently before serving to restore a soft center.
Freezing baked cookies: Freeze baked cookies in a single layer on a tray, then transfer them to a freezer-safe bag once solid. They keep well for up to 3 months. Thaw overnight at room temperature, then warm in a low oven for a few minutes.
Freezing unbaked stuffed dough: Place the sealed cookie dough balls on a tray and freeze until solid. Move them into an airtight container or freezer bag and store up to 3 months. When ready to bake, place frozen dough on parchment and add 1-2 extra minutes to the baking time.
Reheating tips: Reheat a single cookie in the microwave for 8-12 seconds to soften the center, but be careful not to overheat. For even warming, use a 325 F/160 C oven for 4-6 minutes. Always let them cool a minute before eating.
Clara’s Tips for Success
-
Use a chilled filling. Freezing the Nutella scoops is the key to a clean, molten center without leakage. Frozen centers hold their shape while the cookie bakes and then melt into that delicious goo.
-
Measure flour correctly. Too much flour makes cookies dry and cakey. Spoon flour into the cup and level with a knife for the best texture.
-
Don’t overbake. The cookies should look slightly underdone in the middle when you pull them. They continue to set as they cool and that gives you the soft, gooey interior.
-
Seal seams well. When you enclose the frozen filling, make sure to pinch the dough so there are no gaps. A small crack can become a chocolate leak while baking.
-
Try room temperature vs chilled dough for controlled spread. If your kitchen is warm, chill the dough on the tray before baking to prevent too much spreading.
Simple Variations to Try
-
Double chocolate: Replace half the flour with cocoa powder (about 1/2 cup) for a chocolate dough, and use a dark chocolate ganache for the center. You may need to add a tablespoon of milk if the dough feels dry.
-
Salted caramel filling: Use small scoops of store-bought soft caramel or homemade caramel in place of Nutella for a sweet-salty surprise. Sprinkle a few flakes of sea salt on top after baking.
-
Peanut butter twist: Swap the hazelnut spread with a firm peanut butter cup center. Freeze mini peanut butter cups or spoon thick peanut butter mixed with a little powdered sugar.
-
Nutty crunch: Toss a tablespoon of chopped toasted hazelnuts into the dough for extra texture. The toastiness complements the chocolate filling beautifully.
-
Fruity version: Add a teaspoon of raspberry jam to the Nutella center for a fruity burst. This is where inspiration from other recipes like blueberry white chocolate chip cookies can guide pairing ideas.
-
Mini cookies: Make bite-sized versions using 1-teaspoon dough balls and tiny frozen centers. Adjust bake time to 7-9 minutes.
Each variation follows the same basic method: freeze the center, seal it in dough, chill again, and bake until golden at the edges.
FAQs About Chocolate Filled Cookies
Q: Can I make this ahead of time?
A: Yes. The frozen dough balls keep well for up to 3 months. Pull them from the freezer and pop them straight onto a baking sheet. Add 1-2 minutes to the bake time if baking frozen.
Q: My filling leaked a little while baking. What did I do wrong?
A: Most likely the filling wasn’t frozen solid or the dough seam wasn’t sealed tightly. Make sure the filling is well frozen and press the dough around it, smoothing the seam to prevent cracks.
Q: Can I use a different filling instead of Nutella?
A: Absolutely. You can use caramel, peanut butter, or a small chocolate truffle. Adjust freezing and sealing the same way for best results.
Q: How can I make the center extra gooey?
A: Chill the dough thoroughly but don’t overbake. Pull cookies when the center still looks slightly underdone and let them rest on the pan. The residual heat finishes the bake and creates a molten center.
Q: Can I make the dough without eggs?
A: For an egg-free version, use a flax egg (1 tbsp flaxseed meal + 3 tbsp water, chilled). The texture will be slightly different, but it will still be delicious. You may need to rest the dough in the fridge longer to firm up.
Troubleshooting Quick Guide
- Cookie spread too much: Chill dough and filling longer next time. Reduce oven temperature by 10 F if your oven runs hot.
- Cookies are cakey: You probably added too much flour or overmixed. Use the spoon-and-level method for flour and fold gently.
- Center too firm after baking: Bake a little less next time or warm briefly before serving to soften the middle.
A Little More on Technique and Sensory Cues
When the dough comes together it should be soft but not sticky. You will know you have the right consistency when it holds shape when scooped and forms a smooth ball in your hands.
While whisking the sugar and butter, listen for the soft whisking sound and watch for the glossy sheen that indicates the sugar is beginning to dissolve. When you fold in the chocolate, you will see ribbons of chips or shavings. The scent at this point should be warmly sweet with a hint of toasted butter.
As the cookies bake, watch them transform. The edges will first darken to a light golden brown and the center will puff slightly. That puffy, pale center is your cue to remove them. They will settle and look glossy; that gloss is the molten promise beneath the surface.
What to Serve Them With
Coffee: A medium roast with chocolatey notes is a natural fit.
Milk: Cold whole milk for classic pairing, or oat milk for a subtle nutty hint.
Ice cream: Vanilla bean or salted caramel are perfect companions.
Fruit: Sliced apples and pears add a fresh contrast that cleanses the palate.
Gift and Party Ideas
Wrap a stack of 4 to 6 cooled cookies in parchment and tie with baker’s twine for a simple homemade gift. For parties, make a small cookie station with warmers so guests can enjoy the cookies with optional toppings like sea salt, chopped nuts, or a drizzle of extra Nutella.
Clara’s Final Baking Encouragement
Baking is part skill, part intuition, and mostly joy. These Chocolate Filled Cookies reward small attention to detail — freezing the centers, measuring flour properly, and watching the bake — with a result that feels indulgent and special. You do not need perfect tools; you need a willing heart and a readiness to enjoy the process.
Conclusion
I hope this Chocolate Filled Cookies helps you discover how simple and rewarding homemade cooking can be. You’ve got this. If you want more ideas for stuffed or indulgent cookies, take a look at this helpful recipe for Chocolate Filled Cookies | Kitchen 335 to compare techniques and inspiration. For a second perspective on a thick and gooey version, read the take from The Best Chocolate Filled Cookies (Thick and Gooey) – Alpine Ella.

Chocolate Filled Cookies
Ingredients
Method
- Scoop the Nutella by the teaspoon onto a parchment-lined tray. Chill in the freezer until frozen solid, about 20-30 minutes.
- Whisk the sugar and brown sugar into the melted butter vigorously for 1 minute until combined.
- Whisk in the egg and vanilla extract until the batter looks cohesive and slightly thicker.
- Fold in the flour, baking soda, and salt until almost combined, then fold in the chopped chocolate. Cover and chill the bowl in the fridge for 30 minutes.
- Scoop dough with a 2-tablespoon cookie scoop, flatten it, add the frozen chocolate filling, seal, and roll it into a round shape.
- Chill the stuffed cookie dough balls on a parchment-lined baking sheet until frozen solid, about 1-2 hours minimum.
- Preheat the oven to 350°F (180°C). Bake the cookies spaced 2 inches apart for 10-12 minutes until the edges are golden brown and the middle is puffy but still pale.
- Let the pan cool on a wire rack for about 15-20 minutes, then remove and enjoy!