DIY crystal seashells transform ordinary shells into glittering treasures. As crystals attach and expand, each shell becomes a sparkling surprise. Save this ocean-inspired science craft! It’s one of those busy afternoons when the kids suddenly announce they want to create something magical. Without a lot of time to prepare or a long list of materials, you want a project that delivers real results without the chaos. This is where DIY crystal seashells come in. They’re not just visually captivating; they also offer an engaging way to learn about crystals and the beauty of nature. You’ll feel that rush of satisfaction as each shell turns into a treasure, allowing everyone to bask in the joy of creativity.
Why You’ll Love Making DIY crystal seashells transform ordinary shells into glittering treasures. As crystals attach and expand, each shell becomes a sparkling surprise. Save this ocean-inspired science craft!
This DIY project is low-prep and approachable, making it perfect for families with busy schedules. You only need a handful of common household items, and you won’t spend hours setting up. The beauty of this craft lies in how reliably it works. Crystals form as kids engage with the materials, creating visual excitement without requiring complicated processes. With just a little bit of adult involvement to oversee key moments, kids will be thrilled to watch their creations develop. It suits all kinds of ages and attention spans, so everyone can take part.
A Quick Look Before You Begin
You can complete this project in a couple of hours, although it may take longer for the crystals to fully form. Set aside time for a quick setup, and don’t worry too much about mess — any spills are usually just a little water. You’ll want to have a clear workspace, as this will help keep things organized. The level of adult involvement varies; children can handle most of the steps with guidance. Let them take the lead and get hands-on, while you supervise and assist as needed.
Materials You’ll Need
- Sea shells (clean and dry)
- Epsom salt (common household item)
- Water (easy to find)
- A small saucepan (to heat water)
- Heat-resistant bowl (for mixing)
- Spoon (for stirring)
- Cookie sheet (for drying shells)
- Optional: food coloring (to add fun colors)
Step-by-Step Directions
- Begin by gathering your sea shells. Rinse them well and let them dry completely. Look for shells of various sizes for variety.
- In a small saucepan, heat one cup of water over medium heat. You want it hot but not boiling.
- Gradually add a half cup of Epsom salt to the water. Stir continuously until the salt fully dissolves. You’ll notice a slight texture in the water as the salt combines.
- If you’d like to add color, now is the time. A few drops of food coloring will transform the water into a beautiful hue and add a touch of fun to your project.
- Carefully pour this hot salt solution into a heat-resistant bowl. Let it cool for a minute, keeping an eye on the temperature.
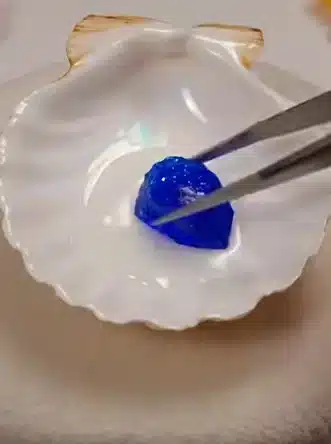
- Now, dip each shell into the salt solution. Make sure to coat them thoroughly. You want every nook and cranny covered for the best results.
- Place the coated shells on a cookie sheet lined with parchment paper. This prevents the shells from sticking as they dry.
- Allow the shells to sit undisturbed in a warm place. Depending on conditions, give them a few hours or overnight to form their crystals.
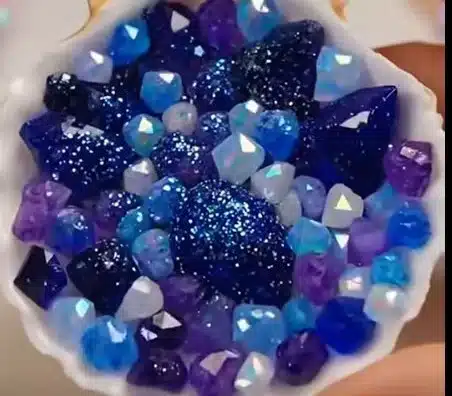
- Once the shells have dried, check to see if the crystals formed to your liking. If they need more time, leave them out for another day.
- Take a moment to admire the sparkling beauty of your creations as the crystals catch the light!
The Simple Science or Skills at Work
While making these crystal seashells, kids engage in a hands-on science experiment that teaches them about crystallization. As they observe how the Epsom salt dissolves and then re-forms into crystals, they experience cause and effect firsthand. Fine motor skills develop as they handle the shells and pour the solution, enhancing their coordination. They will enjoy the tactile sensation of dipping each shell, which is also a great opportunity to practice patience while waiting for results.
Troubleshooting Common Issues
You might run into a few bumps along the way, and that’s perfectly normal. If you notice no crystals forming after a day, it may be because the solution was too diluted. Either let the mixture evaporate for longer or re-do the dipping step with a more concentrated solution. If crystals look too small, consider allowing them more time in the solution. It’s important to ensure that the shells are well-coated; flaky sections might prevent the crystals from forming evenly.
Easy Variations to Try
If you want to switch things up, consider these easy variations:
- Use different types of shells: Try large sea fans or smaller, delicate shells for varied results.
- Engage with colors: Instead of just one color, experiment with multiple food colorings for vibrant effects.
- Try other crystal types: Use sugar instead of Epsom salt to learn about how different materials create crystals.
- Make themed shells: Create decorations for holidays or special occasions by coloring the crystals differently.
- Host a shell-watching party: Have everyone make their own batch and share their results after the wait.
Storing or Reusing This Project
After making your crystal seashells, it’s easy to care for them. Display your creations in a special place at home, such as a shelf or in a sunny window. If they need cleaning, gently rinse them under lukewarm water but do avoid scrubbing as that may damage the crystals. If any shells break or if crystals start to crumble, remember to recycle the materials responsibly. Encourage your kids to explore other artistic projects with their shells.
FAQs About DIY crystal seashells transform ordinary shells into glittering treasures.
How messy is this project? It usually involves just a bit of water and salt. If you’re careful during the dipping step, you won’t have a lot to clean up afterward. Any spills are easy to wipe away.
Can kids of all ages do this? Yes! Younger kids may need some assistance, particularly with the hot water. Older kids can manage most steps independently but should still have supervision for safe practices.
What if I don’t have Epsom salt? You can substitute with table salt or sugar, but the crystal formation might differ. Just note that results can vary.
How long will the crystals last? Once formed, the crystals can remain on the shells for a long time if kept in a dry place. Remember to handle them gently as they can be fragile.
Can I store leftover materials? Yes! Both the Epsom salt and any unneeded shells can be stored for future projects. Just keep the salt in a cool, dry location.
A Final Helpful Note
As you wrap up this creative project, remember to celebrate what you’ve made together. Encouragement goes a long way, especially after watching the shells transform into sparkling beauties. Enjoy the process; it’s all about the joy of creation. You didn’t just make crystal seashells; you also made memories that will last. Feel free to adapt the steps to fit your family’s routines. The beauty of DIY is that it can always be shaped around your preferences and schedule. Embrace the fun and let your creativity flow.

DIY Crystal Seashells
Ingredients
Method
- Gather your sea shells. Rinse them well and let them dry completely.
- In a small saucepan, heat one cup of water over medium heat until hot but not boiling.
- Gradually add a half cup of Epsom salt to the water, stirring continuously until fully dissolved.
- If desired, add a few drops of food coloring to the salt solution.
- Carefully pour the hot salt solution into the heat-resistant bowl and let it cool for a minute.
- Dip each shell into the salt solution, ensuring they are thoroughly coated.
- Place the coated shells on a cookie sheet lined with parchment paper.
- Allow the shells to sit undisturbed in a warm place for a few hours or overnight to form crystals.
- Check if crystals formed; if not, leave them out for another day.
- Take a moment to admire the sparkling beauty of your creations as the crystals catch the light!