
There’s something special about DIY Lava Lamp—the way its vibrant colors swirl, the joy it brings as you watch it bubble and dance. It’s not just a fun project to liven up your space; it’s a testament to the magic that happens when we blend simple ingredients to create something fascinating. This engaging activity is not only a great way to spark creativity but also allows you to spend quality time with loved ones as you watch the bubbles rise and fall. So roll up your sleeves, and let’s dive into the delightful world of DIY Lava Lamp making.
Why You’ll Love Making This DIY Lava Lamp
Creating your own DIY Lava Lamp is more than just a fun science experiment; it’s a unique way to channel your creativity and add a little whimsy to your home. It’s incredibly easy to do, which means it’s perfect for all ages. Whether you’re young or simply young at heart, there’s an engaging simplicity in the way oil and water interact, creating a moving masterpiece right before your eyes. This project can also foster learning by illustrating concepts like density and reactions, making it not only enjoyable but educational too.
The best part? You can tailor the colors and effects to fit your mood or theme. Want a calming blue for a serene space? Or perhaps a fiery red to energize your environment? The possibilities are endless, and it allows for some hands-on fun.
Step-by-Step: How to Make DIY Lava Lamp
“Cooking isn’t about perfection. It’s about enjoying every delicious step.”
Before we get started, let’s set the stage. This project requires just a few ingredients and materials that you likely already have at home. Gather your supplies, clear your workspace, and let’s embark on this fun journey together.
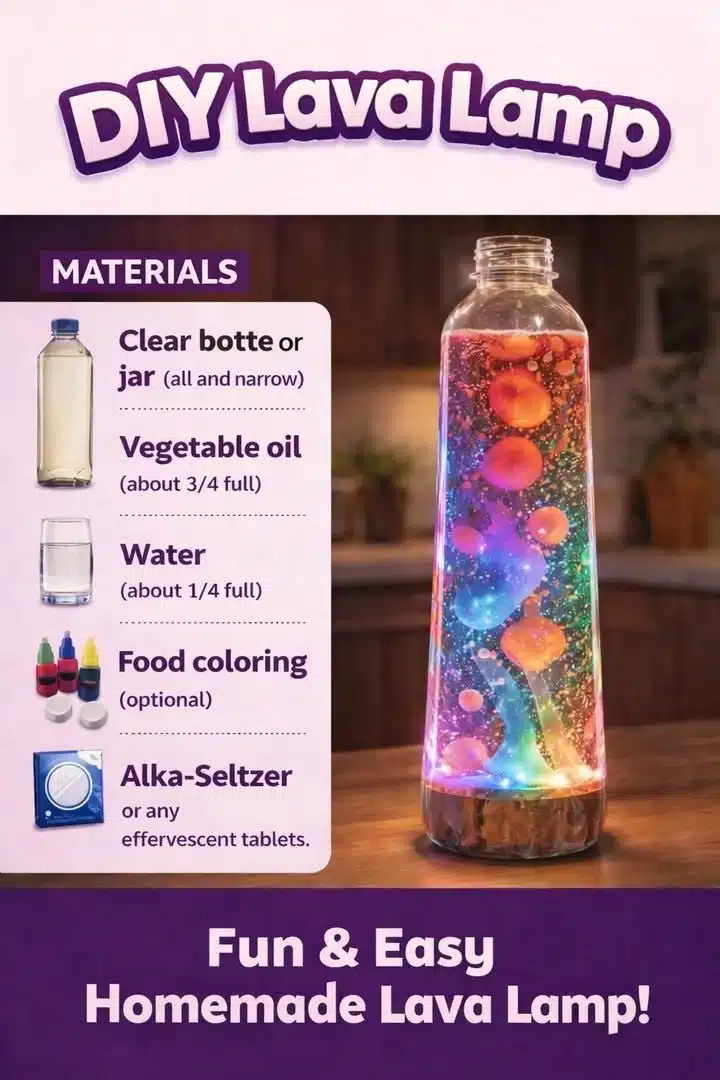
Ingredients You’ll Need for DIY Lava Lamp
- 1 clear bottle or jar (tall and narrow): This will be your magic lamp! Make sure it’s clean for the best viewing experience.
- Vegetable oil (about 3/4 full): Regular or canola oil works great. This is the base that creates the lovely bubbles.
- Water (about 1/4 full): You’ll want to use regular tap water, as it gives the right effect when combined with the oil.
- Food coloring (optional): A drop or two can make your lamp more exciting and colorful.
- Alka-Seltzer tablets or any effervescent tablets: These are key to creating the bubbling effect. One tablet is usually enough for a dazzling show, but you can use more if desired.
Now that you have everything ready, let’s move on to the fun part—making your lava lamp!
Directions: Cooking with Confidence
- Start with a clean, clear bottle or jar. This will be your magic lamp!
- Pour vegetable oil into the jar until it’s about 3/4 full. Watch it glide! This part is mesmerizing. You should see the oil pour in with a beautiful smoothness.
- Add water slowly until the jar is about 1/4 full. Notice how the oil and water stay separate. This demonstrates the concept of density in a surprisingly visual way.
- If you like, add a few drops of food coloring to the water for a lovely swirl. Choose colors that make you happy. Mix gently with a spoon if you want a marbled effect.
- Break the Alka-Seltzer tablet into small pieces. Drop one piece at a time into the jar. You’ll notice the moment you drop it in, a fantastic reaction begins to take place.
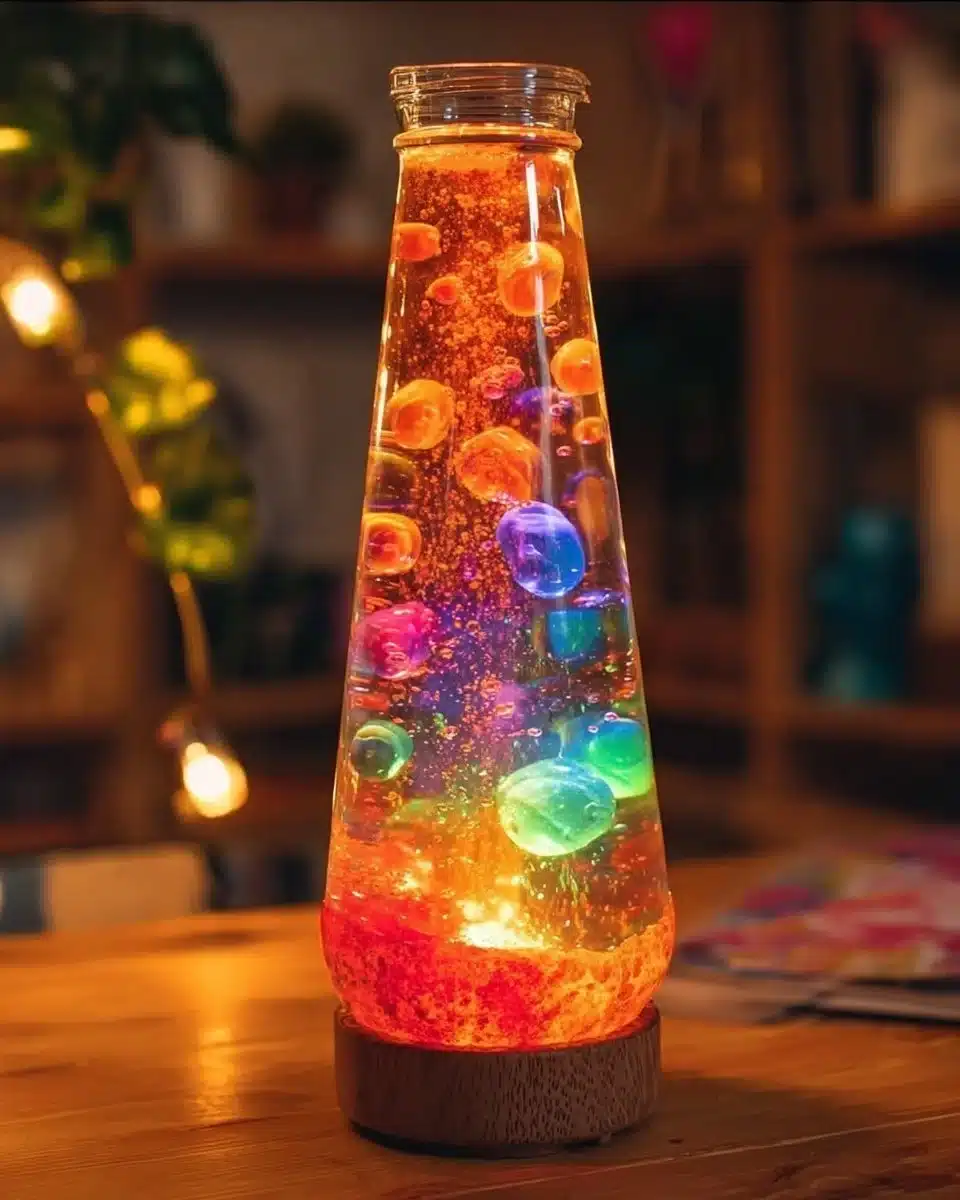
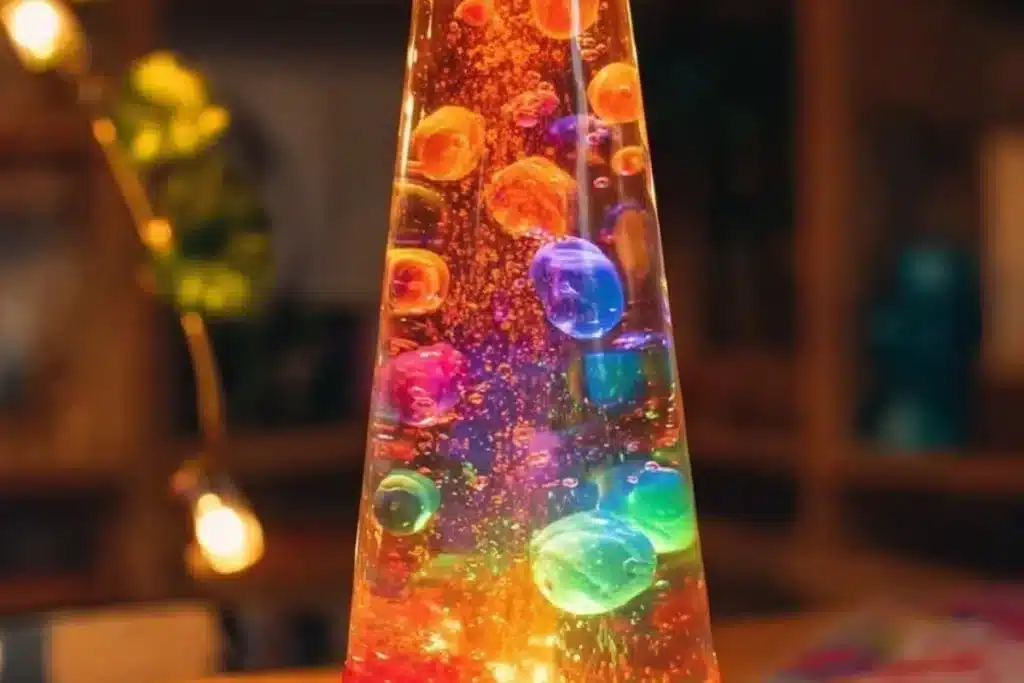
- Sit back and watch the enchantment unfold as the bubbles rise and fall like a lava lamp. Isn’t it magical? Take a moment to enjoy this spectacle, feeling accomplished for making your creation come to life.
How to Serve DIY Lava Lamp and Make It Shine
While you won’t exactly be “serving” your lava lamp like a dish, you can certainly showcase it beautifully in your home. Place your DIY Lava Lamp on a side table, in the living room, or wherever you want to add a pop of fun and color to the atmosphere.
To make it stand out even more, consider pairing it with dim lighting or placing it near a light source that lets the colors pop. You can also create a small display with other DIY projects or colorful candles to enhance the overall look. Each time you turn your lamp on, it will invite curiosity and conversations among family and friends, sparking joy and laughter as you share the experience of making it.
How to Store DIY Lava Lamp for Later
If you decide to take a break and not run your lava lamp continuously, you can easily store it. Simply place a lid on the bottle or cover it gently with plastic wrap. It will keep well for a while, but be mindful that the reaction will stop once the Alka-Seltzer is used up.
When you’re ready to enjoy it again, just add another piece of the Alka-Seltzer tablet into the mix, and you will be back in business. Remember, this creation is meant to bring enjoyment, so embrace the simplicity and focus on having fun with each new attempt.
Clara’s Tips for Success
-
Use clear containers: This is crucial for visibility. The clearer the jar, the more you will enjoy watching the magic unfold.
-
Experiment with colors: Try different colors and combinations. A couple of drops can yield stunning results, especially if you mix shades.
-
Keep it clean: Make sure your bottle is free of any residue before you start so that nothing interferes with the beauty of your lamp.
-
Avoid using too much water: This can make the lamp less effective. Stick to the 1/4 full guideline for optimal results.
-
Don’t rush: Enjoy each step of the process. The waiting and watching are a big part of the fun in this DIY project.
Simple Variations to Try
Once you feel confident in making the basic DIY Lava Lamp, consider exploring variations. How about adding glitter to the water for a sparkly effect? Or instead of regular food coloring, you might grab some neon or pastel colors for a different vibe altogether.
If you’re feeling ambitious, try using colored oil by adding food coloring directly into the oil before you pour! It’s a playful twist that can create unexpected visuals. You could even theme your lamp based on seasons or holidays, changing colors to fit the festive mood.
FAQs About DIY Lava Lamp
-
Can I make this ahead of time?
Yes! You can prepare the jar with oil and water and store it. Just wait to add the Alka-Seltzer until right before you want to use it. -
What if my lava lamp doesn’t bubble?
Check if you’ve added enough Alka-Seltzer. You may need to adjust the amounts of oil or water as well. -
Can I reuse the Alka-Seltzer?
Once it has dissolved in water, it cannot be reused. Simply add a new tablet for the bubbly experience. -
What can I use instead of Alka-Seltzer?
Other effervescent tablets like certain fizzy vitamins or antacids can also work, but be sure to test it out first as it may vary. -
Is it safe for kids?
Yes! This project is safe for children with adult supervision. It’s an excellent way to get them engaged in a science-themed project.
Final Encouragement or Closing Note
I hope this DIY Lava Lamp helps you discover how simple and rewarding homemade projects can be. With just a few ingredients, you’ve created a delightful piece of art that invites curiosity and wonder. Remember, every step you take in the kitchen or during any project is a chance to learn and grow. You’ve got this, and I can’t wait to see what you create next. Enjoy the burst of color and bring joy into your home with your new DIY Lava Lamp.
DIY Lava Lamp
Ingredients
Method
- Start with a clean, clear bottle or jar.
- Pour vegetable oil into the jar until it’s about 3/4 full.
- Add water slowly until the jar is about 1/4 full.
- If desired, add a few drops of food coloring.
- Break the Alka-Seltzer tablet into small pieces and drop one piece at a time into the jar.
- Watch the bubbles rise and fall as the reaction occurs.