
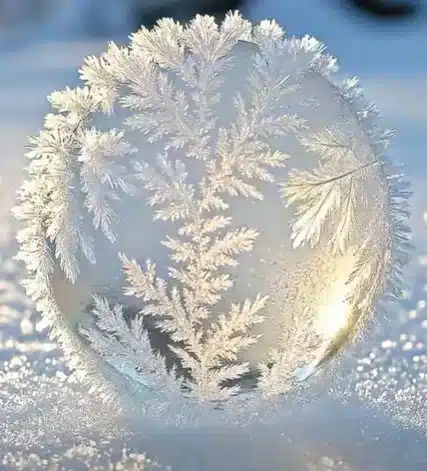
Have you ever found yourself in the midst of a busy afternoon, with kids anxiously asking for something fun to create? Perhaps the weather outside is chilly, and you’re searching for a quick, engaging activity that can bring a little magic into your home. Imagine the delight on their faces as they watch tiny bubbles dance and shimmer right before their eyes. This is where the enchanting world of Frozen Bubbles comes in. With just a few simple ingredients, you can turn an ordinary day into a whimsical experience that invites laughter and awe.
Why This Frozen Bubbles Works So Well
Making Frozen Bubbles is not just an entertaining activity; it’s low-prep and easy to execute, making it perfect for busy households. All you need are common household items, which means you likely don’t have to make a last-minute trip to the store. The real beauty of this project lies in how reliable it is. The bubbles freeze on contact with cold surfaces, creating a stunning visual that you and your kids can marvel at together. You can also set it up quickly and watch the magic unfold without extensive planning.
A Quick Look Before You Begin
Creating Frozen Bubbles is a straightforward process that you can fit into your day without feeling overwhelmed. Expect to spend about 15 minutes preparing the bubble solution. Once it’s ready, the most fun part—blowing bubbles—only takes a few minutes. This means you can easily turn this into a delightful pause in your day without committing to a lengthy project.
You won’t need a vast amount of space or elaborate setups; a kitchen table or your backyard on a chilly day works perfectly. Keep in mind that this activity does involve some bubbles, so a quick cleanup afterward is always a good idea, but it won’t be anything too daunting. If you’re working with younger children, be nearby to help them navigate the straw and bubble blowing, ensuring they can enjoy the process safely.
Materials You’ll Need
- Corn syrup: This common household item adds stickiness to help your bubbles hold their shape better.
- Dish soap: Use any standard dish soap you have at home; it creates the bubble’s structure.
- Water: This will help to dilute the syrup and soap, making it easier to blow bubbles.
- Optional: Glycerin: If you want extra-strength bubbles, adding glycerin will give them more longevity.
Step-by-Step Directions
- In a small bowl, mix the corn syrup, dish soap, and water together. Use about 1 part corn syrup, 1 part dish soap, and 2 parts water. This combination creates a robust bubble solution that glistens.
- If you’re using glycerin, add it now for extra strength. Just a teaspoon in the mix will help create thicker bubbles that freeze better.
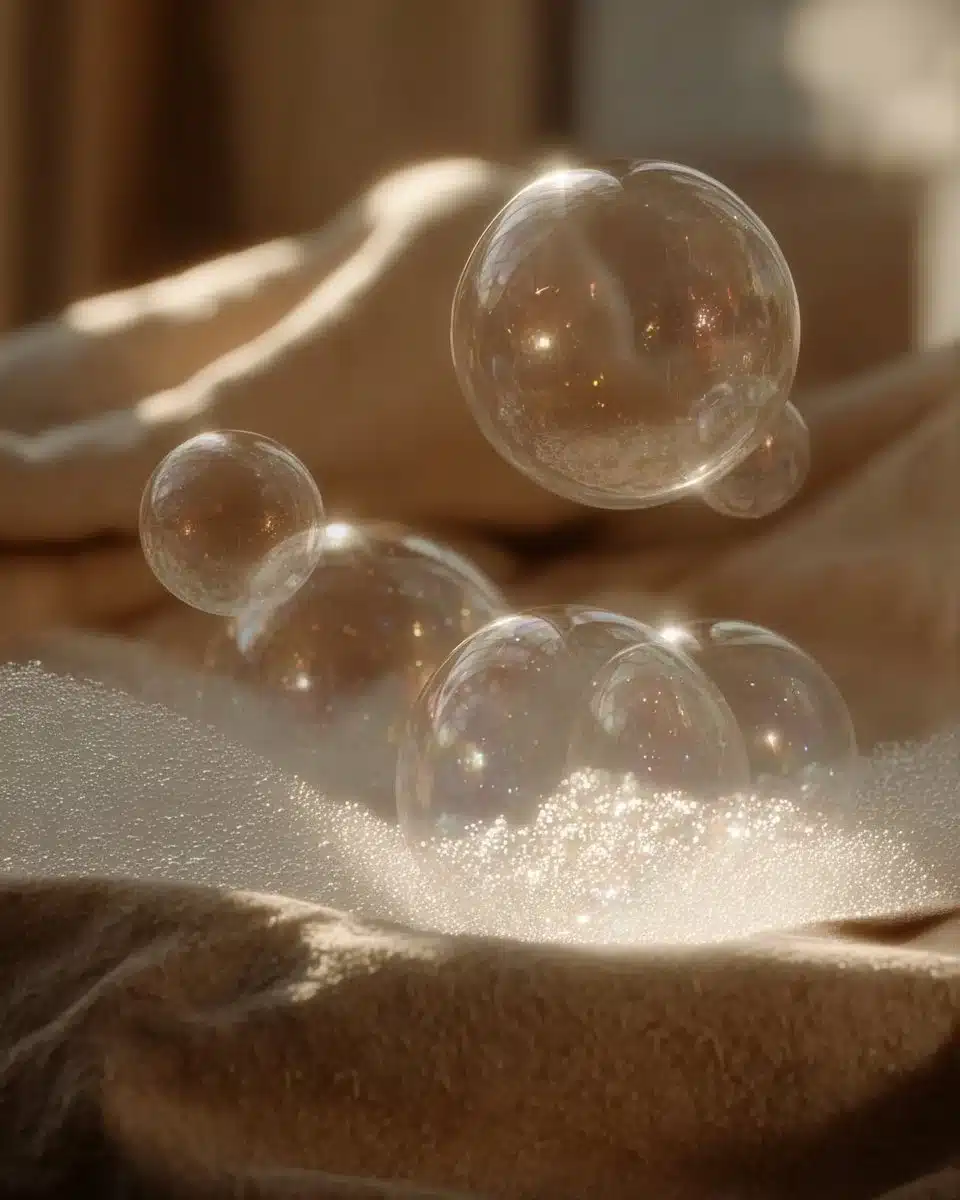
- Dip a straw into the solution, then gently blow a bubble onto a cold surface. Be careful not to pop it! Little puffs of air will create magical floating globes of color.
- Try to blow smaller bubbles and touch them close to the surface to keep them from falling. Practice your bubble-blowing technique, as the gentler the blow, the better the bubbles will float.
The Learning Behind This DIY

As your kids engage in making Frozen Bubbles, they are unknowingly practicing essential skills. The act of dipping the straw and gently blowing helps develop fine motor skills and hand-eye coordination. They learn about cause and effect when they see that their breath creates bubbles and get immediate feedback when the bubbles freeze upon hitting a cold surface.
Engaging in this type of experiment also lays the groundwork for scientific understanding. Kids can observe how the bubble forms – the mixture of ingredients creates a thin film that holds the air in. You can encourage them to ask questions about what they see and make predictions about what will happen next.
Troubleshooting Common Issues
If something doesn’t go as planned, you’re not alone. Sometimes, the bubbles might pop before they reach the surface. This often happens if the mixture is too thin or if the blowing is too hard. A gentle approach can help. If bubbles are sliding away instead of freezing, check the temperature of your surface. Make sure it’s cold enough, or try a colder area outside or in the freezer for a minute before blowing the bubbles.
Easy Variations to Try
You don’t have to stop at just Frozen Bubbles; there are creative twists you can add:
- Add Food Coloring: A drop of food coloring can turn your bubbles into vibrant art.
- Dry Ice: If you’re feeling adventurous, try making them with dry ice for the ultimate freeze experience. Just handle it carefully and with adult supervision.
- Bubble Shapes: Try using a larger straw or different shaped objects to blow bubbles and see what happens.
- Seasonal Themes: Make festive bubbles in the winter by adding glitter or using cookie cutters for unique shapes.
Storing or Reusing This Project
After your bubble-making adventure, you might find you have leftover solution. Pour any remaining bubble mix into a sealed container, and store it in a cool place. A jar or even an old soda bottle works well. Make sure to label it so you don’t mix it up with your regular kitchen supplies.
If you want to clean up, a damp cloth or paper towels will easily handle any spills, and you’ll likely have only a minor mess to tidy up afterward.
FAQs About Frozen Bubbles
“Do these make a mess? I can’t stand cleaning it up.” It’s minimal! The ingredients are sticky, but with a bit of preparation and a damp rag on hand, you won’t be looking at a huge mess.
“Are these bubbles safe for kids?” Yes, definitely! The ingredients are non-toxic and safe for kids. Just remind them not to eat or drink the solution.
“Can we use different soaps or ingredients?” Yes, dish soap is best, but you can experiment with others if you want, although results may vary.
“I’m worried I won’t get good bubbles; will they freeze properly?” If you follow the steps and don’t blow too hard, you should get great results! Remember, it might take a little practice. Adjust your technique if things aren’t working perfectly.
“Will we have to throw everything away after? Can we reuse some of the stuff?” Great question! You can definitely store any leftover bubble solution for another day. Just make sure it’s sealed tight.
A Final Helpful Note
Remember, the joy of making Frozen Bubbles lies in the experience, not just the results. Enjoy the simple pleasure of blowing bubbles and watching them freeze, and don’t worry if everything isn’t perfect. Each attempt is a learning opportunity, and the fun is in the process. Be confident in your ability to guide your children through this delightful adventure, and let each bubble lift their spirits on a chilly day. Happy bubbling!

Frozen Bubbles
Ingredients
Method
- In a small bowl, mix the corn syrup, dish soap, and water together in the ratio of 1 part corn syrup, 1 part dish soap, and 2 parts water.
- If using glycerin, add it to the mix at this stage for stronger bubbles.
- Dip a straw into the bubble solution and gently blow a bubble onto a cold surface.
- Be careful not to pop it; smaller bubbles work better for freezing.
- Practice your bubble-blowing technique and enjoy the sight of floating globes.