
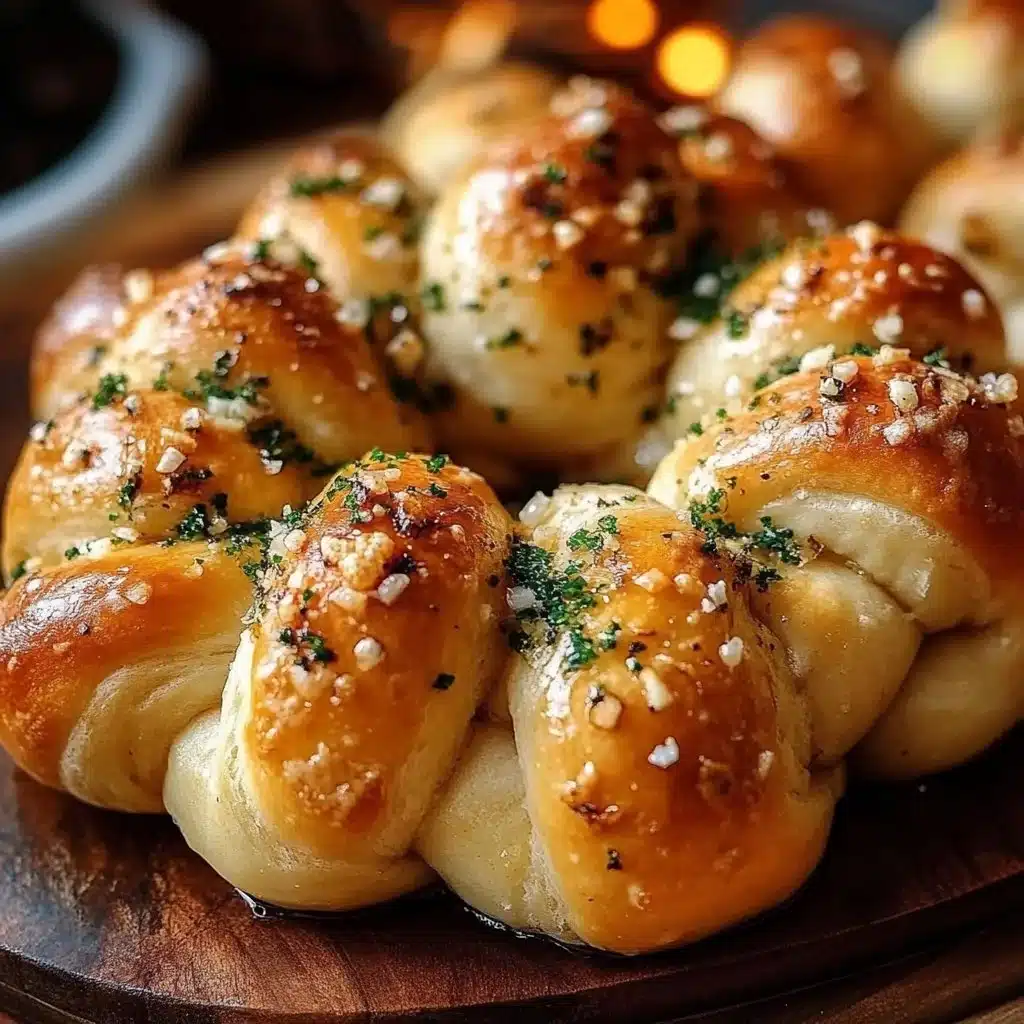
There’s something special about Garlic Knots, the way the smell of garlic and butter moves through the house and gathers people in the kitchen. They are small, humble, and somehow celebratory, a warm invitation to eat right away. Making them yourself brings a quiet pride, the kind that happens when you shape dough with your hands and pull a steaming knot from the oven.
If you enjoy simple bread baking that rewards you fast, this recipe will feel like a friendly secret. It pairs beautifully with soups, salads, or just a bowl of marinara for dipping. If you want a cheesy side to serve alongside, try this buttery cheese garlic rolls recipe for another crowd-pleaser. You’ve got this.
Why You’ll Love Making This Garlic Knots or The Story Behind My Garlic Knots
Garlic Knots are one of those recipes that look impressive on the table but are truly kind to home cooks. The dough is forgiving, the assembly is meditative, and the payoff is immediate: golden, soft knots brushed with garlicky butter that melt in your mouth.
I make these whenever friends stop by or when I want a cozy dinner at home. They are a bridge between simple pantry ingredients and comforting, fresh-baked bread. They teach you how to handle dough without fear, and they reward the hands-on work with aroma and texture that feels homemade.
Step-by-Step: How to Make Garlic Knots or Your Kitchen Game Plan
“Cooking isn’t about perfection. It’s about enjoying every delicious step.”
Before you begin, set up a small station: a mixing bowl, a floured surface for kneading, a bench scraper or knife for dividing the dough, and a parchment-lined baking sheet. Measure ingredients close by, and warm your water until it feels like a hot bath to your wrist, not scalding.
This recipe is straightforward and forgiving. The yeast bloom tells you the dough is ready. The dough texture, smooth and slightly tacky, is the true signal. Work gently, keep your workspace lightly floured, and remember the knots do not have to be perfect to be delightful.
Ingredients You’ll Need for Garlic Knots
3 cups all-purpose flour (start with 2 3/4 cups and add more if dough is sticky)
1 cup warm water (about 105 to 115°F, warm to the wrist)
2¼ teaspoons instant yeast (a standard packet)
1 tablespoon sugar (feeds the yeast and adds a touch of golden color)
1 teaspoon salt (fine sea salt or kosher salt)
2 tablespoons olive oil (for dough softness and flavor)
¼ cup unsalted butter, melted (use real butter for rich flavor)
4 cloves garlic, minced (fresh is best for bright garlic flavor)
2 tablespoons fresh parsley, chopped (fresh herbs make all the difference)
2 tablespoons grated Parmesan cheese, optional (adds savory depth)
Each ingredient is simple, and most you likely have on hand. If you’re short on time, the olive oil helps the dough relax faster during kneading. The butter and garlic mix is what gives these knots their irresistible finish, so don’t skimp on fresh garlic if you can help it.
Directions: Cooking with Confidence
- Preheat oven to 400°F (200°C) and line a baking sheet with parchment paper. Place the rack in the center so the knots bake evenly and brown gently on top.
- In a bowl, combine warm water, sugar, and yeast. Let sit for 5 minutes until frothy. If the mixture does not foam, the yeast might be old or the water too hot or too cold. Try again with fresh yeast.
- Add flour, salt, and olive oil. Knead until dough is smooth and soft, about 8 minutes. You can knead by hand on a lightly floured surface or use a stand mixer with a dough hook. The dough should be slightly tacky but not cling to your fingers.
- Place dough in an oiled bowl, cover, and let rise until doubled, about 1 hour. A warm, draft-free spot helps. If your kitchen is cool, set the bowl inside the oven with just the oven light on for gentle warmth.
- Punch down dough, divide into 12 pieces, and roll each into a rope. Tie each into a knot and place on the baking sheet. Aim for even sizes so they bake uniformly. Don’t worry if knots look rustic; that’s part of the charm.
- Bake for 15–18 minutes or until golden brown on top. Watch the first batch at 14 minutes to learn how your oven behaves. They should smell fragrant and have a light golden cap.
- While baking, melt butter and cook minced garlic for 1 minute. Stir in parsley. Cook just until the garlic is fragrant and slightly softened. Be careful not to brown it, which will make it bitter.
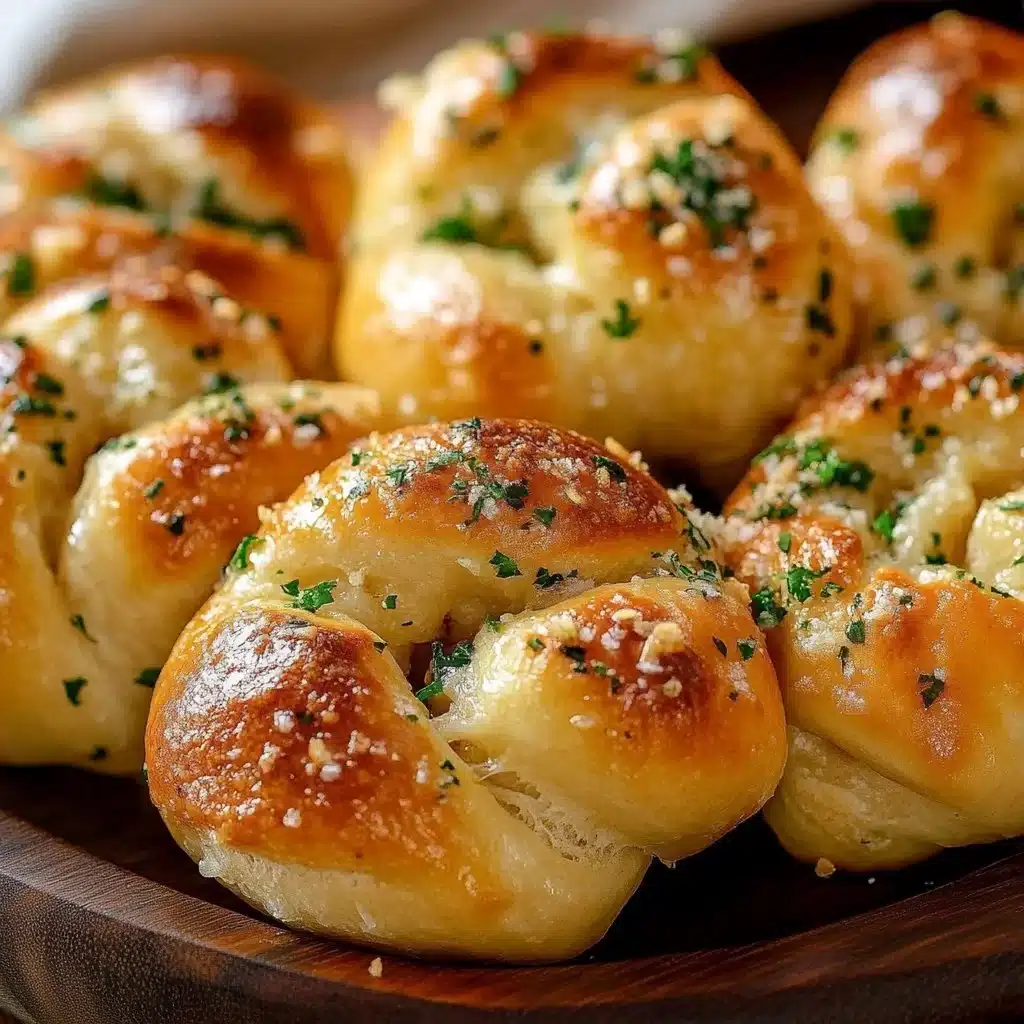
- Brush garlic butter over hot knots. Sprinkle with Parmesan if desired. Serve warm. The butter will soak into the knots and create a glossy, flavorful finish. Enjoy immediate bites while still warm, or let them cool a touch for easier dipping.
These steps are designed to keep things clear and calm. If a step feels tricky, pause and read it again. Baking rewards patience and small corrections along the way. If your dough feels too sticky, add a tablespoon or two of flour at a time. If it feels dry, add a teaspoon of water and continue kneading.
How to Serve Garlic Knots and Make It Shine
Garlic Knots can be a star side or a comforting snack. Serve them warm on a shallow platter so the butter pools a little and everyone can reach in. For a family dinner, pair with a big bowl of soup or a simple salad for balancing freshness.
Try serving them beside a steaming pot of tomato soup, or arrange them next to a saucy pasta for a restaurant-style meal at home. For dipping, offer a small bowl of warmed marinara sauce and another of herbed olive oil. Sprinkle extra Parmesan or crushed red pepper flakes for guests who want a little kick.
If you want to make a more complete plate, pair these with a creamy soup like a cheddar garlic herb potato soup for a filling, cozy meal. A plate with a knot, a cup of soup, and a small crisp salad makes a lovely weeknight dinner.

How to Store Garlic Knots for Later
If you have leftovers, store them the right way to keep texture and flavor. Cool the knots completely, then transfer to an airtight container or a resealable bag. They will stay fresh at room temperature for 1 to 2 days.
For longer storage, freeze on a baking sheet until firm, then move the knots to a freezer bag. They’ll keep well for up to 2 months. Reheat from frozen by placing on a baking sheet in a 350°F oven for 8 to 12 minutes, or until warmed through. Brush with a little extra butter after reheating to refresh the flavor.
If you want a quick microwave option, wrap one knot in a damp paper towel and microwave for 10 to 15 seconds to soften. Then, crisp it in a hot skillet for 30 to 60 seconds per side for a fresh-out-of-the-oven feel. Avoid long microwave times that make bread rubbery.
Clara’s Tips for Success
- Use warm water that feels like a warm bath to the inside of your wrist. Too hot will kill the yeast, too cool will slow it down.
- Don’t over-flour the dough. A slightly tacky dough yields softer knots. Add flour sparingly during kneading.
- Keep garlic cooking short when making the butter topping. Sauté for about a minute just until fragrant. Browning will change the flavor.
- Make knots uniform in size. This helps them bake evenly and finish at the same time.
- If you’re short on time, let the dough rise in a warm oven with the light turned on. It gives consistent, gentle warmth.
These tips come from many afternoons in Clara’s kitchen, learning what small changes make a big difference. They will keep you steady and confident.
Simple Variations to Try
- Cheesy Garlic Knots: Sprinkle shredded mozzarella into the center of each rope before tying. The melted cheese creates a gooey surprise.
- Herby Butter: Add a teaspoon of dried oregano or a mix of rosemary and thyme to the garlic butter for a different aroma.
- Spicy Garlic Knots: Mix a pinch of red pepper flakes into the melted butter for a warm, spicy note.
- Whole Wheat Swap: Replace 1 cup of all-purpose flour with whole wheat flour for a nuttier flavor and heartier texture. Add a touch more water if the dough feels dense.
- Stuffed Knots: Place a small cube of softened cream cheese or a sliver of roasted garlic inside each rope before tying for a creamy center.
These variations let you play without changing the technique. Try one at a time to learn how each element alters the final knot.
Garlic Knots
Ingredients
Method
- Preheat oven to 400°F (200°C) and line a baking sheet with parchment paper.
- In a bowl, combine warm water, sugar, and yeast. Let sit for 5 minutes until frothy.
- Add flour, salt, and olive oil. Knead until dough is smooth and soft, about 8 minutes.
- Place dough in an oiled bowl, cover, and let rise until doubled, about 1 hour.
- Punch down dough, divide into 12 pieces, and roll each into a rope. Tie each into a knot and place on the baking sheet.
- Bake for 15–18 minutes or until golden brown on top.
- While baking, melt butter and cook minced garlic for 1 minute. Stir in parsley.
- Brush garlic butter over hot knots. Sprinkle with Parmesan if desired. Serve warm.
Nutrition
Notes
Tried this recipe?
Let us know how it was!FAQs About Garlic Knots
Can I make this ahead of time?
Yes. You can prepare the dough and refrigerate it after the first rise for up to 24 hours. Bring the chilled dough to room temperature before shaping and baking. This slow rise adds flavor.
What if my dough doesn’t rise?
If the dough doesn’t double, the yeast may be old or the water was the wrong temperature. Try proofing a small teaspoon of yeast in warm water with a pinch of sugar. If it doesn’t foam in 5 to 10 minutes, the yeast should be replaced.
Can I freeze the shaped knots before baking?
Yes, freeze them on the baking sheet until solid, then transfer to a freezer bag. When ready to bake, thaw in the refrigerator overnight and let come to room temperature before baking as directed. You can also bake from frozen, adding a few extra minutes in the oven.
Is instant yeast different from active dry yeast?
They are similar, but instant yeast can be mixed straight into the flour because the granules are finer. If you only have active dry yeast, proof it in warm water with sugar first, then continue as the recipe directs.
How long will they stay soft?
Properly stored at room temperature in an airtight container, they remain soft for 1 to 2 days. Reheat gently to restore that just-baked feel.
These FAQs are answers to the small questions that can stall confidence. If something feels off, take a breath and check these common points one at a time.
A Few More Practical Notes from Clara
- Oven temperatures vary. Use the 15-minute mark as a guideline and look for a golden top and a hollow sound when you tap the bottom.
- Measuring flour by weight removes guesswork. If you have a kitchen scale, 3 cups of all-purpose flour is about 360 grams.
- Fresh herbs lift the final flavor. If you must use dried parsley, reduce the amount to 1 tablespoon because dried herbs are more concentrated.
Small habits in the kitchen lead to reliable results. These notes will serve you whether you bake these knots once a month or once a year.
Making This Recipe Your Own
The technique here is your backbone. Once you understand the dough texture, the knotting, and the finishing butter, you can customize freely. Invite a child to help roll and tie the ropes for a weekend activity. Use leftover garlic butter on roasted vegetables the next day. Think of this recipe as a base for joyful improvisation.
If you enjoy cooking with creamy, garlicky sauces, you might like this creamy garlic butter pasta with ground beef to pair with leftover knots or to turn a meal into a hearty family dinner. If you want a bowl to go with your knots on a chilly night, consider pairing with a hearty cheddar garlic herb potato soup for a comforting combination.
Final Encouragement or Closing Note
Baking Garlic Knots is a small project with big returns: the scent of garlic and butter, warm hands from shaping dough, and the simple joy of pulling something fresh from the oven. The next time you bake them, notice the little improvements you make, and feel proud of the learning you carry forward.
Conclusion
If you want an alternate take or another method to compare, I recommend this Homemade Garlic Knots – Sally’s Baking which offers helpful photos and practical notes.
For a slightly different twist and easy-to-follow steps, see this Homemade Garlic Knots Recipe – Sugar Spun Run that many home bakers find useful.
I hope this Garlic Knots helps you discover how simple and rewarding homemade cooking can be. You’ve got this.