
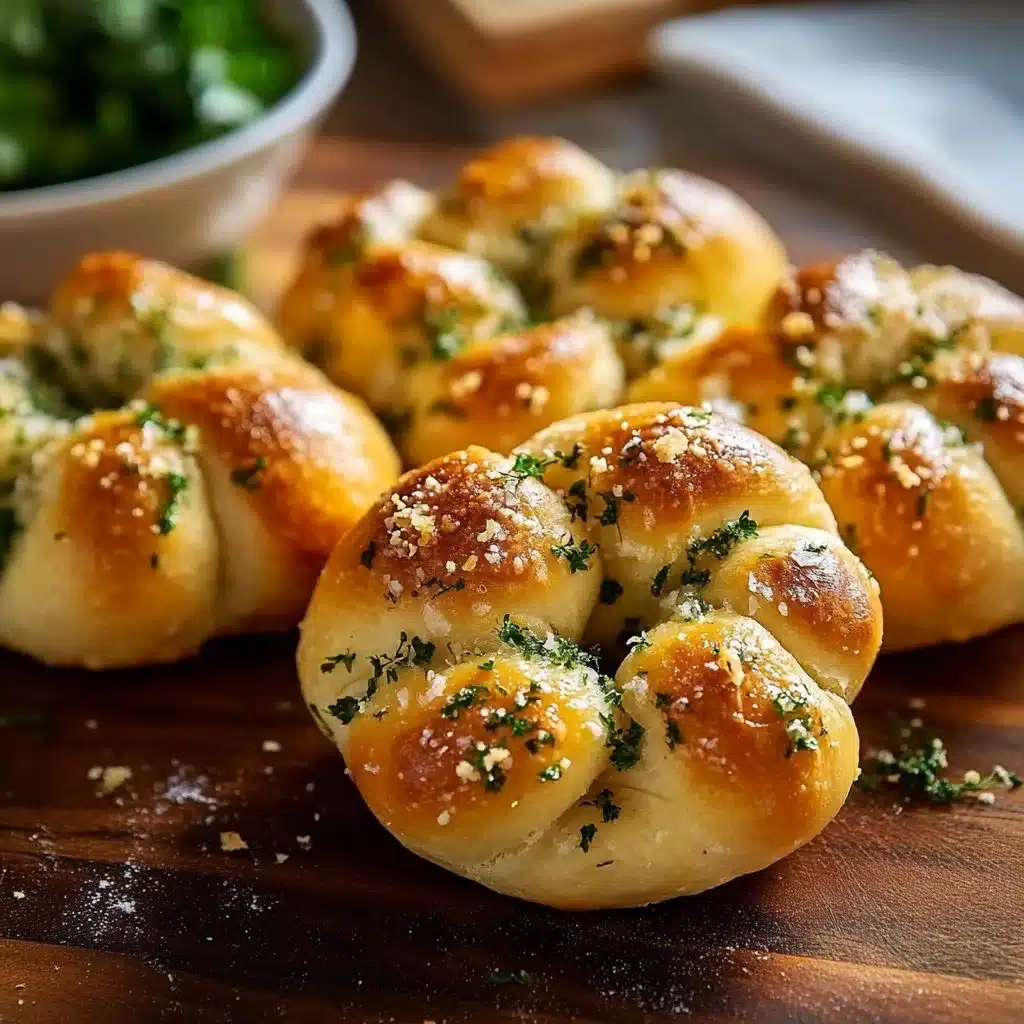
There’s something special about Homemade Garlic Knots the way their warm, garlicky scent invites conversation and the way a fresh knot can turn a simple meal into a celebration. When the kitchen fills with that buttery aroma, people gather without being asked. These knots are small, forgiving, and surprisingly easy to make. You can do this, and I’ll walk you through every step so the results feel like something you could have found at your favorite bakery.
If you love bread that’s soft inside with a slightly crisp edge, this recipe will become one of your go-to comfort foods. Along the way, you might notice how a few simple touches warm water for the yeast, real butter for the flavor, and fresh parsley for brightness make a big difference. If you enjoy similar comforting bakes, you might also like this take on Buttery Cheese Garlic Rolls that pairs wonderfully with a cozy dinner.
Why You’ll Love Making This Homemade Garlic Knots or The Story Behind My Homemade Garlic Knots
These knots are honest food. They are not fussy, and they welcome mistakes. In my kitchen, they are the recipe I make when friends stop by or when I want to make a weeknight meal feel special. They come together quickly, they are forgiving when you shape them, and they reward you with that irresistible combination of soft crumb and garlicky, buttery finish.
They are also a great beginner bread project. You will get comfortable with handling dough, learning how to tell when yeast is active, and seeing the little changes that mean your dough is ready to bake. In the end, you’ll have a warm basket of knots that taste like care and time, not difficulty.
Step-by-Step: How to Make Homemade Garlic Knots or Your Kitchen Game Plan
“Cooking isn’t about perfection. It’s about enjoying every delicious step.”
Before we dive into the ingredients and exact steps, here is a short plan to keep things calm and enjoyable. Start by proofing the yeast so you know it’s alive. Mix and knead the dough until it’s smooth and elastic, then let it rest and rise. Shape the knots, let them puff a bit more, and bake until the edges turn lightly golden. While they bake, whisk up the garlic butter and be ready to brush the knots while they are still warm. That last brush is what makes them shine.
Now let’s gather what you need and go step by step.
Ingredients You’ll Need for Homemade Garlic Knots
3 cups all-purpose flour (use a spoon-and-level method for accuracy)
1 tbsp sugar (feeds the yeast and adds a touch of sweetness)
2.25 tsp instant yeast (one packet; instant works well without preproofing, but we will proof for confidence)
1 cup warm water (105–110°F) (warm to the touch but not hot; too hot will kill the yeast)
2 tbsp olive oil (gives dough some tenderness and flavor)
1 tsp salt (balances the dough and enhances flavor)
4 tbsp butter (melted) (use real butter for rich flavor)
1 tbsp olive oil (for the garlic butter; a small drizzle keeps it smooth)
3 cloves garlic (minced) (fresh garlic makes all the difference)
2 tbsp parsley (finely chopped) (fresh herbs make all the difference)
0.25 tsp salt (for the garlic butter; adjust to taste)
Notes on ingredients:
- All-purpose flour gives a soft, tender knot. If you have bread flour, you can use it for a chewier texture.
- Instant yeast is convenient and consistent. If you have active dry yeast, use the same amount but dissolve it in warm water a few minutes earlier.
- Real butter in the garlic mix gives flavor and a satisfying mouthfeel that margarine cannot match.
- Fresh garlic and parsley are bright; dried parsley will work, but use about 1 teaspoon instead.
Directions: Cooking with Confidence
- Mix warm water, sugar, and yeast in a bowl and let it foam for 5 minutes.
- Add flour, salt, and olive oil. Mix and knead until smooth.
- Let dough rise for 1 hour until doubled.
- Divide dough into 12 pieces and roll each into a rope. Tie into knots.
- Let knots rise for 15–20 minutes.
- Bake at 400°F for 12–14 minutes until lightly golden.
- Mix melted butter, olive oil, garlic, parsley, and salt. Brush warm knots generously with garlic butter.
Now I will expand on each step with clear, practical advice so you feel confident at every turn.
- Mix warm water, sugar, and yeast in a bowl and let it foam for 5 minutes.
Warm the water to about 105–110°F. It should feel warm but not hot on your wrist. Stir the sugar into the water, then sprinkle the yeast on top. Give it a quick stir and set the bowl in a cozy spot. After five minutes you should see foam or bubbles on the surface. That’s the yeast waking up and it means your dough will rise well. If nothing happens after five to ten minutes, your yeast may be old; start again with fresh yeast. - Add flour, salt, and olive oil. Mix and knead until smooth.
Pour the foamy yeast mixture into a larger bowl. Add the all-purpose flour, the teaspoon of salt, and two tablespoons of olive oil. Stir until the dough comes together. Turn the dough out onto a lightly floured surface and knead for about 6 to 8 minutes. You are aiming for a dough that is smooth, slightly tacky, and springy when you press it with a finger. If it sticks to your hands too much, add a teaspoon of flour at a time. If the dough feels dry, wet your hands with a little water and continue kneading. - Let dough rise for 1 hour until doubled.
Place the kneaded dough in a lightly oiled bowl and cover it with a clean kitchen towel or plastic wrap. Set the bowl in a warm, draft-free spot. The dough will take about 1 hour to rise, depending on your kitchen temperature. It should double in size and feel airy. A tip: if your kitchen is cool, you can preheat the oven to 200°F for a minute, turn it off, and place the bowl inside with the oven light on. That gentle warmth helps the dough rise without getting too hot. - Divide dough into 12 pieces and roll each into a rope. Tie into knots.
Once the dough has doubled, gently deflate it and transfer it to a lightly floured surface. Divide the dough into 12 even pieces. I like to weigh pieces if I want uniform knots, but you can also divide visually. Roll each piece into a rope about 8 to 10 inches long. To tie a knot, tie the rope into a loose knot and tuck the ends under the knot so it holds together. Don’t worry about perfection; slightly uneven knots are charming and still delicious. - Let knots rise for 15–20 minutes.
Place the tied knots on a greased or parchment-lined baking sheet, leaving space for them to puff. Cover loosely with a towel and let them rest for 15 to 20 minutes. This short rise gives them a light, airy interior. While they rest, preheat the oven to 400°F so it is ready when the knots have finished their second rise. - Bake at 400°F for 12–14 minutes until lightly golden.
Slide the baking sheet into the preheated oven. Bake for 12 to 14 minutes, watching for the tops and edges to turn a light golden color. The exact time will depend on your oven and how large the knots are. You want a soft center with a slightly crisp exterior. If you prefer a deeper brown, you can give them an extra minute or two, but watch carefully so they do not overbake. - Mix melted butter, olive oil, garlic, parsley, and salt. Brush warm knots generously with garlic butter.
While the knots are hot from the oven, combine the melted butter, a tablespoon of olive oil, the minced garlic, chopped parsley, and a quarter teaspoon of salt in a small bowl. Stir to combine. Generously brush each hot knot with the garlic butter. The heat draws the flavors into the crust and gives a glossy finish. If you like, sprinkle a touch more parsley on top for color.
These seven steps are the backbone of the recipe. Follow them, and you will get soft, garlicky knots every time.
How to Serve Homemade Garlic Knots and Make It Shine
Garlic knots are wonderfully versatile. Serve them warm from the oven in a basket lined with a cloth napkin. They are lovely with a simple marinara sauce for dipping or alongside a composed salad for a complete meal. For a cozy family dinner, pair them with a bowl of soup. Their buttery, garlicky flavor matches especially well with creamy soups.
A few serving ideas that feel effortless:
- Place a small ramekin of warm marinara in the middle of a platter for easy dipping.
- Serve alongside a hearty salad with crisp greens, roasted vegetables, and a tangy vinaigrette.
- Make an Italian-themed dinner with these knots, a big bowl of pasta, and a rustic vegetable side.
If you want a slightly fancier presentation, brush the knots with the garlic butter and then sprinkle with finely grated Parmesan. Arrange them in a circle on a platter and garnish with extra parsley. The look is simple but elegant.

How to Store Homemade Garlic Knots for Later
These knots are best fresh, but they store well if you follow a few simple steps. To keep them soft, place cooled knots in an airtight container or a resealable plastic bag at room temperature for up to 2 days. If you need to keep them longer, freeze them.
To freeze: Wrap cooled knots individually in plastic wrap, then place them in a freezer bag. They will keep for up to 3 months. When you are ready to eat, thaw at room temperature for an hour, then warm them in a 350°F oven for 8 to 10 minutes until heated through.
To reheat from thawed or room temperature: Preheat the oven to 350°F, place knots on a baking sheet, and warm for 8 to 10 minutes. For a little extra freshness, brush with reserved garlic butter after reheating or make a quick batch of the garlic butter and brush them right before serving.
A microwave will warm them faster but can make them a little soggy. If you must microwave, heat briefly and then crisp in a toaster oven or under a broiler for a minute.
Clara’s Tips for Success
- Use comfortably warm water for proofing. If the water is too hot it will kill the yeast; if too cold the dough will rise slowly. Aim for around 105–110°F.
- Knead until smooth but not overdo it. About 6 to 8 minutes by hand will give you a soft, elastic dough. You will know it is ready when the dough springs back slightly when pressed.
- Let the knots cool just enough to handle before brushing with garlic butter. The butter soaks in best when the knots are warm, not piping hot.
- Fresh garlic and parsley are small investments that make a noticeable difference. If you only have garlic powder, use about 1/2 teaspoon as a fallback.
- Don’t overcrowd the baking sheet. Give the knots room to expand so their sides can brown and they bake evenly.
These tips come from making this recipe many times. They help you avoid common pitfalls and make the process feel easier.
Simple Variations to Try
- Cheesy Garlic Knots
Add a small cube of mozzarella inside each knot before tying, or sprinkle shredded mozzarella on top after brushing with garlic butter. You’ll get a gooey, cheesy center that’s irresistible. - Herby Butter Swap
Replace parsley with a mix of basil and oregano, or add a teaspoon of fresh thyme for a different herbal profile. You can also stir in a pinch of red pepper flakes if you like some heat. - Garlic Parmesan Twist
After brushing with the garlic butter, sprinkle each knot with grated Parmesan and a tiny pinch of black pepper. Bake as directed and enjoy a savory, nutty topping. - Whole Wheat or Half-Whole Wheat
Swap up to half the all-purpose flour for whole wheat flour for a heartier texture. You may need an extra tablespoon of water. The knots will be a bit denser but still delicious. - Mini Knots for Appetizers
Divide the dough into 24 smaller pieces and roll into shorter ropes to create bite-sized knots. Reduce baking time by a few minutes and keep a close eye on them.
If you like pairing garlic knots with a rich pasta dish, you might enjoy trying them next to this comforting Creamy Garlic Butter Pasta with Ground Beef.
Troubleshooting and Practical Notes
Sometimes things don’t go perfectly, and that is okay. Here are common issues and easy solutions:
- Dough didn’t rise: Check your yeast. If it did not foam when proofed, it was likely inactive. Replace the yeast and start again. Also check water temperature.
- Knots are dense: You may have overfloured the dough or not kneaded enough. Try to add flour sparingly and knead until the dough is elastic.
- Burnt bottoms: Your oven rack might be too low. Move it to the middle position and consider baking on parchment.
- Garlic taste is too strong raw: If you want a milder garlic flavor, lightly sauté the minced garlic in the olive oil for 30 seconds before mixing into the melted butter. Do not brown it; you want a soft, mellow garlic flavor.
These small adjustments will rescue most trouble spots and help you learn what your own oven and ingredients prefer.

Homemade Garlic Knots
Ingredients
Method
- Mix warm water, sugar, and yeast in a bowl and let it foam for 5 minutes.
- Add flour, salt, and olive oil. Mix and knead until smooth, about 6-8 minutes.
- Let dough rise for 1 hour until doubled in size.
- Divide dough into 12 pieces and roll each into a rope. Tie into knots.
- Let knots rise for 15-20 minutes on a greased or parchment-lined baking sheet.
- Preheat the oven to 400°F.
- Bake knots for 12-14 minutes until lightly golden.
- Mix melted butter, olive oil, garlic, parsley, and salt. Brush warm knots generously with garlic butter.
Nutrition
Notes
Tried this recipe?
Let us know how it was!FAQs About Homemade Garlic Knots
Can I make this ahead of time?
Yes. You can make the dough and let it rise in the fridge overnight for deeper flavor. Bring it to room temperature before shaping, then continue with the recipe. Alternatively, bake the knots and reheat gently before serving.
Can I use active dry yeast?
Yes. If using active dry yeast, dissolve it in the warm water and sugar and let it foam for five minutes. The rest of the steps remain the same.
How can I make them dairy-free?
Replace the butter with vegan butter or additional olive oil. The flavor will be slightly different but still satisfying.
Can I make these without a kitchen scale?
Absolutely. The listed measures are designed to work with cups and spoons. For consistency, scoop flour into the measuring cup and level it off rather than packing it tightly.
How to tell when the dough has risen enough?
The dough should about double in size. Press two fingers into the dough; if the indentation slowly springs back, it is ready. If the dough bounces back immediately, it needs more time. If it collapses, it may have overproofed.
Final Encouragement or Closing Note
You’ve just learned a recipe that turns a few pantry staples into warm, comforting knots that bring people together. Homemade Garlic Knots are forgiving and full of reward. With a little attention to yeast, a gentle hand for shaping, and a perfectly brushed garlic butter finish, you’ll soon be making these without thinking twice. I hope this recipe helps you feel proud the next time you pull a tray from the oven. You’ve got this.
Conclusion
If you want to see other bakers’ versions and compare techniques, I like this detailed version at Homemade Garlic Knots – Sally’s Baking. For another helpful take with clear photos and tips, try Homemade Garlic Knots Recipe – Sugar Spun Run.