
There’s something special about Homemade Garlic Knots: The Incredible 7-Step Recipe You’ll Love the way its aroma fills the kitchen and makes everyone wander in for a taste. It’s simple comfort on a plate, warm and buttery, with little pockets of garlic and herb that feel like a hug. Clara is right beside you: this recipe is straightforward, forgiving, and rewarding, even if you are new to bread making. If you enjoy bold garlic flavors, you might also like a hearty pasta that pairs well with these knots, such as my garlic-parmesan chicken pasta recipe garlic parmesan chicken pasta that uses similar comforting flavors.
Why You’ll Love Making This Homemade Garlic Knots: The Incredible 7-Step Recipe You’ll Love
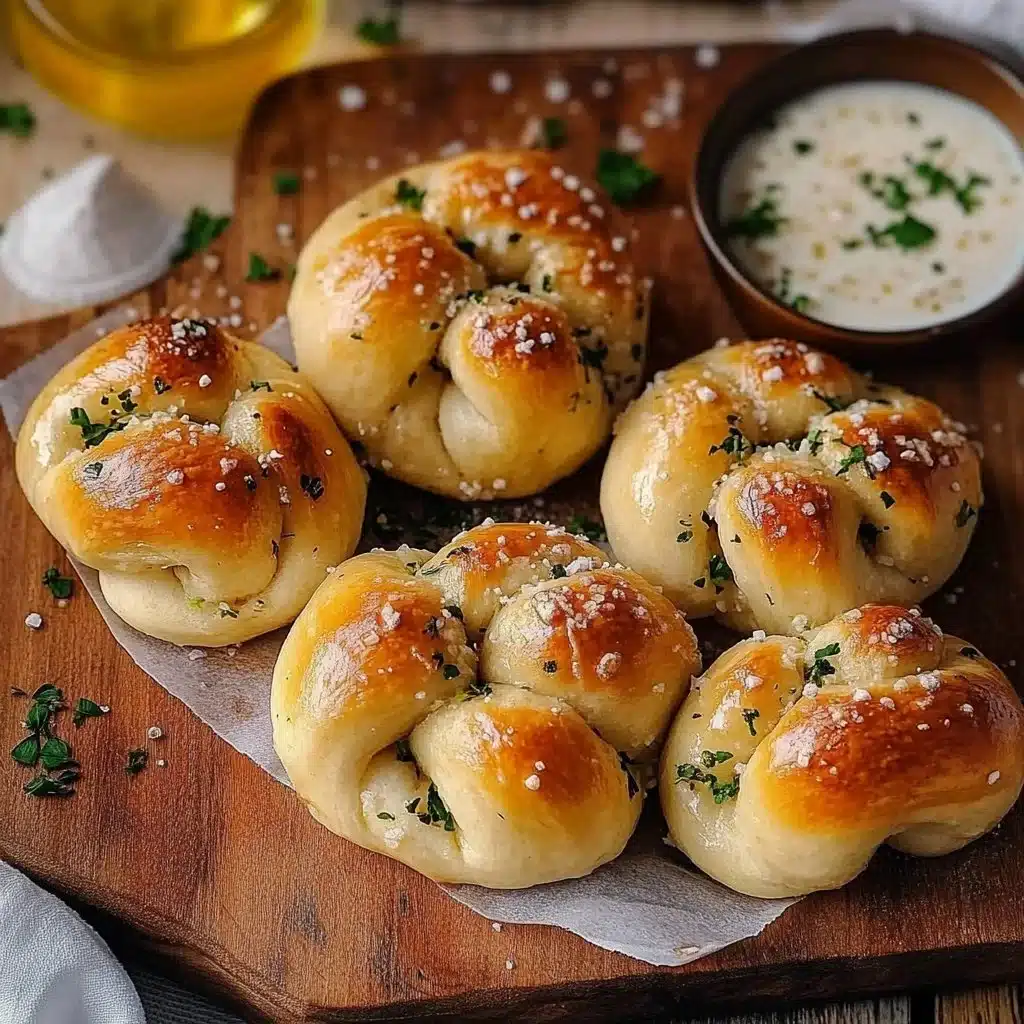
These garlic knots are a small, reliable miracle in the kitchen. They need just seven clear steps, everyday ingredients, and a little patience while the dough rises. The payoff is a tray of glossy, golden knots that are soft inside, slightly chewy, and fragrant with butter, garlic, and parsley.
Why they are worth the time:
- They are approachable. You do not need special tools or fancy flour.
- They make a crowd feel cared for. Kids, friends, and neighbors all smile when garlic knots appear.
- They are flexible. You can make them richer, lighter, spicy, or simple.
- They freeze well, so you can make a big batch and enjoy them later.
Clara’s kitchen tests showed that a gentle hand at kneading and brushing the garlic butter right after baking gives the best shine and flavor. The recipe teaches you dough basics you will use again for rolls, knots, or simple breads.
Step-by-Step: How to Make Homemade Garlic Knots: The Incredible 7-Step Recipe You’ll Love
“Cooking isn’t about perfection. It’s about enjoying every delicious step.”
Before you begin, gather your ingredients and a warm spot for the dough to rise. Set out your butter to soften and measure the flour. Working with a slightly sticky dough is normal that tackiness is part of what makes the knots tender. Read through the steps once, then move confidently through them.
Ingredients You’ll Need for Homemade Garlic Knots: The Incredible 7-Step Recipe You’ll Love
4 cups all-purpose flour use a spoon-and-level method for accuracy.
1 packet (2 ¼ teaspoons) active dry yeast fresh yeast gives a livelier rise.
1 ½ cups warm water (about 110°F / 43°C) warm, not hot; test with a finger.
2 tablespoons granulated sugar feeds the yeast and helps browning.
2 teaspoons salt balances flavor; add it to the flour, not directly to yeast.
¼ cup olive oil gives a soft crumb and subtle flavor.
4 tablespoons unsalted butter (melted) use real butter for rich flavor.
6 cloves garlic (minced) fresh garlic gives the best brightness.
¼ cup fresh parsley (chopped) fresh herbs make all the difference.
½ teaspoon Italian seasoning optional, for depth.
½ teaspoon red pepper flakes (optional) a pinch adds warmth and complexity.
Grated Parmesan cheese (for topping, optional) salty finish, sprinkle while hot.
These ingredients are easy to find and flexible. If you need a dairy-free version, swap the butter for a plant-based spread and use olive oil in the finishing brush.
Directions: Cooking with Confidence
- In a small bowl, combine warm water, sugar, and yeast. Stir gently and let it sit until frothy, about 5 to 10 minutes.
Let the mixture rest in a warm place. Within a few minutes you should see bubbles forming and a foam that smells faintly yeasty. If nothing happens after 10 minutes, the yeast may be old; start again with fresh yeast. - In a large bowl, mix flour and salt, making a well in the center. Add yeast mixture and olive oil, stirring until a sticky dough forms.
Use a wooden spoon or a flexible spatula to draw the flour into the liquid. The dough will be shaggy and a little tacky. That tackiness will transform into smoothness during kneading. - Knead the dough on a floured surface for 5 to 7 minutes until smooth and elastic. Place in oiled bowl, cover, and let rise in a warm place for about 1 hour until doubled.
To knead, fold the dough toward you, press with the heel of your hand, then rotate and repeat. If the dough sticks too much, dust lightly with flour. The dough should spring back when you poke it. A smooth, elastic dough means good gluten development and soft knots. - Once risen, punch down the dough and divide it into 12 equal pieces. Roll each piece into a rope and tie into a knot. Place on a baking sheet lined with parchment paper and let rise for another 30 minutes.
Work gently to keep the knots snug but not tightly wound. Aim for ropes about 8 to 10 inches long; they will shrink slightly as they bake. Give them space on the sheet to grow a little during the second rise. - Preheat oven to 375°F (190°C). While knots rise, combine melted butter, minced garlic, parsley, Italian seasoning, and optional red pepper flakes in a bowl.
This is your finishing sauce. Let the garlic sit in the melted butter briefly so it softens and releases aroma. If you want garlic more mellow, use roasted garlic instead of raw minced. - Bake knots for 15 to 20 minutes until golden brown. Immediately brush with garlic butter mixture.
Bake until the tops are a warm golden brown and the bottoms are slightly darker. The sizzle when you brush the warm knots makes the butter soak in, creating a glossy, fragrant finish. - Sprinkle with Parmesan cheese if desired. Serve warm.
A quick sprinkle of cheese as soon as the butter sets gives a melty, savory finish. Serve the knots warm, so the texture and flavors are at their best.
After each numbered step, take a breath and enjoy the process. Dough making is tactile and forgiving; tiny mistakes rarely ruin the final result. If one knot looks uneven, it will still taste wonderful.
How to Serve Homemade Garlic Knots: The Incredible 7-Step Recipe You’ll Love and Make It Shine
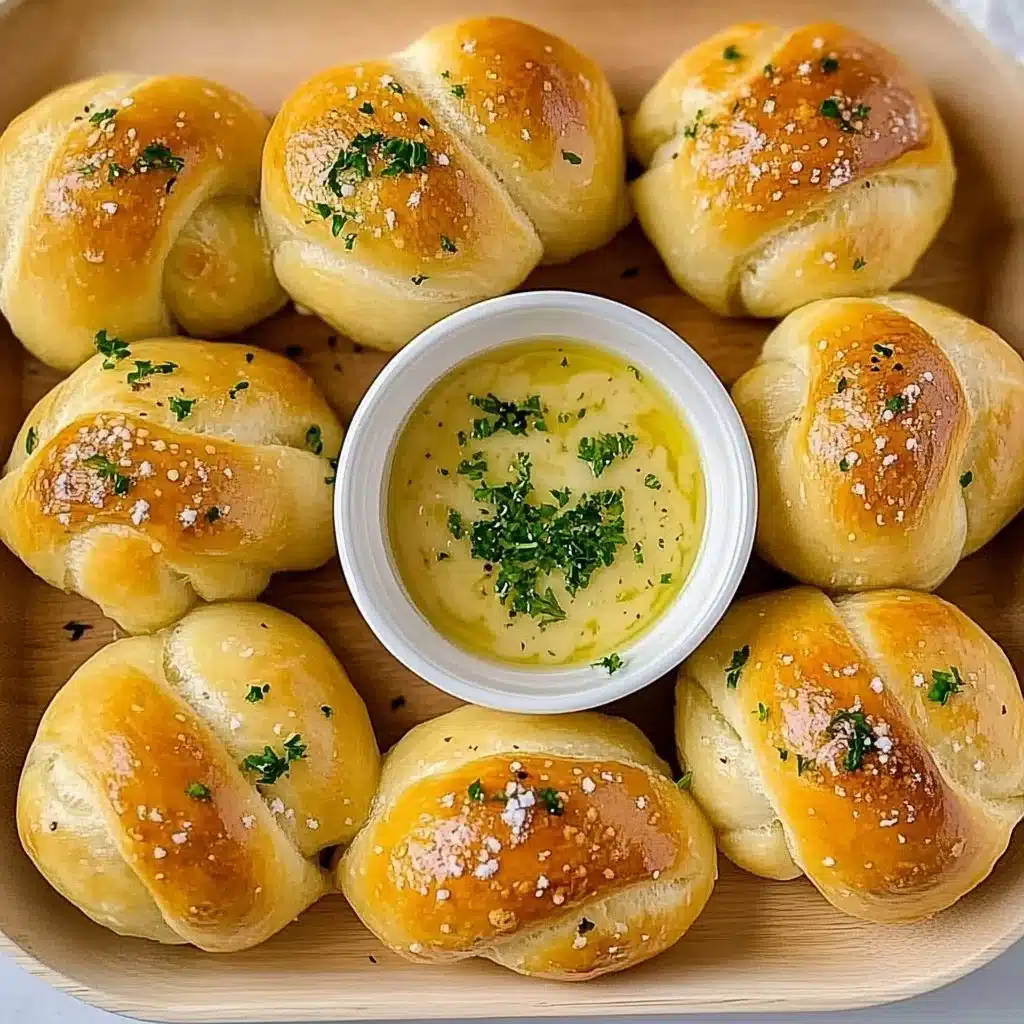
Garlic knots are at home with soup, salad, or a main dish. Serve them in a basket lined with a clean napkin so they stay warm and inviting. For a family dinner, place the knots beside a big bowl of marinara for dipping and a simple green salad dressed with lemon and olive oil.
Here are a few practical pairings:
- Tomato-based dishes like baked ziti, lasagna, or a rich tomato soup.
- Creamy soups such as a roasted garlic soup for an extra garlicky harmony; pair with something like my roasted garlic soup recipe for a comforting meal roasted garlic soup.
- A bright salad with arugula, shaved Parmesan, and lemon vinaigrette to cut through the richness.
- Use leftover knots to make mini garlic bread sandwiches with slices of mozzarella and a touch of tomato sauce.
Presentation tips: Arrange the knots in a spiral or circle on a shallow platter. Brush a little extra garlic butter on any spots that look dry. Scatter fresh parsley and a light dusting of Parmesan for color and texture.
How to Store Homemade Garlic Knots: The Incredible 7-Step Recipe You’ll Love for Later
If you have leftovers, store them properly to keep texture and flavor. For short-term storage, place cooled knots in an airtight container or a resealable bag and keep them at room temperature for up to two days.
For longer storage:
- Refrigerate for up to 4 days in an airtight container. To refresh, reheat gently in the oven at 300°F for 8 to 10 minutes, or pop them in a toaster oven until warmed through.
- Freeze for up to 3 months. Wrap each knot in plastic wrap and place in a freezer-safe bag. Reheat from frozen in a 350°F oven for 12 to 15 minutes, then brush with warmed garlic butter.
Reheating tips: Avoid the microwave if you can. The microwave will make them chewy or gummy. An oven or toaster oven restores the crisp edges and warms the butter without collapsing the texture.
If you plan to freeze a batch, consider brushing the knots with a light coat of plain olive oil before freezing and then brushing with garlic butter after reheating. This keeps the garlic flavor fresher and prevents sogginess.
Clara’s Tips for Success
- Proof the yeast properly. The yeast should foam within 5 to 10 minutes in warm water. If not, start over with fresh yeast and water that is warm but not hot.
- Use a light hand with flour when kneading. Add only enough to prevent sticking. Too much flour makes the knots dense.
- Brush while hot. The warm knots absorb garlic butter best immediately after they come out of the oven. Brushing later will not sink in as well.
- Fresh garlic beats pre-minced. For the cleanest, brightest garlic flavor, mince garlic yourself and let it sit briefly in the melted butter.
- Room temperature butter and warm water help the dough come together without chilling the yeast.
These tips come from simple experience in Clara’s kitchen. They keep the process smooth and the results consistently great.
Simple Variations to Try
The base recipe is forgiving, so try these twists the next time:
- Herb and lemon: Add 1 teaspoon lemon zest to the butter and swap half the parsley for chopped basil. This brightens the knots nicely for spring meals.
- Cheesy pull-apart: Sprinkle shredded mozzarella into the center of each rope before tying the knot so a stringy cheese pocket forms as they bake.
- Spicy garlic: Increase red pepper flakes to 1 teaspoon and add a pinch of smoked paprika to the butter for a smoky, spicy note.
- Vegan version: Use plant-based butter or olive oil for brushing, and skip the Parmesan. If you like a tangy finish, sprinkle nutritional yeast for a cheesy flavor. For a creamy side, try serving with a light dip like an easy homemade coconut yogurt dressing for a cool contrast easy homemade coconut yogurt.
- Stuffed knots: Press a small cube of goat cheese or a sliver of roasted pepper into the center of the rope before tying for a gooey surprise.
These variations make small adjustments that can change the personality of the knots while keeping the same dependable dough.

Homemade Garlic Knots
Ingredients
Method
- In a small bowl, combine warm water, sugar, and yeast. Stir gently and let it sit until frothy, about 5 to 10 minutes.
- In a large bowl, mix flour and salt, making a well in the center. Add yeast mixture and olive oil, stirring until a sticky dough forms.
- Knead the dough on a floured surface for 5 to 7 minutes until smooth and elastic.
- Place kneaded dough in an oiled bowl, cover, and let rise in a warm place for about 1 hour until doubled.
- Once risen, punch down the dough and divide it into 12 equal pieces. Roll each piece into a rope and tie into a knot.
- Place knots on a baking sheet lined with parchment paper and let rise for another 30 minutes.
- Preheat oven to 375°F (190°C).
- Combine melted butter, minced garlic, parsley, Italian seasoning, and red pepper flakes in a bowl.
- Bake knots for 15 to 20 minutes until golden brown. Immediately brush with garlic butter mixture.
- Sprinkle with Parmesan cheese if desired. Serve warm.
Nutrition
Notes
Tried this recipe?
Let us know how it was!FAQs About Homemade Garlic Knots: The Incredible 7-Step Recipe You’ll Love
Can I make this recipe ahead of time?
Yes. You can shape the knots and place them on a sheet lined with parchment, then cover and refrigerate for up to 24 hours. Bake them straight from cold, adding a few extra minutes to the bake time. For longer storage, freeze before baking and thaw in the refrigerator before finishing.
My dough is too sticky. What should I do?
A slightly sticky dough is normal, but if it is unmanageable, dust your work surface lightly with flour and add a teaspoon at a time while kneading. Avoid adding too much flour. It is better to keep the dough lightly tacky than to make it dry.
Can I use instant yeast instead of active dry yeast?
Yes. Use the same amount of instant yeast but mix it directly with the dry ingredients, and reduce the initial proofing time slightly. Still use warm water so the dough comes together easily.
How do I know when the dough has risen enough?
After about an hour, the dough should be noticeably larger and feel airy. A gentle poke should leave a slight indentation that slowly fills back in. If it springs back immediately, it needs more time.
Can I make smaller or larger knots?
Of course. Adjust the size and the baking time accordingly. Smaller knots may bake in 12 to 15 minutes; larger ones may need a few extra minutes. Keep an eye on color, not only time.
Final Encouragement or Closing Note
You’ve just learned how approachable Homemade Garlic Knots: The Incredible 7-Step Recipe You’ll Love can be. With a little patience and these clear steps, you will have a reliable, delicious bread that makes any meal feel special. The dough is forgiving, the flavors are familiar, and the satisfaction of pulling warm knots from the oven is unmistakable. I hope this Homemade Garlic Knots: The Incredible 7-Step Recipe You’ll Love helps you discover how simple and rewarding homemade cooking can be. You’ve got this.
Conclusion
If you want a vegan take that still delivers cheesy, pull-apart satisfaction, check out this easy cheesy vegan garlic pull apart bread recipe for inspiration. For another garlic-bread technique and flavor profile, this guide to The Best Garlic Bread You’ll Ever Eat offers useful tips and variations to try alongside your knots.