

There’s something special about Sally’s Nightmare Before Christmas Cookies — the way its aroma fills the kitchen and draws everyone in for a taste. The anticipation in the air is palpable as the warm, sweet scent wafts through the house, inviting even those who don’t usually bake to come and join the fun. This delightful recipe isn’t just about delicious flavors; it’s about creating memories, sharing joy, and perhaps even a bit of whimsy. It’s a reason to gather around the kitchen, to make something beautiful, and to celebrate the magic of baking together. Let’s dive into the wonderful world of cookies that not only taste incredible but also bring a spirit of adventure and connection.
Why You’ll Love Making This Sally’s Nightmare Before Christmas Cookies
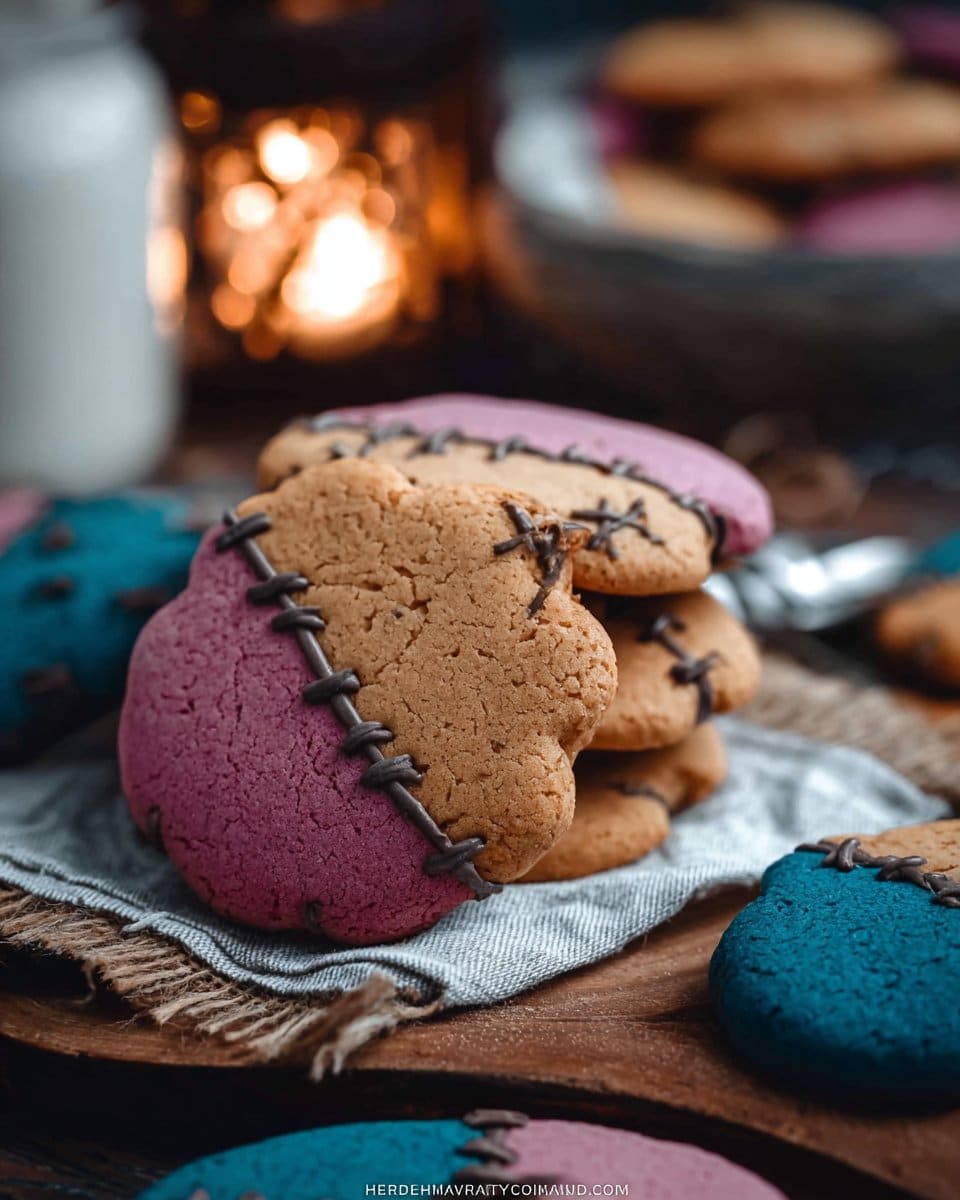
Sally’s Nightmare Before Christmas Cookies are a true delight for both the eyes and the palate. They are perfect for any festive occasion, especially during the holiday season. From their vibrant colors to their rich, buttery flavor, these cookies are as much a treat to look at as they are to eat. The recipe is easy to follow, making it suitable even for those who may be new to baking. You will appreciate how each step leads you closer to a finished product that will impress family and friends alike.
These cookies provide a delightful crunch with a tender crumb that melts in your mouth. The added touch of melted chocolate to decorate them adds an element of creativity and plays into the fun of the theme. Whether you are sharing these tasty gems at a holiday gathering or simply enjoying them at home, they are bound to evoke smiles and spark conversations.
Your Kitchen Game Plan
“Cooking isn’t about perfection. It’s about enjoying every delicious step.”
Before we get started, let’s lay a solid plan for making Sally’s Nightmare Before Christmas Cookies. Gather your ingredients, set out your tools, and clear a bit of space on that countertop. This process is all about enjoying the journey of baking, from mixing to decorating. With just a few simple ingredients and a little time, you’ll create a batch of cookies that will surely be a seasonal favorite.
Ingredients You’ll Need for Sally’s Nightmare Before Christmas Cookies
Here’s what you’ll need to make these delightful cookies:
- 1 cup unsalted butter (softened) – Use real butter for a rich flavor.
- 1 cup sugar – Granulated sugar will give the cookies that perfect sweet balance.
- 1 egg – This helps bind everything together beautifully.
- 1 teaspoon vanilla extract – A splash adds a lovely aroma.
- 3 cups all-purpose flour – That gives your cookies structure and texture.
- Tinted food coloring – Dark yellow, lilac purple, and turquoise blue for festive fun.
- Melted chocolate (to decorate) – This is the finishing touch that adds sweetness.
You might find that these vibrant colors really bring the cookies to life, making them even more enticing for anyone who lays eyes on them.
Directions: Cooking with Confidence
Now that we have everything ready, let’s get baking. Follow these steps, and soon you will have a delicious batch of cookies.
Prep Your Oven and Baking Sheets: Preheat your oven to 350 degrees Fahrenheit (175 degrees Celsius). Line a couple of baking sheets with parchment paper to ensure your cookies don’t stick.
Cream the Butter and Sugar: In a large mixing bowl, place the softened butter and sugar. Using a hand mixer or stand mixer, cream them together on medium speed until the mixture is light and fluffy. This should take about 3-4 minutes.
Add Egg and Vanilla: Crack that egg into the bowl and pour in the vanilla extract. Beat them together until thoroughly combined. The mixture should become smooth and creamy.
Incorporate the Flour: Sift the flour directly over the butter mixture to eliminate lumps, then mix on low speed until just combined. It is important not to overmix, as this could affect the texture of your cookies.
Divide and Color the Dough: Once your dough is ready, divide it into three equal parts. Use your tinting gel or food coloring to dye each portion in dark yellow, lilac purple, and turquoise blue respectively. Wear some gloves if you want to avoid getting colored hands.
Shape the Cookies: Take small amounts of each colored dough and form them into little balls (about one inch in diameter) and place them onto the prepared baking sheets. Leave some space in between each cookie because they will spread slightly as they bake.
Bake the Cookies: Slide the baking sheets into the preheated oven and bake for 10 to 12 minutes. Keep an eye on them; you want the edges to turn golden brown.
Cool the Cookies: Once baked, remove the cookies from the oven and let them sit on the baking sheets for about 5 minutes before transferring them to a wire rack to cool completely.
Decorate with Melted Chocolate: Melt your chocolate using a microwave or double boiler and pour it into a piping bag or a parchment paper cone. Decorate the cooled cookies with drizzles or swirls of melted chocolate. You can get creative here!
Enjoy with Loved Ones: Once the chocolate sets, your beautiful, colorful cookies are ready to be enjoyed. Share them with family and friends, or keep them as a sweet treat for yourself.
How to Serve Sally’s Nightmare Before Christmas Cookies and Make It Shine
When it’s time to serve these delightful cookies, presentation matters. Place your cookies on a festive plate, perhaps surrounded by a few holiday decorations. If you want to make it extra special, pair them with a warm beverage like hot cocoa or spiced cider. The combination of the rich cookies with a hot drink can create a cozy atmosphere that invites conversation and connection.
To make things even more festive, you could create a cookie platter mixing these colorful cookies with other treats. A mix of textures and flavors can make any dessert table shine. The vibrant colors of Sally’s cookies will stand out, sparking joy in everyone who sees them.
How to Store Sally’s Nightmare Before Christmas Cookies for Later
These cookies can be enjoyed fresh, but if you find yourself with leftovers (or if you are a planner), it’s a good idea to know how to store them. To keep your cookies fresh, allow them to cool completely before storing.
Use an Airtight Container: Store your cookies in an airtight container at room temperature. They will stay fresh for about a week.
Freezing for Future Enjoyment: If you want to keep them for longer, you can freeze the cookies. Place them in a single layer on a baking sheet to firm up, then transfer them to a freezer-safe container. They can be frozen for up to three months.
Thawing: When you’re ready to enjoy them again, simply thaw at room temperature for a few hours or pop them in the microwave for a few seconds.
Clara’s Tips for Success
Butter Matters: For that rich, delicious flavor, use unsalted butter. It truly makes a difference in the quality of your cookies.
Mixing and Measuring: Ensure you measure your flour correctly. Too much flour can lead to dry cookies. Spoon it into your measuring cup and level it off with a knife.
Uniform Size: Try to keep your cookie balls uniform in size. This helps them bake evenly. Using a cookie scoop can make this job easy.
Chill Your Dough: If you find that your dough is too soft to work with, you can chill it for about 30 minutes before shaping.
Experiment with Toppings: While melted chocolate adds a great finish, consider also sprinkling some festive sprinkles on top before the chocolate sets for an added pop of color.
Discover What’s Trending Now
Wondering what recipes are stealing the spotlight?
Check out our Recipe Trends page for fresh ideas, seasonal favorites, and dishes people can’t stop talking about.
See what’s hot in the kitchen this week and bring the buzz straight to your table!
Simple Variations to Try
Feel free to get creative with this cookie base! Here are a few ideas to switch things up:
Add Spices: A pinch of cinnamon or nutmeg can lend a warm, cozy flavor to your cookies, especially during the holiday season.
Nuts for Crunch: Chop up some nuts, like walnuts or pecans, and add them to the dough for added texture.
Dried Fruits: A handful of dried cranberries or raisins can add a surprising burst of flavor and sweetness.
Different Colors: Use other food colors to match different holidays, making these cookies perfect year-round.
Frosting Instead of Chocolate: Instead of melted chocolate, you could use a simple icing to decorate your cookies for a different look and flavor.

Sally’s Nightmare Before Christmas Cookies
Ingredients
Method
- Preheat your oven to 350°F (175°C) and line baking sheets with parchment paper.
- In a large mixing bowl, cream together the softened butter and sugar on medium speed until light and fluffy (about 3-4 minutes).
- Add the egg and vanilla extract, beating until well combined and smooth.
- Sift the flour over the mix and gently combine on low speed until just mixed, avoiding overmixing.
- Divide the dough into three equal parts and color each with the tinted food gel, using gloves to avoid stains.
- Shape small balls (about 1 inch in diameter) from each colored dough and place them onto the baking sheets with space in between.
- Bake in the preheated oven for 10 to 12 minutes, or until the edges turn golden brown.
- Remove from oven and let sit for 5 minutes before transferring to a wire rack to cool completely.
- Melt the chocolate and decorate the cooled cookies with drizzles or swirls.
- Enjoy the cookies with family and friends as they bring joy and color to your gatherings.
Nutrition
Notes
Tried this recipe?
Let us know how it was!FAQs About Sally’s Nightmare Before Christmas Cookies
Can I make this ahead of time?
Yes! This recipe keeps beautifully. Store them in an airtight container, and they will remain fresh for about a week.
What can I use instead of butter?
If you’re looking for a dairy-free option, try using coconut oil or a plant-based butter substitute.
Can I use gluten-free flour?
Absolutely! Just ensure you’re using a gluten-free flour blend that is designed for baking, adjusting the amount slightly if necessary.
How do I know when the cookies are done?
Look for the edges to be slightly golden. If the centers look a bit underbaked, don’t worry; they will continue to set as they cool.
Can these cookies be shipped?
Yes, if you plan to send them to friends or family, ensure they are packaged securely. Layer them with parchment paper and pack tightly in a box to prevent them from breaking.
Final Encouragement
I hope this recipe for Sally’s Nightmare Before Christmas Cookies helps you discover how simple and rewarding homemade cooking can be. This is not just about making cookies; it is about the shared love of baking and the joy it brings to you and those around you. You’ve got this! Every batch you make will only improve your skills and confidence in the kitchen. Happy baking!
Stay Connected with Feel the Recipes
Love cooking and sharing good food? Let’s stay connected! Clara posts new recipes, helpful tips, and little moments from her kitchen every day to keep you inspired.
Join our growing community of home cooks who believe food is meant to be simple, joyful, and shared around the table.
👉 Facebook: Follow us on Facebook
📌 Pinterest: Explore our boards for endless recipe inspiration
🐦 X (Twitter): @feeltherecipes for quick tips and updates
📸 Instagram: @feeltherecipes for fresh photos and behind-the-scenes peeks
Let’s keep cooking, creating, and sharing. Whether you’re here for classic comfort food or something new to try, we’re just a click away.