
Valentine bird seed feeders are a sweet way to spread love to nature. Kids love shaping, hanging, and watching birds visit. Save this heartwarming outdoor craft! On a busy afternoon, you might find yourself scrambling for an idea that combines creativity and connection with nature. Picture your little ones bustling with energy and eagerness to create something special. This is just the moment for making Valentine bird seed feeders. It’s a simple way for kids to show their love, not just through crafting, but also by inviting beautiful birds into your backyard. As you shape these feeders and hang them outside, you’ll create lasting memories while also enhancing your family’s connection to nature. Let’s dive into this delightful project that blends fun and learning seamlessly.
Why You’ll Love Making Valentine bird seed feeders are a sweet way to spread love to nature
This project stands out as a low-prep activity that fits comfortably into busy schedules. There’s no need to gather complicated materials or spend hours on detailed instructions. You can whip these feeders up in no time, making it perfect for a quick afternoon activity, a rainy day, or even as last-minute gifts for friends and family.
The approachability of this craft is part of its charm. With just a few ingredients—some of which likely already reside in your kitchen—you can engage your kids in a hands-on project that brings a piece of nature closer to home. Children thrive with creative projects, especially when they involve an element of caring for living beings. This DIY not only fosters creativity but also teaches kids the importance of kindness—towards animals, nature, and each other.
The reliable outcome is what many parents appreciate. When kids pour their heart into this craft, they typically end up with bird feeders that are functional and delightful. Watching birds flit around can become an exciting event for the whole family, igniting a sense of wonder and curiosity. Each visit from the birds becomes a shared experience, reinforcing the love and effort put into crafting something beautiful for nature.
A Quick Look Before You Begin
Creating these Valentine bird seed feeders is enjoyable and does not require extensive preparation. You can expect to spend about 30 minutes on the crafting process with your kids. Clean-up is also manageable, as the materials are easy to work with and contain minimal mess.
You’ll need just a little area to set up your workspace. A kitchen table or a picnic blanket outdoors works perfectly. Keep in mind that parental supervision is recommended, especially for younger children. You’ll be there to assist if things get a little messy or if they need help with the materials. Embrace the chaos, as it often leads to laughter and unforgettable moments. As you prepare for this delightful DIY, expect giggles, splashes of color, and the sheer joy of your children’s creativity in action.
Materials You’ll Need
To make these bird seed feeders, gather the following materials:
- 3 cups birdseed – Buy in bulk for budget-friendly options.
- 1 cup peanut butter – Common household ingredient; check for allergies.
- 1/2 cup flour – Easy to find and affordable.
- Strings or twine – Optional for hanging.
- Cookie cutters – Any shape you like, heart-shaped adds a festive touch.
- Wax paper or parchment paper – For easy cleanup.
With this simple list, you’re ready to create a meaningful project without the stress of finding hard-to-get supplies.
Step-by-Step Directions

- Prepare Your Workspace: Clear a space on your table and lay down some wax paper or parchment paper. This helps with quick cleanup after and keeps your surfaces protected.
- Mix Ingredients: In a large bowl, combine the birdseed, peanut butter, and flour. Use a sturdy spoon to mix until the birdseed is well-coated. You’ll feel the texture change as you combine everything. It should be sticky, yet still crumbly.
- Shape the Feeders: Grab your cookie cutters and press the mixture firmly into them. Make sure to compact the birdseed tightly for a sturdy feeder. Kids love this part; they can use their tiny hands to mold and shape something unique.
- Add Hanging Loops: If you’re using strings or twine, poke a hole through the top of each shape before removing the cookie cutter. This step ensures you can hang the feeders later. If you don’t have twine handy, you can simply place them on a flat surface.
- Set to Dry: Place your shaped feeders on the wax paper. Let them sit for at least a couple of hours, or until firm. You can choose to leave them overnight for extra sturdiness. Kids can check in on them, watching them change from sticky to solid.
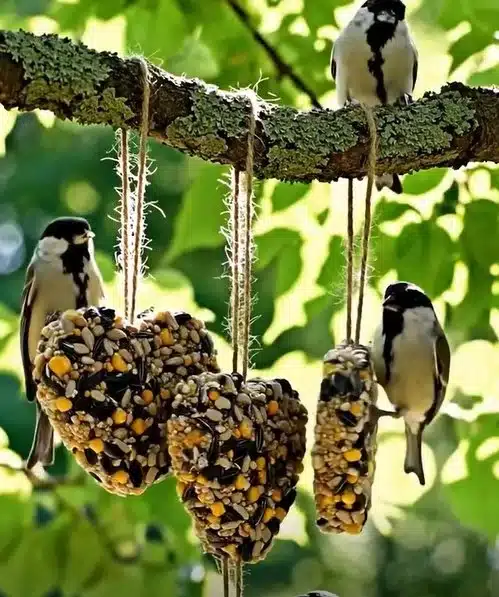
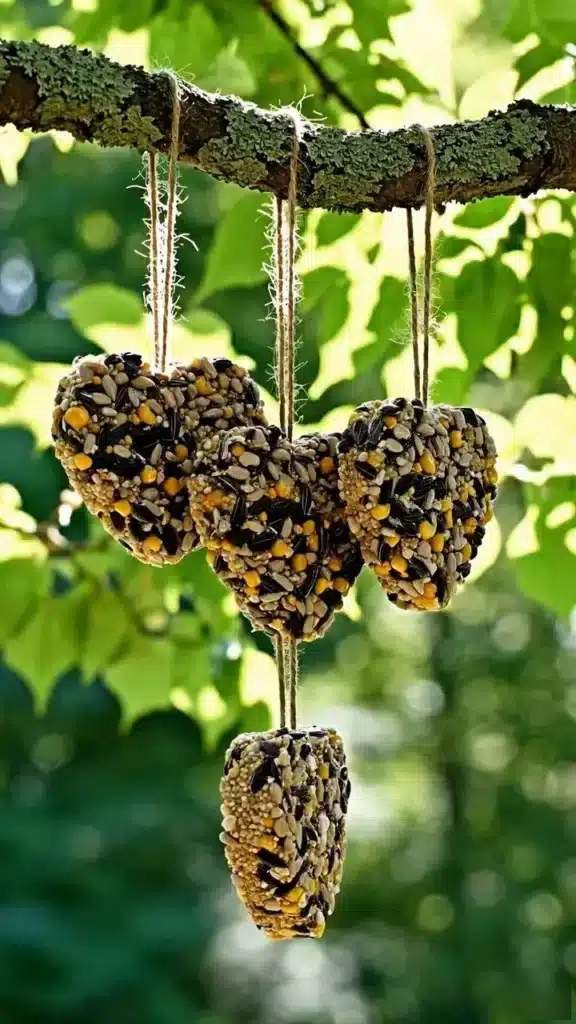
- Hanging: After the feeders are dry, it’s time to hang them up outside. Find visible spots like tree branches where you can easily view the feeders. Children enjoy hanging their creations, imagining birds visiting them.
- Enjoy the Show: Sit back, relax, and watch as birds come to feast. Encourage your kids to track the different types of birds they see. This reflection helps develop their observation skills and appreciation for nature.
The Learning Behind This DIY
{image_template}
This simple DIY introduces children to several science concepts as they engage with nature. When kids hang their bird feeders, they learn about ecosystems and the role birds play within them. Observing which birds visit can spark interest in birdwatching or ecology, enriching their understanding of the world around them.
In addition to the scientific aspects, children practice vital fine motor skills. Mixing, shaping, and hanging the feeders helps enhance coordination. These activities also promote creativity, as kids express themselves through the shapes and designs they create. By engaging in cause and effect, they’ll learn that their actions directly impact the environment and living creatures.
Troubleshooting Common Issues
As with any DIY, sometimes things don’t go as planned. It’s okay, and many parents have been there. Here are a few common problems and simple solutions to keep your crafting experience positive.
If the mixture seems too crumbly and not sticking together, add a little more peanut butter. This ingredient acts like glue, binding the birdseed together. Conversely, if it feels too gooey, add more flour to balance it out.
In the case that the shaped feeders don’t hold their form once removed from the cookie cutter, use a firmer pressing technique during shaping. Don’t hesitate to re-pack the mixture back into the cutter and try again.
Should you find the feeders are too soft or not drying in time, let them sit longer. Depending on your environment, factors like humidity can affect drying. Patience will yield the best results.
Easy Variations to Try
To keep this craft fresh and exciting, consider these simple variations:
- Different Shapes: Use seasonal cookie cutters. While hearts are perfect for Valentine’s, stars, flowers, or holiday-themed shapes can add fun throughout the year.
- Birdseed Mix-Ins: Incorporate dried fruits or nuts if there are no allergies present. This variation can attract different types of birds, each with its unique preferences.
- Decorative Touches: After the feeders dry, kids can have a go at painting them with non-toxic craft paints. This adds a personal touch while still being safe for the birds.
- Themed Feeders: Craft feeders to celebrate other holidays or seasons, using colors or shapes that parallel the theme.
- Buddy Crafting: Invite friends or siblings over for a crafting session to foster teamwork and shared creativity.
Storing or Reusing This Project
Discuss how to store any leftover materials. Keep leftover birdseed sealed in an airtight container for future projects, or safely store any extra feeders in a cool, dry place until the next crafting day.
Cleanup is simple. Just fold up the wax paper with collected bits and dispose of it. As for the mixing bowl and utensils, wash them promptly to avoid stickiness.
If any feeders don’t get hung, consider reusing them. They can become decoration elements in a spring outdoor gathering by placing them in visible spots for nature to enjoy.
FAQs About Valentine bird seed feeders are a sweet way to spread love to nature
Can I make these bird feeders with young kids? Yes! Just be mindful of supervision when using messy materials like peanut butter. For very little ones, you can handle the build-up while they help with the mixing.
How messy is this project? Expect a bit of fun mess! Most spills can be cleaned with a damp cloth. Choose a space where cleanup is easy, like outdoors or on a surface that’s easy to wipe down.
What if I do not have birdseed? You can repurpose a mix of grains like oats or leftover nuts (ensure no allergies). Adjust based on what you have and stick to non-salted materials.
Will the feeders last long outside? They typically hold up for several days to a few weeks, depending on weather conditions. You can always recreate them as needed.
Should I coat the feeders with anything? If you find that birds aren’t coming, consider lightly coating them with a bit of lard mixed with seeds to enhance the appeal.
A Final Helpful Note
As you embark on making these Valentine bird seed feeders, remember the key is to enjoy the process with your kids. Embrace the crafting journey with its mess and creativity. Allow your children to express themselves, learn, and ultimately connect with nature. There’s no need for perfection; simply focus on the joy of creating something together. With each tiny bird that visits, you’ll celebrate the love shared not just in your family but with the beautiful creatures who come seeking food and companionship. Enjoy the moments spent together, and let this project remind you that love, in all its forms, makes a significant impact.
Valentine Bird Seed Feeders
Ingredients
Method
- Clear a space on your table and lay down some wax paper or parchment paper.
- In a large bowl, combine the birdseed, peanut butter, and flour. Mix until the birdseed is well-coated.
- Grab your cookie cutters and press the mixture firmly into them.
- If using strings or twine, poke a hole through the top of each shape before removing the cookie cutter.
- Place the shaped feeders on the wax paper. Let them sit for at least a couple of hours to dry.
- After the feeders are dry, hang them outside in visible spots like tree branches.
- Sit back and watch as birds come to feast.